Pages

Sunday, January 31, 2016

Evan's First Valentine Card


It is going to be my grandson Evan's first Valentines Day soon and I made him a special card from Grandma and Grandpa. Here we are with Evan the first time we met him. And here is the card:

I created this Elmo Valentine with Stampin' Up's flip card die, an embossing folder and a bunch of circle punches. When it flips open, there is a circle to write Evan a Valentine wish and sign it.

I am entering this card in the anything goes challenge at Simon Says Stamp Wednesday Challenge and the use dies and punches challenge at The Stamping Boutique.

Saturday, January 30, 2016

Two More Woodgrain Cards


I am loving a new technique I learned about here on the Snippets blog. It is easy and makes an authentic looking woodgrain background. I posted a card a couple days ago and today I am posting my second and third tries. I like the colors in this background the best so far. I used Vintage Photo, Weathered Wood and a little Black Soot Distress Inks. I cut the door with a new die from Embossing Essentials. To be honest, I thought all the little pieces of the door were going to cut out, but the name of the company who designed it should have been a hint- they emboss instead. So for this card, I cut it in black cardstock, embossed it and while the die was still on the cardstock, sponged with a white ink. I added Penny Black's "Into the Woods" tree die and a little red bird from Memory Box. Here is my favorite so far of the cards I have made with this technique:

I like how the door looks like it is part of an old weathered wood building. I used the same Distress Inks and the tutorial to create the background of this card. I cut the door out of the completed woodgrain piece, then embossed and sponged with black distress ink. I also sponged around the whole door before attaching it back in the door opening. I added the same white trees and little red bird to complete this card. This is the one I will teach my students next month in class.

I am entering the second card in the Anything Goes challenges at Simon Says Stamp Wednesday Challenge  and at 613 Avenue Create.

Friday, January 29, 2016

Main Squeeze Valentine


It's Crackerbox Palace Friday and today I am sharing another card I made with Crackerbox Palace stamps, a stencil and BoBunny glitter paste. I think these kissing giraffes are so sweet and the sentiment from CBP is perfect for my DH. I stamped the giraffes on patterned kraft paper, did a little coloring and cut them out. I applied red and gold BoBunny glitter paste through a hearts stencil to complete this CAS Valentine.

I am entering this card in the anything goes challenges at Simon Says Stamp Wednesday Challenge and at Wonderful Wednesdays. 

Thursday, January 28, 2016

First Card with a New Technique and Dies I Love


I am a huge fan of Karen D. and her Snippets blog! I think I pin her cards the most of any of the blogs I subscribe to! Recently she posted some gorgeous cards and then a tutorial on how to make beautiful and realistic looking woodgrain on our cards. Here is a link to her tutorial. This is my first card and you will see many more on my blog soon. I followed Karen's tutorial and will share the hardest part is waiting for the glue to dry:) After it does dry, you simply score from the back and apply distress ink direct to paper to the front, spritzing it to mix the colors. For this one I used Rusty Hinge, Scattered Straw and Weathered Wood. I suggest attaching the completed woodgrain piece with strong two sided tape. I used a tape runner for this one and the corners and edges kept coming up. The woodgrain piece curls somewhat when the water is sprayed to mix the colors. I pulled out some new dies to complete this card. The brick wall and fence are from a die set called New England Stone Wall and Gate by Elizabeth Crafts. I cut the wall pieces out of kraft paper and sponged this with distress inks too. I added some green branches from Penny Black, a little red bird from Memory Box and a larger black bird from Impression Obsession.

I am entering this card in the Anything Goes challenges at Simon Says Stamp Wednesday Challenge and Crafty Sentiments.

Wednesday, January 27, 2016

Repeat Impressions Sketch Challenge Monochromatic Card


Happy Wednesday everyone! It's time for another fun sketch challenge at The House that Stamps Built and we are challenging you to make a card using the sketch below and link it up for a chance at some great Repeat Impressions rubber! For all the details on what you can win and to see the other Rock Stars cards using this sketch, please visit our blog.


I decided to make my sketch card monochromatic – all in blues. I started with a light blue cardbase and added two panels of a darker blue. I stamped Repeat Impression’s “Postcard” background stamp in a blue ink and sponged the edges with some more blue ink. I stamped “Joanie’s Pals” with black ink on a white piece colored with Broken China Distress Stain, then cut it out with a stitched die. 


Here is the sketch for you to follow when you create a card for our challenge. You do not need to use Repeat Impressions stamps to enter our challenges, but you get an extra chance to win if you do!

I am entering this card in the Anything Goes challenges at Crafting from the Heart , Simon Says Stamp Wednesday Challenge and Craft Your Passion.


**Don’t Forget: for a 10% discount on any size order at Repeat Impressions, make a note of my discount code (rr10kh), click on the blog badge on the side of my blog and go to the website here to shop and save!**

Tuesday, January 26, 2016

Blog Candy Contests and New Tonic Gold Embossing Card


Would you like to win some blog candy? Of course you would! I am starting TWO blog candy contests today on my blog! In both cases, I need your help and if you help, you could win some great stamping and die-cutting goodies!

My first Blog Candy Contest has to do with the embossing technique shown on the card above and here is more detail:


I am not quite ready to write a tutorial or share the details yet- I need a name for the technique and that is where you can help. I showed some friends and they suggested Patent Leather - but when I picture Patent Leather, it is black and totally smooth- like the patent leather dress shoes from my childhood. These pieces are totally textured, but different from when you normally melt embossing powder. I subscribe to hundreds of blogs and check Pinterest boards every day for new ideas, and I have never seen this technique, so I think it is new?  What does it remind you of? The best name I can think of is Textured Embossing Mix- I know,boring.... It is a little like faux (colored) leather, but that title has been used and used. Think of a name and leave it in a comment on my blog, and if your idea is the one I choose, you will be sent a package of fun stamping and die-cutting goodies. (Sorry, I can only mail to U.S. residents.) THIS CONTEST IS NOW CLOSED.

**Edited to Add Update: I received many excellent suggestions of names for this technique. I have chosen to use Designs by Donna's suggestion that it looks like a camo pattern. I am going to call it Metallic Camo Technique. Donna- I have a prize package of dies, stamps, sequins and a magazine that features one of my articles ready to go to you. Just need a snail mail address, and I will try to contact you directly for that.**

To create the card above, I added a strip of the textured embossing mix of Tonic gold, black and silver embossing powders to a black card base. I embossed the whole card with an embossing folder from We R Memory Keepers. In doing so, the embossed strip lost some of its texture, so I will probably not emboss future projects in an embossing folder. I love love love Tonic's Crystal Drops (available here on the website) and I added a gold Crystal Drop to each black intersection and a black Crystal Drop to each intersection on the texture strip. I attached Tonic's "Make A Wish" from the Everyday Sentiments Two Collection to complete the card.

THIS BLOG CONTEST IS STILL OPEN:  My second Blog Candy Contest has to do with the number of (Google) followers you see over to the right of my blog. It has hovered close to 500 for quite some time now. I would really love to see the number of Followers and friends cross the 500 + mark and keep moving upward. If you are already a follower, I appreciate that more than you know. If you are not, please sign up as one and leave me a comment you have done so. If you are already a follower, or want extra chances to win, refer someone to my blog who becomes a follower, and leave me a comment you have done so. Tell your friends, followers, anyone you can to take a minute to visit my blog and sign up as a follower. When the number hits 500, I will draw a name from the comments left on one of my blog posts and you might win. (Again, I can only send the blog candy package to U.S. residents.)

I appreciate every one of my followers and subscribers. That number on the side may not seem like a big deal, but it can be a factor when we want to grow in this crafting industry.

**Update on this Blog Candy Contest: My quest for 500 followers is not going as well:( The timing of this attempt to reach 500+ followers is the issue. Blogger had announced that they were going to be deleting followers who do not have a Google account here. This happened mid January and  I went from 482 followers down to 466:( But I am not giving up! I still need your help. Sign up as a follower and/or refer friends to do the same and someone is going to receive the blog candy pictured at the top right of my blog. It will remain there until we hit the goal of 500 Blogger friends and followers. IF YOU SIGN UP AS A NEW FOLLOWER OR REFER SOMEONE WHO DOES, YOU NEED TO LEAVE A COMMENT THAT YOU HAVE DONE SO TO BE IN THE RUNNING TO WIN!**

This is what you can win- lots of stamps, embossing folders, dies, glues, sequins and a magazine featuring an article I wrote:


Thanks and good luck in the contests! I will keep them open until I get a name for my technique and 500+ followers.

I am entering this card in the Anything Goes challenges at 613 Avenue Create and Crafty Friends.

Monday, January 25, 2016

Romantic Dancers with Die-Versions Dies


Hope you are having a great day! It's my turn to post a card on Die-Version's blog and mine, and I am sharing this card featuring Die-Version’s beautiful Diamonds Background and the Sweet Petites Dancers. My husband and I love to dance together so this Dancers die cut makes me smile. Die-Version’s A2 sized background dies make card making so easy. You can choose to back them with different colors of cardstock or designer paper. On this card, I created a background with Cosmic Shimmer Gemstone Gilding Flakes on a sticky two sided tape paper, then I attached the Diamonds Background cut out of black cardstock. I cut the Dancers out of white cardstock and popped them up with pop dots to attach.

**Remember you can get a 15% discount on any of Die-Versions great dies by simply using my discount code karen15 when you check out at the Die-Versions website.**


I am entering this card in the Anything Goes challenge at 613 Avenue Create and the “Love is in the Air” challenge at Scrapy Land. (All the dies are from Die-Versions.) 

Sunday, January 24, 2016

Big Hugs from Tonic Shaker Card


I am having so much fun designing different cards for a magazine assignment with this awesome die from Tonic Studios that I borrowed from a friend. The die set is called "Sending a Big Hug Semi-Circle Set" and it is available on the US Tonic website here.  I cut the words half of this die out of a piece of red shiny cardstock and attached acetate to the back. I turned the piece upside down and attached two layers of mounting tape all around the semi-circle opening, then dumped in a bunch of fun beads and sequins. Here is a picture of what that looked like:


This shaker piece is on my Scor-Buddy (any scoring board will work or even a MISTI)  because I find the easiest way to make a shaker card is to cut the shaker top the same size as the card base, fill it up like this with the shaker elements, and take the tape off the top of all the mounting tape. Push the shaker piece into the upper left corner of the scoring board and attach the card base pushing both together to line up on the left side and the top. Press down firmly and the shaker elements will stay in place and the top of the card will be lined up perfectly with the card base.


I added a few more sequins on the top of the card and shook it up for you to see the beads and sequins on the move. I love making shaker cards and seeing the fun movement when the cards are shaked, rattled and rolled.

I am entering this card in the Anything Goes challenges at Crafty Girls Creations and Little Miss Muffet Challenge.

Saturday, January 23, 2016

Tonic Rococo Music Dies, Brushos and Create and Craft


The Pick of the Week at Create and Craft (on line and on your TV) is the entire Tonic Rococo Music Die Collection shown here:


Here is a link to the special deal at Create and Craft.  But you have to hurry- the week is almost up! You can order the dies individually too, but again, you need to hurry because they are selling out. The best deal is the whole set for 22% off it's original price! There are also deals on Tonic's fabulous self-leveling Crystal Drops and Glitter Drops and if you want it all- and you know you do!- you can also choose Flex Pay to spread out the payments. (If you want any of the individual dies that are sold out, you can order them directly from Tonic Gold U.S. here.)

Today I am sharing several more projects I created for CHA with these fantastic dies. I love all the dies in this super set and had so much fun designing with them. The two cards I am showing feature backgrounds I created with Brusho Coloured Crystals and cling wrap. On my first card above, I sprinkled several blue and purple colors of Brusho crystals on a piece of glossy paper, spritzed it with Tattered Angels glimmer mist and covered it with a scrunched up piece of cling wrap while it dried. I die cut Tonic's Electric Guitar and You're a Star (from Everyday Sentiments Two) out of a textured gold cardstock. I also cut out the frame for the square card front from that textured gold cardstock. I cut a few extra stars out of the gold and an extra sentiment out of white cardstock. I like layering two colors of die cut sentiments to make them stand out more.


I shouldn't play favorites I guess, but to be honest, Tonic's Saxophone Solo is my favorite of this set. And this Brushos and cling wrap background is my favorite too. To make the cling wrap background more dramatic like this one is, mix your Brusho crystals and water (or glimmer mist for a golden touch) inside a scrunched up piece of cling wrap, and then place a piece of glossy cardstock into that glorious mess. When you remove it about 15 minutes later, this awesome background is the result. I let it dry and then attached it to a white card base with the white showing only on the bottom and right side. I die cut the Saxophone Solo man out of white and black and layered them together. I die cut and attached notes from Tonic's Musical Notes set.


Told you I was having fun designing with these dies for the CHA booth:) Here is one more project featuring my favorite Saxophone Solo and also the beautiful Piano Melody die from the Rococo Music Die set. I made this wine gift box and decorated two sides with these fun dies. The other two sides and the handle were made with Tonic's Moroccan Mosaic Simply Screens dies:
I am entering the You're a Star card in the Anything Goes (with a sentiment) at Aud Sentiments and the other card in the Anything Goes challenge at Southern Girls. 

Friday, January 22, 2016

The Definition of Love from Die-Versions


Happy Friday! It's my turn to post a card on Die-Version's blog and mine, and I am sharing this Valentine featuring Die-Version’s beautiful Love Definition heart die. Valentine’s Day will be here before we know it and I am going to be needing more Valentines. This card was very easy to make but perfect for a loved one. I started with a white A2 cardbase embossed with Tonic Studio’s Forever Moments Rosalyn Embossing Folder. I sponged the embossed areas lightly with a red dye ink and added red pearls in various sizes. I die cut Die-Version’s Love Definition heart out of a red glossy paper and attached.

**Remember you can get a 15% discount on any of Die-Versions great dies by simply using my discount code karen15 when you check out at the Die-Versions website.** 

I am entering this card in the Anything Goes challenge at TTCRD and the “Love is in the Air” challenge at Scrapy Land. (All the dies are from Die-Versions.) And the Love is in the Air challenge at Cut It Up. 

Thursday, January 21, 2016

Stepping Out as a Tonic U.S. Ambassador


I am very proud to share that my first tutorial as a Tonic U.S, Ambassador was posted on the Tonic blog today. Here are the steps and pictures showing how to make this card.

I started with a black card front and stamped the Juliet Butterfly stamp with Versamark ink randomly and heat embossed those butterflies with gold embossing powder. Then I filled in the rest of the card front with silver embossed butterflies. I used gold crystal drops and silver glitter drops to show the flight of the butterflies on the card background.
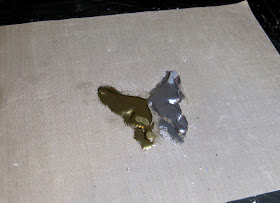
My step out pictures show the process I used to create the deeply impressed butterflies attached to the top of the card using melted embossing powders. When I first learned the Deep Impressions technique as taught by Fran Seiford of Stampendous, we used ultra-thick embossing powders and specialty embossing powders mixes. But I wondered if someone only owned regular clear, gold and silver embossing powders, could the same beautifully embossed results be achieved? The answer is yes. One key to success with this technique is to choose a die that is not too intricate with a matching stamp. I chose Tonic’s Juliet Butterfly die and stamp. I used the outside edge of the die and trimmed off the small antennae and body pieces when I die cut it out of chipboard three times. The embossing powder layers need to be melted from underneath, so I used an electric griddle heated to 300 degrees. I placed the butterfly chipboard piece on a heat resistant craft sheet and covered it with Tonic clear embossing powder. A glass cover can be placed over it to speed the melting.


Once the clear layer was melted, I added gold and silver embossing powder and let that melt thoroughly. After the gold and silver embossing powders were melted, I moved the piece over on the craft mat to remove any excess melted embossing powder, then used a large spatula to remove the craft sheet and butterfly from the heat. I quickly stamped into the molten butterfly with the matching Juliet stamp. If the stamp used is a good quality rubber stamp, stamping into the molten embossing powder does not damage the stamp.


Once the molten embossing powder cools just a bit, the stamp can be removed to reveal the lovely deep embossed gold and silver butterfly. I repeated this process on two more butterflies. I attached one of the butterflies with a glue dot and a pop dot to the side of the black card front. I attached two of the butterflies together with pop dots and then to the card front with glue dots. 


Here is the completed card again:

I had fun playing with Tonic's embossing powders in this unique way and hope you will try it for yourself sometime. The "flights of the butterflies" on this card were made with Tonic's gorgeous Nuvo Bright Gold Crystal Drops and Silver Moondust Glitter Drops. Both of these drops are self leveling- they really do level out evenly without the "tails" you can get with other brands. I love them and both kinds are very reasonably priced here on the website. You can also go to Create and Craft and check out all the specials on many of Tonic's dies, cutters, glitters and drops. Today is the last day for FREE SHIPPING! 

I am entering this card in the Use a Critter challenge at Simon Says Stamp Wednesday challenge and the Anything Goes challenge at 613 Avenue Create.

Wednesday, January 20, 2016

Photo Inspiration Challenge at Repeat Impressions


On the third Wednesday of every month at Repeat Impression’s blog, The House that Stamps Built, the challenge is going to be an Inspiration Photo challenge. Here is the photo chosen to inspire us this month:

Will you be inspired by the colors or the shapes in the photo? It is up to you to pick out what inspires you and make a card, then enter it for a chance to win some great Repeat Impressions rubber. Be sure to check out the RI blog for the inspiration based cards by the other Rock Stars. I have seen them and you do not want to miss them!

I was inspired by the snow on the trees and roof of the building and decided to create a snowy scene with RI stamps and Flower Soft. I stamped the winter trees and building on a cloudy dp and then simply used glue to add the Flower Soft for snow.

 I am entering this card in the Anything Goes challenges at Crafting from the Heart,  Craft Your Passion, and the Take a Stamp Anything Goes challenge at Craft Stamper Magazine. 

Tuesday, January 19, 2016

Tonic Party Time Pick of the Week at Create and Craft!


The Pick of the Week at Create and Craft (on line and on your TV) is the entire Tonic Rococo Music Die Collection shown here:

Here is a link to the special deal at Create and Craft.  You can order the dies individually too, but hurry because they are selling out. The best deal is the whole set for 22% off and FREE shipping and handling this week only as part of the birthday specials at Create and Craft. There are also deals on Tonic's fabulous self-leveling Crystal Drops and Glitter Drops- again free shipping and if you want it all- and you know you do!- you can also choose Flex Pay to spread out the payments. (If you want any of the individual dies that are sold out, you can order them directly from Tonic Gold U.S. here.)

OK- back to our regularly scheduled card post:) I created some cards with these fabulous dies for the Tonic Gold U.S. booth at CHA. My first card above is an easel card with a background of antique musical sheet paper. I distressed the edges of the musical paper with my Tonic Tim Holtz distresser and some brown distress ink and layered it onto a red cardstock square. I die cut Dance Tribute (1179E) out of black and white cardstock, and attached them together on the musical background. I cut out some Musical Notes (1180E) and attached them too. Here is a close-up of the top of this card:


This card is an easel card and the top part stands up using the popped up piece featuring Tonic's Perfect Harmony (1176E) cut out of red cardstock. Here is another card I made with this fantastic die collection:

I love this Jukebox Jive die (1177E) and I made a shaker card featuring it. I die cut the jukebox out of dark brown Kraft-core Shattered cardstock (by Tim Holtz for Core-dinations) and also from the center of the card front. I attached a piece of acetate on the back and two layers of mounting tape all around the edge of the jukebox opening. I dumped in a bunch of beads and sequins that shake, rattle and roll when the card is shaken. I added Tonic's Treble Clef (1182E) to complete the card. Here is another picture showing the shaker elements on the move:

I watched the Tonic Party Time Pick of the Week show several times today and the samples shown and the ones made during the show were fantastic! I definitely recommend watching the shows here- even if just for the great ideas! But don't forget- free shipping and great savings too!

I am entering these cards in the Anything Goes challenges at 613 Avenue Create and Craft Your Passion. 

Monday, January 18, 2016

Die-Versions Oriental Fan Celebration Card


Happy Monday! It's my turn to post a card on Die-Version's blog and mine, and I am sharing this card featuring the beautiful Oriental fan die from the newest release from Die-Versions that can be found on the website here. I love all the dies in this new Oriental inspired release! I die cut the Oriental fan twice out of black and white cardstock. I created a black square card base and attached a piece of white cardstock over the right half.  I attached the white fan over the black side and the black fan over the white side. I also die cut Die-Version’s Celebrate Express Edges die in black and white and attached half of each along the bottom of the card. I added a black and pearl floral accent to complete the card.

**Remember you can get a 15% discount on any of Die-Versions great dies by simply using my discount code karen15 when you check out at the Die-Versions website unless the dies are already on sale.**

I am entering this card in the Anything Goes challenges at Crafting from the Heart and Craft Your Passion.

Sunday, January 17, 2016

Tonic Studios Pink and Black Deco Card


The challenge this month at our local stamp club was to make a deco inspired card with the colors pink and black. I am loving my new Clematis Vine Simply Screens dies from Tonic Gold U.S. and made this card with them for the challenge. I did a search on Pinterest to see what exactly "deco style" meant. I came up with some that were shaped somewhat like this one. I started with a white cardbase and added the pink layer with the angle cut sides. I die cut the vines screens in black and attached. Then I die cut the flowers screen in pink and layered over a black center column. I added some pink and black Nuvo Crystal Drops to complete the card. I so wish I had found Nuvo Crystal Drops before I bought all my Liquid Pearls and Pearl Pens because the Nuvo brand Crystal Drops are really so much better. They form perfect rounded drops without all the pointed tails of the other brands, and they are only $2.99 for a large bottle. Just saying- check them out here. 

I am entering this card in the Anything Goes challenges at Scrapy Land (used Tonic dies) and Wags 'n Whiskers. 

Saturday, January 16, 2016

Birthday Fun 4 Kids Challenge at Send a Smile 4 Kids!


It’s Saturday and time for another fun challenge at Send a Smile 4 Kids! This time our challenge is Birthday Fun 4 Kids! Create and link any birthday card appropriate for a child, and you could win one of our great prizes.


We have two very generous sponsors for this challenge: All Dressed Up Stamps is giving their winner 2 digis of their choice! And Bugaboo’s winner gets 7 digis! TEAM S.A.S will also be choosing their favorite cards for our top three and the winners will receive a blog badge and an opportunity to be a guest design team member on a future challenge.

My card above features the sweet Birthday Butterfly from All Dressed Up Stamps. I started with a pink cardbase I embossed with birthday words from Sizzix. I printed the birthday butterfly and cut out the rectangle with a stitched die from Lil' Inker. Then I printed all the pieces and paper pieced most of the colored elements. 

I am entering this card in the Stitching challenge at Dies R Us and the Birthday challenge at 613 Avenue Create.

Friday, January 15, 2016

Rainy Day Lady with Crackerbox Palace Stamps and BoBunny Glitter Paste


It’s Crackerbox Palace Friday and today I am sharing a card I made with Crackerbox Palace stamps, a stencil and BoBunny glitter paste. This rainy day lady stamp is one of my favorites at Crackerbox Palace. And I love how you can use BoBunny glitter paste with a stencil like stencil paste, but it dries much quicker and is so sparkly! I used silver BoBunny glitter paste and a stencil from Memory Box to create the rain on this card. I stamped and paper pieced the beautiful lady and raised her with pop dots on the navy blue piece which I attached to a green card base.

I am entering this card in the stencil challenge at Simon Says Stamp Monday Challenge and the anything goes challenge at 613 Avenue Create. I am also entering it in the Take it Make it Challenge at Craft Stamper Magazine. 

Thursday, January 14, 2016

CASED Super Cute Baby Cards


I found a card on Pinterest that used safety pins to tell this story and fell in love with it. Unfortunately the card that inspired me was just an image with no links to the designer of the card so I cannot give credit where credit is due. I rushed right out and bought some larger safety pins to recreate it. I started with a pink card base and cut four rectangle pieces and attached, then embossed the whole card in a baby embossing folder from Sizzix. I attached the safety pins with glue dots and clear glue. The hearts are from a Martha Stewart hearts border punch. The perfect word dies are by Die-Versions. Here are my "it's a boy" and "don't know the sex" versions:


I had little yellow and pink pins but not blue, so I used a Sharpie to color the little pins blue in my boy card. The "It's a Boy" die is from Die-Versions and you get both sexes in one die, so it's a great deal (especially if you used my discount code on the side of the blog.) I am sharing these cards in my classes in my home next month.

I am entering these cards in the Something New challenge at Eureka Stamps (the dies are brand new) and the Anything Goes challenge at Crafting From the Heart.

Wednesday, January 13, 2016

Winter Wonderland DCC at Repeat Impressions


It’s another Designer’s Choice Challenge at The House that Stamps Built, Repeat Impression’s blog. It is Kathy’s turn and her theme is Winter Wonderland. Why don’t you join us in this challenge and enter your winter project for a chance to win some awesome Repeat Impressions rubber? Please visit the blog for all the details and to see the other Rock Star's projects for this DCC challenge. I have seen them and you do not want to miss them!


One of my favorite Repeat Impressions stamps is this sweet kitty looking out at a snowy scene through her window. I stamped, did a little coloring and cut her out. I attached her in the inside of a square shaker card. I used glass glitter to look like snow. Here is a view with the “snow” all shook up: 


I am entering this card in the Anything Goes challenges at Crafting from the Heart and Craft Your Passion.

And don’t forget: For a 10% discount on any size order at Repeat Impressions, just make a note of my discount code (rr10kh), click on the blog badge on the side of my blog and go to the website here to shop and save! 

Tuesday, January 12, 2016

Warm Winter Wishes with Faux Textured Metal Look


Jennifer McGuire reminded me of this technique recently in this post and video, so I pulled out my Perfect Pearls and tried it. The card is much more shiny IRL. The technique is very easy to do- just mask the 4 sides with temporary tape, then sponge on two shades of Distress ink. I chose Peacock Feathers and Faded Jeans and blended them together. Then I applied Perfect Pearls over the sponged center with a brush and brushed off the excess with a soft cloth. I removed the masking tape and embossed the piece with an embossing folder from WeR Memory Keepers. I die cut the Snowflake Ribbon Die from Poppy Stamps and the words from Tim Holtz out of navy  blue suede paper and added some pearls. I love how this turned out and will be teaching it in my classes in my home.

I am entering this card in the Anything Goes challenge at Scrapy Land (Poppy Stamps and Tim Holtz dies) and the Something New challenge at Simon Says Stamp Wednesday challenge (the Snowflake Ribbon die is brand new and never been used before.)