Pages

Wednesday, August 31, 2022

Many More Christmas Cards Made with the Faux Rice Paper Technique


Here is another card I made with a Christmas dinner napkin and the Faux Rice Paper Technique for my newest video here. The top layer of the napkin was used to create 3 different cards and in total I made eight cards with one dinner napkin. I showed how two cards could be made with one of the unpatterned layers and stencils and made these cards that way:


I demo how to stencil on the napkins before adding the glue and coffee mixture, and shared the information that we need to use a permanent ink not just any dye ink as they will smear. I used Versafine Clair and a stencil from A Colorful Life Designs on this card.  I added the Merry Christmas sentiment with a layered die from Karen Burniston and raised it for an eclipse look. 

This pretty layered tree was created with a stencil from Trinity Stamps and framed with Double Dotted Rectangle dies from Crealies.

This is a favorite of all the Christmas cards I created even though I used a darker napkin with very little white space. Look what happens when the star is pushed:


Isn't that cool? Because the paper is somewhat transparent, the EZ lights from Pear Blossom Press shine through! The inside of this card is very cool too and can be seen in the video, but I just have too many pictures to share in this post to show that too.


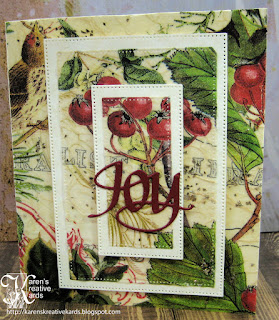
This card is a slimline showing napkins with no white space can be used with this technique but are not as translucent and so not (in my opinion) as pretty, but still nice. My last card shows an alternative if you can't find patterned napkins with lots of white space. Gift wrap tissue paper does work with the Faux Rice Paper technique. This was the only Christmas gift wrap tissue paper I had but soon there will be many to choose from in the stores.


I now have a bunch of lovely Christmas cards for my stash and had great fun making all these cards for this new video which is the 2nd in my series on my favorite new technique- Faux Rice Paper Technique. I am going to play with different additives and stamping for the third installment coming soon. 

Monday, August 29, 2022

Faux Rice Paper Technique For Gorgeous Christmas Cards!


The answer to this question and shown in my new video is EIGHT! The translucent Faux Rice Paper I show how to make in a couple different ways makes easy and unique cards. I chose a dinner napkin with three layers and all three layers are used to make beautiful cards. 


I make a card almost identical to this one in the new video step by step. As you can see in the picture below, the "Happy Holidays" is on the inside and can be seen through the translucent paper created with this fun technique.


The Double Dotted squares and rectangles used on many of the cards I show were created with sets from Crealies that I love. Here is another card similar to one I show how to make in the video:


Usually coffee is added to the glue mixture creating a vintage look, but dye reinkers can also be added to create any color you might want. I chose to make this faux rice paper red and added glass glitter before it dried for a pretty shiny look. The layered deer on the front is an Easy 3D Topper from Hearty Crafts and the sentiment dies are from Stampendous.


The faux rice paper created with this technique is somewhat transparent so I used a piece with some glitter on it to create this shaker card. The snowflakes in the shaker are from Kat Scrappiness and I added shaker beads too which move really well in shakers. The sentiment die is a new one from Crealies and the frame was created with a pretty die from Penny Black.


Here is another card I created with the 3rd layer of the napkin for a pretty vintage wrinkled look over white cardstock. It was decorated with rub-ons from 49 and Market so even though the paper created was wrinkled and had some glitter on it, rub-ons do work. 

I share many more holiday cards and ways to use this technique in different ways in the new video, so be sure to check it out here.

Thursday, August 25, 2022

Fabulous Folded Flip-Flap Cards From Paper Wishes For My Grandsons!


I have a subscription to the monthly Fabulous Folded Cards and late last month I received the Flip-Flap Card Die Set that does this:


Isn't that fun?! (If you get this blogpost by email subscription, for some reason those don't show my videos like this one showing the action when opened, so go to the actual blogpost to see it. And THANKS for subscribing!) And the cards are so easy to make that I made one for each grandson. Here is what Nate is getting inside of his: 


The popsicle die and stamps are from Impression Obsession. We love to make s'mores at our son's lake house, so I made this card for my other grandson:


The Smiley S'more die is from Lawn Fawn and the perfect sentiments are once again from Impression Obsession (IO). 

Even though this was last month's subscription box die set, you can choose to buy any of the very reasonably priced Fabulous Folded Cards die sets anytime even without a subscription. I save 10% and get a surprise in the mail each month so I am happy to subscribe. 

Wednesday, August 24, 2022

Single, Double Column, Surprise Pop Up and Square Triple Pillar Cards With New Crealies Dies


I am loving all the new butterfly dies in the August release at Crealies, but the die set I had the most fun with (and featured in my new video here.) was appropriately called A Lot of Pillar Cardz. My title lists all the cards I am posting today from the new video. This card also features the gorgeous Varia layered Swallowtail Butterfly die set.


This is the square triple easel I show how to make step by step in the new video. Another of the new dies in the August release is the Beth Frame Diamond Inlay Set which reminds me of a quilt when layered up like this.


How about a double column pillar card? All of these cards are so easy to make with the A Lot Of Pillar Cards die set, and I used more dies and stencils from Crealies to decorate this card. Each of these pillar cards stand up for display and lay flat to mail. My last card is for a coffee lover and has a fun pop up surprise inside the card:


I used the double pillar to hold a Starbucks gift card and two candles for the birthday girl. (I was inspired by a card by Sam of Mixed Up Crafts to add the candles this way.) I added a layered Happy Birthday die and an Oval with Wonky Stitched Lines to write my message on. 

I had great fun creating cards with the new A Lot of Pillar Cards die set as well as the others from Crealies for my new video, and hope my cards inspire you to give some of the ideas and products a try.

Tuesday, August 23, 2022

Tonic Studios Designer's Choice Safety Deposit Box Pop Up Treat Boxes


Oh my- I just received my new Tonic Studios Designer's Choice Safety Deposit Box pop up treat box and look at what these boxes do:


Isn't that fun?! (If you get this blogpost by email subscription, for some reason those don't show my videos like this one showing the action when opened, so go to the actual blogpost to see it. And THANKS for subscribing!) 

I made this one to fill with candy for my grandson, and here is a look at what pops up inside:


This Dancin' Ghost above and the Dancin' Gnome below are both new dies from Spellbinders, and the legs swing back and forth to dance- too cute! Here are some more views of the Christmas version:


The gnomie sentiment stamp on the front of the Christmas version is from Picket Fence and the little gnome is from Karen Burniston. The spooky Happy Halloween die is an older one from Tonic Studios.

Tonic Studios USA is coming out with more and more dies like these Designer's Choices, so keep an eye out for more designs and videos too! 

I am entering the Christmas box in the Christmas challenge at Simon Says Stamp Wednesday. 

Monday, August 22, 2022

Lot's and Lots Of Pillar Cardz with Video and Big Announcement!

Today I am so excited to announce I am going to be part of the Crealies design team, and I am  sharing my first video and cards today here and on their blog! I have been a huge fan of  the unique and innovative dies at Crealies for quite some time now and will be creating a new video each month for them. 


The August release at Crealies is full of many unique dies and gorgeous butterflies, but the die set that intrigued me the most was the set called A Lot of Pillar Cards. For the new video here, I created single, triple, double column, surprise pop up, square and easel pillar cards.  This pink triple pillar birthday card with the Varia Swallowtail butterfly is one of my favorites. To see how easy it is to use the A Lot of Pillar Cards die set to make a triple pillar card, be sure to watch the video. Here is another view of this triple pillar card:


Another fun idea to try with the A Lot Of Pillars die set is to make an easel card like this one with the large Swallowtail Butterfly die: 


I did a partial die cut of the large Swallowtail butterfly to create the easel which is held up by two pillars and decorated with more butterflies from the Set of Three Butterflies #6. Of course all the dies used in these cards are linked below. And if you would like to see how to make an easel card just like this one step by step, watch last week's video here.

You can see many more cards made with these dies from the August release in the new video out today. I hope all my cards encourage you to give these ideas and products a try. 

Crealies Dies/Stansen:


Wednesday, August 17, 2022

More Butterfly Cards and Giveaway Reminder


I just purchased the 3 in 1 Butterfly Garden die set from Gemini and Crafter's Companion and this card from my new butterfly video shows how to make a lovely card simply by cutting and layering! The die is large and this is a 5 x 7 card but my next card shows it can be used on an A2 sized card as well:


The background is embossed pink mirror card from Paper Wishes. Here is a card I made with a 3D slimline embossing folder from Nellie's Choice and made even more lovely by adding embossed butterflies:


This card is so much prettier IRL or in the video where you can see the 3D texture and color better! I simply brushed on yellow and green inks before layering on a green slimline card. The sentiment die is from Sue Wilson and Creative Expressions. 


My last two cards feature the Butterfly Heart Create A Card die set from Gemini and Crafter's Companion. The die alone is so pretty all I needed to do was die cut it out of a card front, add some of the embossed butterflies from the same die set and add a sentiment strip. 

**Check out the new video here and leave a comment as detailed for a chance to win a prize package worth about $100 celebrating my 5 year anniversary of being on YouTube!**