Pages

Saturday, May 30, 2020

Window Weaving Made Easy with Sue Wilson Weaving Dies


On Day 20 of Spring Card Camp 2 at Online Card Classes, Jennifer McGuire showed weaving in a die cut window and I created this card for their gallery. But can you see the stitched dots in the strips I wove for this pretty rainbow butterfly? I was just playing with weaving for a new video but I made my strips so easy by cutting them out with Sue Wilson's and Creative Expression's Intermediate Weaving Die. The open butterfly window was cut with a die from Stampendous and I simply added some black pearls to finish the card. 

I am entering this card in the Anything Goes Challenge at Simon Says Stamp Wednesday. 

Friday, May 29, 2020

Day 20 Window Weaving Spring Card Camp 2

I have been playing with weaving for a new video recently but it never occurred to me to try weaving with vellum until I watched the videos from the last day of Spring Card Camp 2. I also added added a ribbon to the weaving. The vellum I used was all colored but of course it is see through so is very subtle. I started with a card front embossed with a new Memory Box 3D embossing folder. The stitched butterfly opening was die cut with a Simon Says Stamp die and the sentiment is a Sue Wilson die. 

I am entering this card in the Anything Goes Challenge at Simon Says Stamp Wednesday. 

Tuesday, May 26, 2020

More Celebration Slimline Magic Iris Cards From My Newest Video

I love the slimline format for my cards because it allows lots of room for many dies. For this baby card that I share in my newest video, I put Frantic Stamper's Dresser Card Panel on the bottom half along with lots of the tiny baby dies from that cute set. On the top half I created a Lawn Fawn Magic Iris that opens to reveal: 


The sentiment strip and die are from Taylored Expressions. The first idea I had when I received the Lawn Fawn Magic Iris die was to make it into a jack-o-lantern and so here is my "Boogie Nights" slimline card: 


I started again with Pinkfresh Studio's stitched slimline die and Lawn Fawn's Magic Iris Die on patterned Halloween cardstock. "Boogie Nights" is a fun layered die from Tonic Studios. Just look at what happens when the arrow tab is pulled down:


The jack-o-lantern was created with oval dies from Spellbinders and the inside face was made with a Fiskars punch. I added a fun googly-eyed spider sticker and will mail in the matching orange #10 envelope. 

I had so much fun making these holiday and celebration slimline cards with Lawn Fawn's Magic Iris die. I hope you will watch the video and try some for yourself!

Monday, May 25, 2020

Video - Celebration and Holiday Slimline Cards with Lawn Fawn's Magic Iris Die


I love interactive dies and recently purchased Lawn Fawn's Magic Iris Die. Dies can get expensive so as part of my ongoing Stretch Your Supplies Series in my new video I am sharing 4 different celebration and holiday slimline cards made with this unique fun die. This double magic iris card is the one I make in the video: 

It is never too early to start making Christmas cards so there is no need to rush that time of year. The two magic irises open to share my Christmas wishes for you: joy and peace and the inside has a third wish. The center sentiment die is from Sue Wilson and the inside words are from Tim Holtz and Sizzix. 


Love and the ornament on the inside are dies from Quietfire Design. I also had great fun creating this monstrous birthday wishes card: 


I show in the video how this Magic Iris die from Lawn Fawn makes it so easy to hide and then reveal the surprise behind the circle. In this case another fun monster (Impression Obsession dies) appears to delight the birthday boy or girl. The slimline card front was cut with a Pinkfresh Studio stitched die, the circular Happy Birthday is from My Favorite Things and "birthday wishes" is from Tonic Studios. So that the sides of the inner workings of the Magic Iris do not show, I layered the top piece on a circle die just a tiny bit bigger from Gina Marie Designs.

It is really fun and easy to make these Lawn Fawn Magic Iris cards and I show step by step just how to do it in the new video as well as share several more slimline celebration and holiday cards. Every minute you watch as well as subscribing and commenting is greatly appreciated as is your visit to my blog today. 

Saturday, May 23, 2020

Another Fun Spring Card Camp 2 Idea


On Day 13 of Spring Card Camp 2 at Online Card Classes, Jennifer McGuire taught us a highlighting technique where she layered white die cut pieces 3-4 times and then attached them to a white card front. Because they are raised, when we brush on ink there is a little white shadow around them. Then she suggested choosing one to highlight with another die cut piece. Jennifer did her highlighted flower in white, but I chose a rainbow designer paper for my highlighted butterfly. I added clear gems from Gina Marie Designs and a layered "Thinking of You" sentiment from Sue Wilson. 

Friday, May 22, 2020

Letter Substitution Slimline Card with Pinkfresh Studio and Free Digital Stamps


It never occurred to me to substitute a letter of a large die cut word with an image of some kind and I learned how easy that is to do in Day 10 of Spring Card Camp 2 at Online Card Classes. The stamped and die cut butterfly from Pinkfresh Studio is replacing the O in Hope created with alphabet dies from Kat Scrappiness. Hope, Kindness and Love Cannot Be Cancelled is the wonderful message in a free digital stamp set from Queen & Company.  I used another free digital stamp on the inside of the card from Catherine Pooler


I love how our stamping crafty community is stepping up to share joy and helping others in these tough times and am happy to do my small part.

Thursday, May 21, 2020

Couple More Faux Leather Experiments with Thankful Sentiments

 In my newest video I experiment with combining older faux leather techniques on different papers and this thank you card was the result of that fun play. As I ask in the video if you can come up with a name for my new technique and I pick it, you could win one of the cards I made and a prize for helping me out. Leave your suggestion in the comments here. I die cut a background die from Gina Marie Designs out of the faux leather combo and added a thank you circle from Impression Obsession as well as some gems also from Gina Marie Designs.

I tried some Bister faux leather on a green metallic marble cardstock from Sizzix that had been embossed with a cover die from Memory Box. The sentiment was cut out with a die from Bright Rosa. 

I had so much fun playing with older techniques and updating them with dies and other current supplies for my new video and hope my cards inspire you to give these techniques a try. 

Wednesday, May 20, 2020

Vellum Framed Card with Idea from Day 7 of Spring Card Camp 2

One of the ideas from Spring Card Camp 2 that I am currently participating in from Online Card Classes was to use vellum overlays in unique ways. I loved the look of a vellum leafy frame with a green one so much I quick ordered the Leafy Frame die from Simon Says Stamp. I am so glad SSS and many other companies are back to their quick shipping times! I have been playing with Pinkfresh Studios "Forever in Our Hearts" butterfly stamp and die for a new video and am sharing this sneak peak of one of SIX cards I made with this beautiful set. Here is a look at the inside with one of the perfect sentiments from this stamp set:


Tuesday, May 19, 2020

More Faux Leather Cards with Background Dies From My Newest Video

Years ago I learned a faux leather technique with glycerin on kraft cardstock and Distress inks and I show how that is done in my newest video here. It is fun to try older techniques and update the look of the cards with new products like background dies as I did on all the cards I share in the video. This masculine thank you card features a faux leather background cut with a die from Dee's Distinctively and a Gina K. Designs thankful sentiment on a vellum strip. 


I created this background with the faux leather glycerin technique on woodgrain cardstock from Park Lane and then die cut the background with a cool die from Yvonne Creations. I die cut an Impression Obsession circular thank you out of an oval of the same background. 
And here is one more faux leather background die cut with a frame from Jeanine's Art and added a thank you cut with a sentiment die from Spellbinders. It is hard to see in the photo but the dragonfly has sparkle added to it with my Nuvo Midas Touch Aqua Shimmer Pen. 

To see how easy it is to create these faux leather backgrounds, watch the video here on my YouTube channel.

Monday, May 18, 2020

Video - Updating Faux Leather Techniques with Cover and Thankful Dies


It is fun to play with older techniques and expand on them with newer supplies and ideas and in my newest video I do just that with two Faux Leather techniques. 

In the video I show how to make this card with Bister water soluble wood stain powders from The Netherlands over an embossed crackle stamped background. I cut the completed piece with a stitched triangular background die from Kat Scrappiness and raised the triangles. The sentiment is a die from Lil' Inker.

This is my favorite of the cards I make in the video because I combined two faux leather techniques together for a new technique and my only problem is I don't know what to call the technique. I used some different colors of Bisters with parts of another faux leather technique (which I also share and will have card samples tomorrow). After you watch the video here and see how it is done and closeups of the background I create, if you can think of a name for the technique I may send you this card and another prize. Leave your suggestion in the comments on the video on my YouTube channel. The pretty wreath cover die is from Taylored Expressions and I cut it out of a wood grain green cardstock from Park Lane. 

*Edited to add: We have a winner! Kay F. suggested Faux Suede for the new technique I show in this video - combining the two faux leather techniques together. I am sending Kay the card above and a prize of a new stamp set as soon as I have her address.

Thanks for your visit today and for your support of my YouTube channel. 

Thursday, May 14, 2020

The Cat's Pajamas Social Distancing Digi and Lawn Fawn Magic Iris Card


The Cat's Pajamas recently shared a free digital stamp set with cute images perfect for these "social distancing times". I was playing with my new Lawn Fawn Magic Iris Die Set for an upcoming video and made this card in the slimline format to put a smile on someone's face. The cute Paper Poochie was cut out with a Gina Marie Designs oval die and I paper pieced the tp. The Magic Iris topper and inside were debossed with Altenew's Dotted Starburst Die for added interest and texture. Here is are pictures of the Magic Iris starting to open and fully open:


The cute sentiment is from the same free digital set from The Cat's Pajamas as are the images in the inside of the card:

I am having so much fun creating cards with my new Lawn Fawn Magic Iris Die set and will share all of them and a video soon. 

Tuesday, May 12, 2020

CAS and Nuvo Shimmer Powder and Tissue Cards with Poppystamps Raining Frame Die Set


In my newest video I explore different ways to use the same die set to stretch our crafty dollars and the die set I am featuring is the Poppystamps Raining Frame. It is a little hard to see the rain streaks on this background created with Nuvo Shimmer Powders on tissue paper with silver embossing powder highlights, but IRL they are easier to see. I had a piece of this tissue paper left over from a recent video I did with Nuvo Shimmer Powder Techniques and thought it would make a perfect stormy background for this card. The inlaid umbrella was die cut out of a cheerful pink polka-dot paper and the hopeful sentiment was found (unattributed) on the internet. 


This CAS (Clean and Simple) card was created in just a few minutes with this awesome Raining Frame Die and a sentiments strip and die from Taylored Expressions. I added a couple clear gems to complete the card. All of the cards I created for this video were encouraging and hopeful as is perfect for these times we are living through and I will be sending them out soon to spread some hope and cheer. 

Monday, May 11, 2020

Video - Die Cut Crazy Series - CAS to Detailed Cards with Poppystamps Raining Frame Die Set


I am die cut crazy and love to share ways to stretch our crafty dollars by using the same die set in different ways. I recently won the awesome Poppystamps Raining Frame Die Set and in my newest video I share many cards ranging from CAS (Clean and Simple) to more detailed cards. 


 Here are two versions of the card I make in the video. The Raining Frame Die from Poppystamps is perfect for the Magical Rain Shaker Cards. The beads hide away and then move up and down on invisible thread to create the illusion of rain. 


On both of these samples I inlaid a bright yellow cheerful umbrella and created grass and clouds with dies from Karen Burniston. "Sending Hugs" is a die from Sue Wilson and the sentiment banner and "sunshine" stamp are from Taylored Expressions. Here is another view of the "rain" beads:


I created a stormy rainy sky for this card with Distress Oxide inks and the Poppystamps Raining Frame Die. The inlaid umbrella was created with a scrap of glossy cardstock with Nuvo Shimmer Powders and cling wrap from this video. I found the perfect uplifting and hopeful sentiment on the Internet (unattributed) and printed it out for my rainy day cards. To see more card samples and how I created the Magical Rain Shaker card above, watch the new video here.

Thursday, May 7, 2020

Loving the New Altenew Dotted Starburst Debossing Cover Plate!


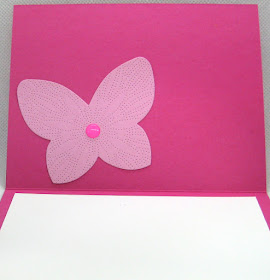
My favorite new cover die is the Altenew Dotted Starburst Debossing Cover Die and this is just one of the cards I have made with it this week! This cover die cuts all the little dots of pattern you see on this card front and adds beautiful subtle details and texture! I used the Simon Says Stamp Shimmer Butterfly to die cut out the stitched butterfly opening and the yellow patterned butterfly and raised the pink piece on pop dots. "Hello" is a die from Tonic Studios and I added some gems from Gina Marie Designs. The debossed cut out butterfly was way too pretty to toss, so I put it in the inside of the card:


I love this cheerful bright hello card and will send it to someone special soon.