Saturday, October 8, 2022

Oh Hey! What a Great Three Days!! Crop and Create Delivered - Cardmaking


Last weekend I was in the middle of three awesome days of classes with internationally known super creative teachers using hundreds of dies, stamps, stencils and other goodies we received in our huge box from Crop & Create Delivered - Cardmaking put on by Scrapbook & Cards Today. I have not completed many of the cards especially from the 9+ classes taught on Friday, but am sharing what I have completed so far. I have a beautifully bound book and on line classes I can watch again and again in the Facebook group, so I can finish at my own pace. I love coloring with layered stencils so one of my favorite of the classes was the Concord & 9th class where we were taught how to layer colors in the "Oh Hey" stencils and cut out with the matching die, plus use the stamp set and tags and gems to make three cards. I loved these so much I made four and added some of my own sentiment dies to some:


Another favorite class was from Taylored Expressions and we made 3 mini-slim cards at once with these brilliant beautiful stencils:


The Taylored Expressions release is called Falling For You and includes the layered stencils, along with dies and stamps and even foil accents (which I will use soon and share.) I added my own sentiment dies to the cards above and to these below I made in different colors:


One of the tips we learned from another class was a reminder that we can use our foil to color small die cuts (like the leaves on the first card) cut out of two sided adhesive foam pieces. 


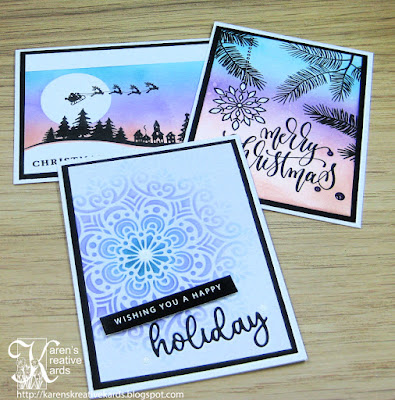
Gina K Designs gave us a large gorgeous set of silhouette stamps, a word die and a beautiful stencil and Gina K showed us how to create these cards with blending techniques. Most of the full length classes (1 1/2 hours long with three complete cards each and a Facebook live where we could ask questions) were not Christmas or holiday cards, but Gina's and the  Spellbinders class was, and I made these cards:


We got a lovely background stencil that we made the gold background with on black, white with glitter on white and I chose to do blue ink on the blue cardstock on the 3rd card. Then we got 5 or 6 sets of dies from Spellbinders too! I did not make all the cards from the full length classes on Saturday or Sunday, but I loved the sunflower dies from Lawn Fawn and I made this card with paper from them too:


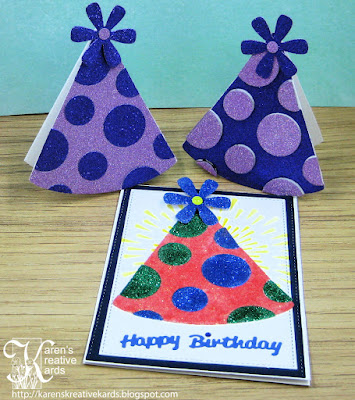
Pink & Main gave us a several cute die sets and a fun stencil and I made one card as was taught in her class so far. Then the amazing Jennifer McGuire showed us how to take the party hat and made shaped cards with it - one is two layer and one is a tri-fold:


One of my favorite classes from Friday was taught by Honey Bee Stamps and we received a lovely stamp set with layered stencils to color the flowers and the leaves. I hate to color stamps and try to shade, etc, but I can add color with stencils as you can see here:


I took some pictures of the rest of the product I received and have not made cards with yet:


The classes alone from three full days taught by internationally known instructors were worth what we paid ($290). But then we got a huge box of stamps, dies, stencils, paper, envelopes and tons of other goodies that is worth hundred and hundreds of dollars. I think these weekends are a bargain and I highly recommend them. We had 2900 students this time and it sold out in just days! If you want to join in the fun next time (spring 2023), join the Scrapbook & Cards Today Facebook page and watch for your chance to sign up and jump on it quickly. There are payment plans available, and all the classes are available to watch again and again on the private FB page once you sign up. There are also weekends for scrapbooking and a mix of holiday cards and scrapbooking. 

Wednesday, October 5, 2022

Six More Quick and Easy Gorgeous Cards With Background Dies


Another recent die I saw and couldn't resist is this Hummingbird Edger from Creative Expressions. As you can see, all I needed to do is cut it out of white and attach to a mirror card background and add a sentiment (or not as you can see in the next two examples.) This die is large but can be cut down to A2 size as I did in the next two cards:


And another favorite background die set I recently purchased during a great sale at Birch Press Designs is the three layer set used in these cards:


On the first card I used all three layers of the die, but on the next two cards I chose to use just two layers on the large part and one on the semi-circles on the side. The possibilities are endless! I show all thirteen cards I made with these dies in my newest video here and the dies are all so versatile I could make many more! 


Tuesday, October 4, 2022

Kat Scrappiness Halloween Shaker Slimline Card


I love to make shaker cards and also slimline cards so I had great fun making this card with dies from the new release at Kat Scrappiness. My favorite of the new dies in this release is the Jack-O-Lantern/Pumpkin Shaker die set and I used it on both sides of this shaker card. As you can see you can choose to make a shaker or not and you could also choose to make a pumpkin that is not for Halloween. Inside the shaker I added sequins from "Going Batty" from Kat Scrappiness as well as some other beads. This slimline card opens this way:


Isn't that fun?! The layered Spooky Word Boo is a new die from this release at Kat Scrappiness too. Here is how it looks when the other flap is lifted:


I am going to write my message on the pumpkin on the right. I hope you will check out all the new products at Kat Scrappiness and have a crafty fun week!

Monday, October 3, 2022

A Baker's Dozen Cards With Background Dies and Embossing Folders!


Are you a die cut fanatic like me but struggle sometimes to find enough ways to use a die- especially the more expensive background dies - to justify the expense? In my newest video here, I show 3 ways to create cards with 4 different background dies. My newest favorite background die is the Pinwheel Quilt Top Die set from Concord & 9th and here are the three cards I showed in the video: 


Aren't they pretty cards? The background can be used on it's own for a subtle debossing look and the additional dies can make quilts in unlimited ways! The sentiments on these cards are from a set by Altenew perfect for these cards.


The backgrounds on this and the next three cards were created with a 3D embossing folder from Simon Says Stamp and a matching flower die and this is the card I made in the video step by step. The YOU letters were cut with a die from Kat Scrappiness and the rest of the sentiment is from Karen Burniston. I brushed ink on the letters and flowers and attached them with fun foam to raise them up. Here are three more cards I made with these same products:


These cards were so easy to make with white cardstock, mirror card and brushed inks on slightly patterned papers, but I love how they turn out and will be proud to send or give them away to brighten someone's day. 

You can see many more cards with background dies here in the new video. Then I hope you have time for a play and send some handmade joy out into the world.

Saturday, October 1, 2022

Celebration Cards 4 Kids at Send A Smile 4 Kids


It’s the first Saturday of a new month and time for another fun challenge at Send a Smile 4 Kids! The theme for this challenge is Celebration Cards 4 Kids, but you can choose to participate in our challenge with any card appropriate for a child.

I am getting ready to celebrate Halloween and so I made this fun card with new dies from Karen Burniston. The front features the new Bats Slim Pattern Plate and an older KB Happy Halloween oval with bats to continue the theme. But just look what happens when the card is opened:


I made this card with the new KB Label Charm Pop Up die set and the front oval pivots in a trio of ovals that stand up for display. The Spiders Slim Pattern Plate as well as the Skeleton and Bat are also new dies all available in the new release.

Be sure to check out the rest of the cards from TEAM SAS here and we would love it if you entered our challenge. 


I am entering this card in the Anything Goes Challenge at Simon Says Stamp Wednesday.


Monday, September 26, 2022

Holiday Stand and Display Card Creations with New Karen Burniston Dies


I am a huge fan of Karen Burniston's pop up dies and in my newest video I share many Halloween and Christmas cards made to stand up and be displayed by the delighted recipient. Here is the fireplace pop up card I made a version of in the new video:


The front of the card is very simple but lovely with a pretty designer paper and Karen's layered Merry Christmas die popped for the eclipse look. The real magic happens when the card is opened:


As I show in the video, I used the new Fireplace Pop up dies and Fireplace Extra die sets to make this lovely scene. The fireplace pops up with stockings and a picture of my Mom and Dad. I am making each of my siblings one of these cards. This one has an extra special feature which happens when the "push here" is pushed and can't be shown properly with still pictures. You can see it in the new video here and in this mini movie:


(If you are a subscriber and are reading this in your email, the videos added to a blogpost do not appear. But you can go to the actual blogpost by clicking the title and see this mini video showing the fire light up.) 

I added EZ Lights from Pear Blossom Press after seeing a similar card done by Lois Bak of the KB design team to make the fire light up. Here is a Halloween version of this card:


Again a very simple card front with an older Tonic Studios fun sentiment die and a Easy 3D Topper from Hearty Crafts. Just look at what happens when this card is opened:


Isn't that scene amazing? I once again CASED an idea from the KB design team and have hanging ghoul hands in the fireplace. All the dies used are new or older dies from Karen Burniston. 

I had great fun making these and other cards for my newest video and hope they inspire you to give some of these products and ideas a try!

Thursday, September 22, 2022

Bonus Faux Rice Paper Fall Cards


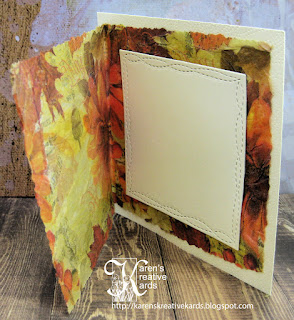
I had a bunch of pretty fall napkins so decided to make some pretty cards with the Faux Rice Paper Technique and share them in my new video here. This card is an easel card and the light shining through the translucent fall scene is created with this:


My favorite way to use the gorgeous paper created with this technique is to fold it and use the front part as the front of the card like I did here:


And here are a couple cards I used frame dies to frame the beautiful fall napkin created with this fun easy technique:


The new video is the third in a series of three about this gorgeous technique and you can see all three videos here in this Playlist on my YouTube Channel.