Tuesday, June 6, 2017

Karen Burniston New Pop up Dies Series - Day Three


I teach a Christmas card every month to my in home classes and so we all have a nice stash ready to go when it is time to mail our our holiday cards. Today is day three of my series of cards featuring the new release of pop up dies from Karen Burniston and I will share this card with my classes soon. I am keeping the fronts of my cards fairly simple because the inside of the card is where all the fun is. I created a side folding A2 navy card base and simply adhered the gorgeous Merry Christmas Ornament die cut from Simon Says Stamp. Ready for the surprise inside the card?


I love the snowman in Karen's new 1012 Snowman Twist Circle Die Set!  The twist circle pop up is so easy to make with this die set and can be adapted to make any kind of fun card any time of the year. But I am in love with the sweet and simple snowman made with the pieces in this die set. Here is a close up:


I added a Joy die cut and sentiment from a Hero Arts set to the inside of my card. The washi tape on the center fold covered up a small boo boo and I added that same washi tape to his hat. Each layer of the snowman is popped up on pop dots. I know the recipient of this card will open and close this card many times with great joy.

I am entering this card in the Anything Goes challenge at Simon Says Stamp Wednesday Challenge.

Thanks for helping me #spread the joy of creativity!

Monday, June 5, 2017

Karen Burniston New Pop up Dies Series - Day Two


If you follow my blog at all, you know I love playing with interactive and unique card folds and one of the most popular in the last year or so has been the twist panel pop up fold. I watched countless tutorials on different ways to score and cut the twist and pop panels and tried many to find one that worked easily. I found a relatively easy version, but even then the panels most often ended up being crooked when the card was complete. I am so thrilled that one of the new dies that Karen Burniston recently released is her 1009 Twist Panel Pop Up Die Set. If you visit her website, for each die she has a video tutorial that walks you through exactly how to use her dies with great tips and a PDF version you can print as well. 

Today is day two of my series of cards featuring Karen Burniston's new dies. If you missed my first post, here is a link. I recently purchased a super cute new baby set of stamps from My Favorite Things and a couple cute baby dies. On the front of this new baby card, I die cut pink and blue Nursery Mobiles from Tonic Studios, layered them slightly offset and attached. I created a belly band and stamped the Welcome Baby sentiment (from My Favorite Things) and added some Blue Crush Nuvo Glow Drops. As is the case with most of Karen's dies, the real magic happens when the belly band is slid off and the inside of the card is revealed:


Here the twist panel is starting to open and you can see the arms that are created so easily using Karen's Twist Panel Pop Up die pieces. 

I recently purchased a super cute baby laundry die from Glitz Dies and die cut it out of a yellow checked dp. I added some baker's twine and hung it across the four panels created with the dies in this set. I thought the dotted scalloped panel pieces were perfect for a baby card. I cut the yellow inside piece out with the wavy edge die piece and cut the arms in the center following Karen's video tutorial. (You can make your card any size you want of course. I made my top folding green cardbase an A2 or 11" x 4 1/4". I cut the yellow inside piece 9" by 4" and then cut the top and bottom with the wavy dotted die in the set.) I stamped more sweet baby sentiments on the top and bottom of the inside piece. Here is a close up of the baby laundry and the twist panel pop up inside:


I am entering this in the Simon Says Stamp Wednesday Anything Goes Challenge. Come back all this week for new cards featuring the spring release at Karen Burniston.com.

Thanks for helping me #spread the joy of creativity!


Saturday, June 3, 2017

Anything Goes 4 Kids at Send a Smile 4 Kids

It’s Saturday and time for another fun challenge at Send a Smile 4 Kids! This time our challenge is: Anything Goes 4 Kids! Create and link any card appropriate for a child and you could win one of our great prizes.

We have two very generous sponsors for this challenge: So Suzy Stamps is giving their winner a $15 gift certificate! And the winner from Dies R Us will also receive a $15 gift certificate! TEAM S.A.S will also be choosing their favorite cards for our top three and the winners will receive a blog badge and an opportunity to be a guest design team member on a future challenge.

I made this "awesome" kids card with a couple cute stamps from So Suzy Stamps that I cut out of brightly colored patterned papers. My background was made with several colors of Distress Oxide inks, spattered water and a bubbles embossing folder. I finished the cute CAS kid's card with a sentiment diecut from Penny Black.

I am entering this card in the Anything Goes challenge at Simon Says Stamp Wednesday Challenge.

Friday, June 2, 2017

A Foiled Masculine Thank You Card


I needed a masculine thank you card recently and created this one with the positive and negative foiled sheets I made with a Patterns II Foilable from Creative Vision Stamps, Emerald Watercolor Deco Foil and some new dies. Here are the steps I used to create this card:

1. After heating up my laminator, I layered a piece of Emerald Watercolor Deco Foil on top of a Patterns II Foilable (which is a piece of cardstock with a pattern made out of toner from Creative Vision Stamps) in a folded piece of parchment paper and ran it through my laminator. (I recommend the Royal Sovereign brand of laminator- very inexpensive and works great!)

2. After removing the piece of foil from the background piece, I layered that leftover piece on a piece of Deco Foil Toner Sheet in the folded parchment paper and ran that through the heated laminator again. 

3. I adhered the white and green foiled background onto a black A2 cardbase. 

4. Next I die cut Tim Holtz's Sizzix Cityscape Skyline die out of black cardstock and also out of the negative foiled sheet and attached them offsetting the buildings to the bottom of the card front.

5. I die cut "thanks" (from Taylored Expressions) out of the negative foil sheet and also out of black fun foam, adhered them together with Nuvo Deluxe Fine Tip Adhesive and attached it to the card front to complete the masculine thank you card.

I am entering this card in the Anything Goes challenge at Simon Says Stamp Wednesday Challenge and the Masculine challenge at Dies R Us.

Thanks for helping me #spread the joy of creativity!

Wednesday, May 31, 2017

Uchi's Design Hugs & Happy Thoughts Animated Card


I recently received the DC 103 Animation Envelope Die Set from Uchi's Design and I created this card for a dear friend with it as soon as I had time to play. I watched the video on the website (link above) and learned how to use the die, stamps and grid from Uchi's Design to create this animated card. Here are a couple more pictures showing the tab being pulled:


I used the bird and sun stamps from the Growing Garden stamp set by Uchi's Design, a sentiment stamp from Altenew and a "Pull Here" stamp from Lawn Fawn. I added a couple punched polka dotted birds to complete the hugs card. Still photos do not show the wonderful animation of these cards very well, so I am sharing a video so you can see the magic:


**Edited to add: To see the animated motion of the bird and sun in this card as well as the butterflies and ballerina above, check out my Cardmaking Techniques and Tips Session 102 - Uchi's Designs Animated Stamps and Dies in Three Different Ways video on my YouTube channel here:  https://www.youtube.com/watch?v=wpRxxjX_M4M&feature=youtu.be. You could even win the cards shown if you subscribe and comment before early October 2017!


Thanks for helping me #spread the joy of creativity!

Tuesday, May 30, 2017

Happy For You Bride's Card with Nuvo and Tonic Studios


A friend recently announced she was getting married and so I made her this card to say how happy I was for her. I stamped Tonic Studio's Belle Boutique Sweet Sashay Stamp with Versamark ink and heat embossed it with Nuvo's black embossing powder. I colored her hair and skin with Nuvo Soft Rose and Rustic Oak Aqua Flow Markers and a Nuvo Aqua Flow water brush. I created a stencil with Tonic Studio's Floral Blooms Patterned Panels Die and used a craft knife to add some Powder Blue Embellishment Mousse through the stencil. I stamped "Happy For You" by Flourishes with black ink, added a few dots with Nuvo's Signature Calligraphy Pen and layered the finished card front onto a black card base. 


Thanks for helping me #spread the joy of creativity!

Monday, May 29, 2017

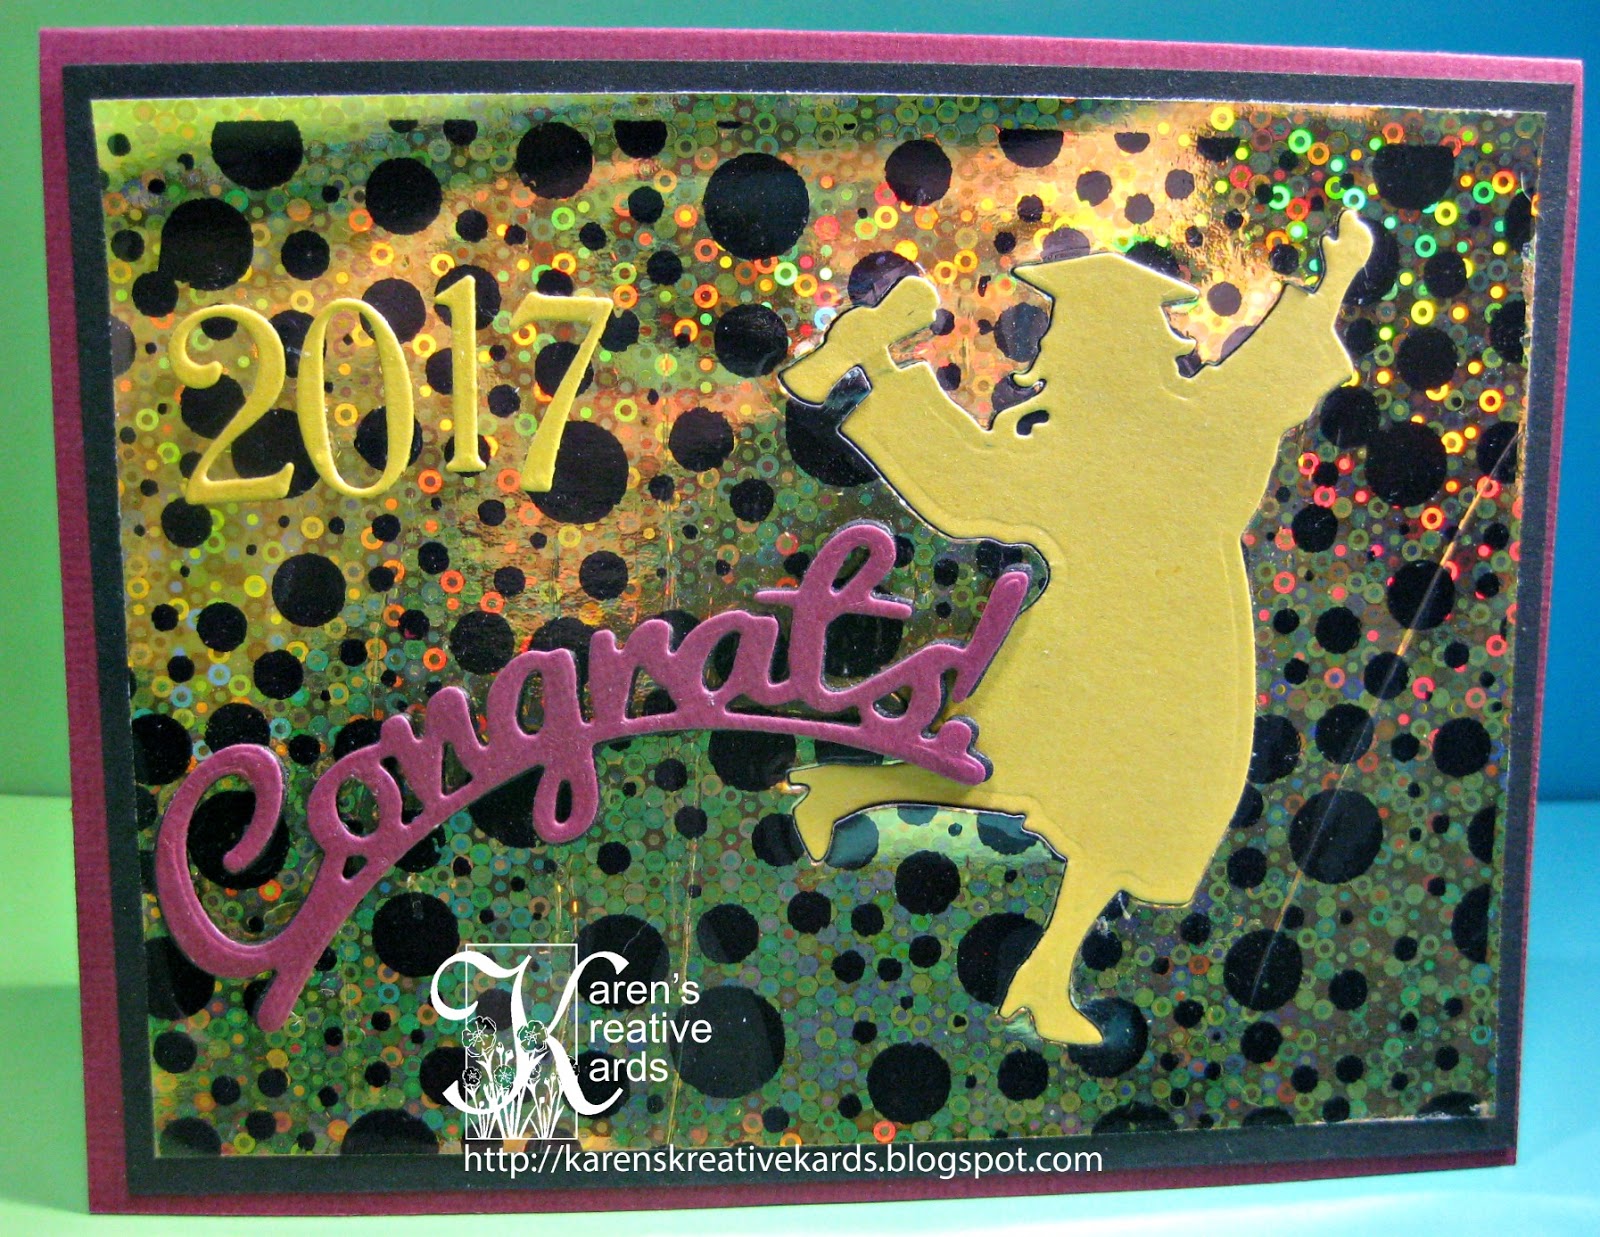
Congrats 2017 Graduate Card

My great niece (yes I am that old! My nephew's daughter is graduating from high school!) graduated this weekend and this is the card I made for her. The colors are gold and maroon as those are her school colors- at least they were many, many year ago when I graduated from the same high school:) I started with the negative of a piece of Gina K's Foil-Mates foiled with her gold sequins. I layered it on black and then onto a maroon cardbase. I die cut a celebrating female grad out of gold and out of the foil sheet and inlaid her back in the shape's hole. I die cut and attached "congrats" and the year 2017 (dies from Tonic Studios.) 

I just can't waste any of the gorgeous golden sparkly foil, so I put it inside the card where I wrote my message of graduation best wishes. 


Thanks for helping me #spread the joy of creativity!