Friday, June 8, 2018

Happy Everything Foiled Marble Card


One of my favorite cards from a video hop I participated in recently was a card that showed stamping a marble background stamp and then adding some gold foil using Deco Foil Transfer Gel, and I decided to make a couple more cards with that technique. I stamped a new My Favorite Things marble background using my Tim Holtz Tonic Studios Stamp Platform and grey ink from Nuvo. Then I put some Deco Foil Transfer Gel on the stamp along some of the curved lines and stamped again with the stamp platform. After cleaning the stamp thoroughly and letting the Transfer Gel dry, I put a piece of gold Deco Foil on top of the marbled background and ran it through my Minc Mini. I love the sparkle of this foiled background in contrast to the grey ink. I die cut Happy Everything from Penny Black out of a piece of cardstock heat embossed with Ancient Amber Baked Texture embossing powder from Seth Apter, then layered that on a black diecut. I added some black gems to complete the card. 

I am entering this card in the Bright and Beautiful challenge at Simon Says Stamp Monday.

Thursday, June 7, 2018

Ice Cream Cones for Father's Day


My husband loves ice cream more than anyone I know, so when I saw this set of layered stamps and dies from Sunny Studio I just had to buy it to make him a card. The ice cream and cones look good enough to eat! He is going to like the inside of this card even more:
I put a gift card to a local ice cream shop in a pop up gift card holder created with a new die from Lawn Fawn. I know he is going to love this Father's Day card and the ice cream he will get for free:)

Tuesday, June 5, 2018

Another Floral Floating Easel Card from My YouTube Collaboration Video


In my newest YouTube video, I collaborated with Maaike Uijhoven to share some card ideas using flowers.  I show how to make a Floating Easel card here, and Maaike's video is here. 

This is the second card I made with this fun version of an easel card where the sentiment appears to be floating (link to the tutorial where I learned how to make this is in yesterday's blog post.) On this card, I featured Kitchen Sink Stamps and dies from Altenew. Lil' Inker and Cheery Lynn Designs. Here is another view of the card closed:


I love finding new fun fold ideas and then sharing them here and on YouTube. To see how easy it is to make this floating easel card, watch my video here. 

I am entering this card in the Anything Goes challenge at Simon Says Stamp Wednesday and the Bright and Beautiful challenge at Simon Says Stamp Monday. Thanks for watching, subscribing and sharing my videos and thanks, too, for helping me #share the joy of creativity!

Monday, June 4, 2018

Video- Floral Floating Easel Card Collab with Maaike Uijthoven


I love flowers and crafty friends and I am featuring both in a YouTube collaboration video along with how to make this Floating Easel Card. I have made so many crafty friends because of this wonderful hobby, and a new crafty YouTube friend named Maaike Uijthoven and I are collaborating on videos featuring flowers this week. To see my video on how to make this floating easel card, watch here. To see Maaike's floral collab video, watch here.


I learned how to make this type of easel card in a blog post with a video on Melissa's Kre8tions blog here. I used dies from Penny Black, Poppy Stamps and Lil' Inker on this card as I show in the video here. 

I am entering this card in the Anything Goes challenge at Simon Says Stamp Wednesday. Thanks for watching, subscribing and sharing my videos and thanks, too, for helping me #share the joy of creativity!

Saturday, June 2, 2018

Anything Goes 4 Kids at Send a Smile 4 Kids


It’s Saturday and time for another fun challenge at Send a Smile 4 Kids! This year, all challenges at SAS4Kids are Anything Goes 4 Kids! We will often have an alternative theme that you can choose to follow, but are not required to. Create and link any card that is appropriate for a child and your card could be chosen as one of our top three cards and you could join us as a guest dt member on a future challenge.

The theme for this challenge is: Anything Goes 4 Kids with no alternative theme this time.

I created a card for an awesome kid using Nuvo Moonstone Glimmer Paste mixed with Nuvo Shimmer Powders over a Tonic Studios stencil and Geometric Flower dies from Impressions Obsession. The “awesome” die is from Tonic Studios.

I am entering this card in the Anything Goes Challenge at Simon Says Stamp Wednesday.  Be sure to check out the rest of the cards from TEAM SAS here and we would love it if you entered our challenge.

Thursday, May 31, 2018

One Love, One World Dark Ink Emboss Resist Cards


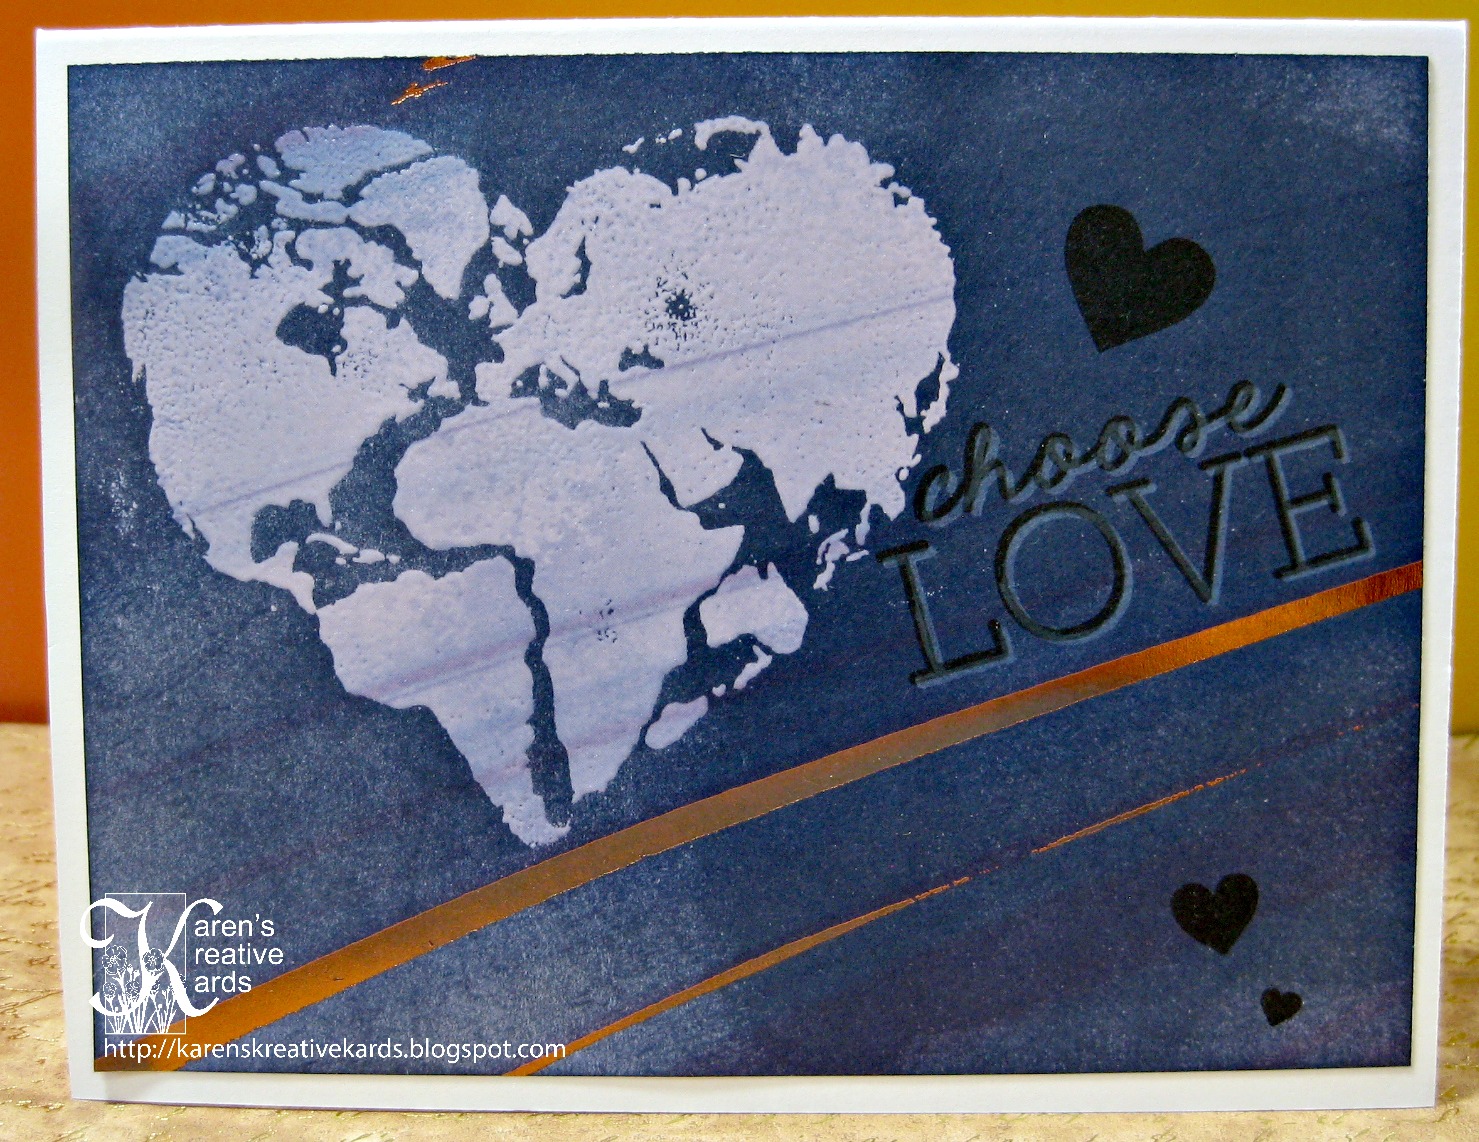
I have been playing with some new stamp sets as well as techniques that are on my list to try someday. I was inspired by some cards made with a technique called Black Resist Emboss over patterned paper here on this blog and made these cards using that technique and a new stamp set from Lil' Inker called One Love Stamps. I stamped the heart world from that stamp set on a striped designer paper with Versamark, dumped on clear embossing powder and melted that with my heat gun. Then I simply applied navy blue ink directly to the paper and wiped off the world heart. I stamped "Choose Love" and some hearts from the inspirational Lil' Inker set, and attached the completed card front onto a white card base.


The technique I found on line used black ink, so I tried it on a Christmas card with the same world heart embossed with clear embossing powder and some blue holiday wishes paper. I added the perfect Christmas sentiment die cut in  gold paper with a die from Penny Black. This technique is easy to do and creates a lovely resist look with any stamps and designer paper you choose to use. 

I am entering the second card in the challenge at Scrapy Land. and the first in the Anything Goes challenge at Simon Says Stamp Wednesday. 

Tuesday, May 29, 2018

Paper Pleated Cards


I found a new background idea in the Issue 4 of Love Cardmaking called paper pleating and tried it on these cards. I love how they turned out! I played around with the measurements which in the article were in centimeters. I found I liked the look the best scoring at the 3/4 inch lines and the one inch line. So to make it easy, score at every inch line on a piece of thin designer paper 8 1/2 x 11. This is bigger than you need, but after folding the pleats you lose much of the width. Then score at every 3/4 inch line- so 3/4", 1 3/4", 2 3/4" etc. I started with a very pretty designer paper from Recollections. After scoring and folding, I die cut the front out with a wonky stitched rectangle die from Kat Scrappiness. I held the pleats down with regular tape on the back and a little glue on the front under the pleats. I also pleated some yellow floral dp and die cut a stitched heart (also from Kat Scrappiness) with the pleats going horizontal. I attached that pleated heart with pop dots to raise and added a "love" die from Tonic Studios.


My second card was made the same way but I used a Stamplorations stitched rectangle die to cut out the pleated brown dp and added a pleated butterfly cut with a Stampendous die and "Heartfelt Sympathy" from Tonic Studios. This was an easy and lovely looking technique and I hope you give it a try.

I am entering the first card in the challenge at Scrapy Land.