Tuesday, February 25, 2020

Flower Cards with Flower Soft From My Newest Video


Remember Flower Soft? Many of us bought it years ago when it was hot for making flowers on our cards but I haven't seen a card made with it for years. I pulled mine out recently and had a play updating it with today's tools and supplies to make it easier to attach. A few years after the original flower soft came out, Flower Soft came out with Ultra Fine colors and I find I like those better now along with new crafty products such as TCW Tacky When Dry Gel Medium. I applied that through a Gina K Designs stencil and when it was dry I attached Ultra Fine Sage Flower Soft mixed with a little Christmas Green for this textured background. All the flowers were created with Raspberry Fizz Ultra Fine Flower Soft but they look different because I started with different colors of cardstock covered with two sided tape from Sookwang. The flowers were cut out with dies from Marisa Job and Spellbinders. 

I started with another Gina K Designs stencil on this card with brushed on green ink and then I moved it over and added TCW Tacky When Dry Gel Medium. When that was dry I attached green Flower Soft and some more Marisa Job flowers created in various colors of flower soft. They are soft and full of texture as you can see in the video here. The sentiment die is from Sue Wilson and Creative Expressions.

I am entering the second card in the Add A Sentiment challenge at Simon Says Stamp Wednesday.

Monday, February 24, 2020

Video - Remember Flower Soft? Updating Older Products With Today's Tools


I am on a mission to use older products I have in my craft room and updating them with newer tools and products to make them current and easy to use. I came across my Flower Soft recently and had a play for this video. 

If you don't have any Flower Soft and would like to see the colors and more info, you can visit Frantic Stamper here.


It is still very much winter here in Wisconsin and my favorite thing to do with Flower Soft is to create snowy winter scenes. We used to have to attach Flower Soft with thick glue which was messy and uneven in my opinion. In my new video I show how easy it is to cut a snowbank out of two sided Sookwang Scor-Tape and simply push the white Flower Soft into it. I also added some Flower Soft snow to the tree using glue in a fine tip bottle. The animal dies on this card are from Sizzix, the tree is from Die-Versions and the hello is from Tonic Studios.

I created another winter card with white Flower Soft on the snowbank in the snowglobe attached again with Scor-Tape and added snow to the trees with glue. The snow globe die is from Gina Marie Designs; the trees and the snow holes were made with dies from Memory Box; The deer is a die from Tim Holtz and Sizzix and the "warm winter wishes" is from Cutplorations. I can use both these cards for warm winter wishes now or save for my Christmas cards next year. 

In the new video I also share non-winter cards made easy with Flower Soft and new products, so click here to check that out.

I am entering the second card in the Add A Sentiment challenge at Simon Says Stamp Wednesday.

Thursday, February 20, 2020

More Fun Melted Crayon Background Cards From My Newest Video


I created this patriotic red, white and blue card with metallic crayon shavings for my newest video where I show how easy it is to melt crayons without an iron for mixed media backgrounds. I simply added some stickers from a patriotic collection and one more card is done for my brother's Honor Flight.


I love this new cover die from Gina Marie Designs and cut it out of a melted crayon background with greens and blues and gold embossing powder for an easy birthday card for a friend. I hope all the cards I shared in the video and on my blog tempt you to try this technique. I did not try it in a laminator, but it might work in those too, or you can use an iron if you don't have a MINC.

I am entering the first card in the Simon Says Stamp Add a Sentiment Challenge.

Tuesday, February 18, 2020

Easy Guys and Kids Cards with Melted Crayon Mixed Media Backgrounds


I had so much fun making cards with melted crayon backgrounds for my newest video and this guy's card is one of my favorites from the video. Melted metallic crayon shavings and black embossing powder created a grungy masculine background and then I added the perfect beer die cuts from Sue Wilson's Birthday Brewing die set. I added some metallic rub-on to the beer keg and the beer glass inside: 

The melted crayons make easy backgrounds for kids cards too as in this fun card: 
I used stitched dies from Gina Marie Designs and My Favorite Things as well as the cute frog die from Simon Says Stamp and Howdy from Karen Burniston. 

To see how easy it is to make mixed media backgrounds with crayons, watch the video here. I appreciate every minute watch on my YouTube channel as well as shares and comments and new subscribers!

Monday, February 17, 2020

Video - No Iron Melted Crayon Mixed Media Card Backgrounds


I have shared in previous videos how a MINC machine can be used to melt cling wrap to easily attach napkins and also how it can melt embossing powders. I recently watched a video where crayons were melted to create cool backgrounds and wondered if my MINC would melt crayon shavings too and the answer is YES! It is so easy to create fun colorful mixed media backgrounds and in my newest video I show how it is done and many card samples with this technique.

This is the card I create in the video with metallic crayon shavings, embossing powder and a stencil from A Colorful Life Designs. The sentiment dies are from Bright Rosa. Here is another version of this card with slightly different colors:


This card example shows you can emboss the crayon background and add metallic rub to your cards. A tip I share in the video is when you want to add a die cut sentiment to a very busy background like this one, if you attach it to a vellum strip it will stand out and not distract from the background. The scripty Celebrate is a die from Tonic Studios.

I had so much fun with the easy melted crayon backgrounds made with my MINC, I share many more cards in the video and later this week on my blog. Thanks for your visit today and your support of my YouTube channel.

Friday, February 14, 2020

Happy Valentine's or Galentine's Day!

This is my favorite of the seven cards I made for my newest video with the same embossing folder and stencil set from Crafter's Companion and I show easy it is to get this look in the video. I started with embossing Tonic Studio's Scarlet Organza Mirror Card in the embossing folder and then applied Deco Foil's Transfer Gel through the matching stencil. When it was dry, I ran the piece through my MINC with a piece of Brutus Monroe Sunrise Foil which has a lovely mix of red and gold changing colors. I love how this turned out!

Not every Valentine has to be romantic and I made this one for my dear friend by changing a Karen Burniston die to say "Happy Galentine's Day". She should have it by now so saved this one for the last card to share this week. 

Thursday, February 13, 2020

Foiled and Mixed Media Love Cards From My Stretch Your Supplies Video Series


Today I am posting two more cards I made with the same embossing folder and stencil set from Crafter's Companion as well as the same blue  mirror card from Tonic Studios and Silver Sketch foil from Brutus Monroe and Therm O Web. As I show in this week's video, it is easy to apply Deco Foil Transfer Gel through a stencil and then when it is dry, attach the foil by running it through a laminator or MINC. I can't wait to try the brand new Duo Gel from Therm O Web which allows you to attach foil without the heat of a MINC or laminator! The Mr. and Mrs die on the front of my first card is from Honey Bee Stamps and the die on the inside of this card is from Lil' Inker.


This mixed media version of this card started out with a big mistake but I turned it into a happy mistake. I accidentally smeared the Deco Foil Transfer Gel while it was still wet, so I deliberately smeared the other hearts and transferred some of the gel to the rest of the background with a scrunched up paper towel. When it was dry, the silver sketch foil attached to all the gel creating the hearts and the silver spotted areas on the blue mirror card. I also spattered on some white paint for more of a mixed media look. "Forever" is a die from Cutplorations. 

I had fun making 7 cards using the same embossing folder and stencil for this video and on Valentine's Day I will share the last card which is my favorite of the bunch. 

Tuesday, February 11, 2020

More Love Cards from My Newest Stretch Your Supplies Series Video

If you follow me on my blog or YouTube channel, you know one of my favorite techniques with a stencil is to apply Therm O Web Deco Foil Transfer Gel through a stencil and then add gorgeous foil to it when it is dry and I share how to do that in my newest video here. All of the seven cards in this video started with creating a background with the Gemini Contemporary Hearts Embossing Folder.  Amber Watercolor is one of my all time favorite colors of Deco Foil and I used that one this masculine love card on the stenciled hearts. I also cut the layer on the love die from Honey Bee Stamps out of that foil and punched some hearts.

Another fun way to use this matching embossing folder and stencil is to brush on ink through the stencil and then add Nuvo Gold Aqua Shimmer on the inked hearts. My husband's favorite colors are orange and yellow so this card will be saved for our anniversary. The scripty "with love" die is from Tonic Studios.

Be sure to stop back the rest of the week as I share more of the seven love cards I show in the video here. 

I am entering the first card in the With Love Challenge at Simon Says Stamp Wednesday.

Monday, February 10, 2020

Video - Stretch Your Supplies Series - 7 Love Cards with 1 Embossing Folder and Stencil


We all need to find ways to stretch our crafty dollars and supplies and in this week's video, I am sharing 7 different love cards made with one embossing folder and matching stencil from Gemini and Crafter's Companion called Contemporary Hearts.


My first card shares the easiest way to get a gorgeous card by simply embossing Tonic Studios Scarlet Organza Mirror Card with the Contemporary Hearts Embossing Folder and adding a fun "happy heart day" diecut from Lawn Fawn. 

I show in the video how I made this tone on tone love card with Therm O Web Deco Foil White Pearl Metallix Gel on a cream suede heart cut out with a Kat Scrappiness Wonky Heart Die. I embossed the cream colored background with the Contemporary Hearts embossing folder and also embossed the suede heart. Then I applied the metallix gel through the matching stencil. I raised the heart on pop dots and attached so the hearts pattern continues from the background through the heart. The gorgeous Love die is from Quietfire Designs. 

There are 5 more cards I share in the video using many other products and techniques so be sure to watch it here. Thanks for your visit here today and any minutes spent watching my videos as well as your comments and subscribing if you have not already! 

I am entering the first card in the With Love Challenge at Simon Says Stamp Wednesday and the second card in the Hearts challenge at Kat Scrappiness.

Thursday, February 6, 2020

Heart Hands Love Card with New Dies From I-Crafter


I was excited to see a new company introduced at Creativation this year and ordered one of the die sets to give it a try. I love interactive unique dies so the Heart Hands, Wiper Insert die set from I-Crafter was the one I chose. I created this sparkly colorful background with Nuvo Shimmer Powders in a video I just finished so decided to use it on this card. The hands are from the new set and the sentiment is from Tonic Studios.


The hands move together to form a heart in the inside piece of this die and the striped heart is from the same I-Crafter set. The layered "With Love" is from Tonic Studios.

I ame entering this card in the With Love Challenge at Simon Says Stamp Wednesday.

Tuesday, February 4, 2020

More Love Cards from the Kitchen Sink Stamps Video Hop


Doesn't that lamb look totally real? And I created him not with any shading or coloring, but with multi-step layered stamps from Kitchen Sink Stamps in different shades of grey and black ink for my newest video. The set from Kitchen Sink Stamps I used is called Multi-Step Little Lambs. The round frame is a die from Sue Wilson.

I am participating in a video hop this week and each of us are sharing projects and tips on how to use these brilliant stamps. In the description box of my video is a link to the next stop on the hop and also to a Rafflecopter where you can enter to possibly win a gift certificate to Kitchen Sink Stamps! 


I also made this love card for the video with the Multi-Step Coffee and Friends set from Kitchen Sink Stamps and a background heart die from Altenew. It is so easy to stamp realistic images with these brilliant layering stamps!

Click this link to watch my video and then enter for a chance to win in the description box. 

I am entering the first card in the Anything Goes challenge at Simon Says Stamp Wednesday.

Monday, February 3, 2020

Video Hop: Layered Love Cards Made Easy with Kitchen Sink Stamps and A Giveaway!


I have been a huge fan of Kitchen Sink Stamps realistic layered stamps for years and am so happy to be part of a video hop this week where you could win a gift certificate from Kitchen Sink Stamps. In my video I share many tips on how to use these multi-step layering stamps and show how I made this card: 

Don't those roses look real? I share tips on how easy it is to stamp with Kitchen Sink Stamps multi-step layering stamps in my video. Here is a look at the inside of this card: 

The front heart shape opens to reveal the heart shaped area where I can write my love note. I used a stencil from A Colorful Life Designs for the background and a stitched heart die from Kat Scrappiness. 

In the description box of my video is a link to the next stop on the hop and to the Rafflecopter where you can enter to have a chance at the prize from Kitchen Sink Stamps before February 10, 2020.

I am entering this card in the Anything Goes challenge at Simon Says Stamp Wednesday.

Saturday, February 1, 2020

Easter or Spring Cards 4 Kids OR Anything Goes 4 Kids at Send a Smile 4 Kids


It’s Saturday and time for another fun challenge at Send a Smile 4 Kids! Again this year, all challenges at SAS4Kids are Anything Goes 4 Kids! We will often have an alternative theme that you can choose to follow, but are not required to. Create and link any card that is appropriate for a child and your card could be chosen as one of our top three cards and you could join us as a guest dt member on a future challenge. We are also continuing as a monthly challenge so new challenges will be posted on the first Saturday of every month and you will have a whole month to make and link your cards.


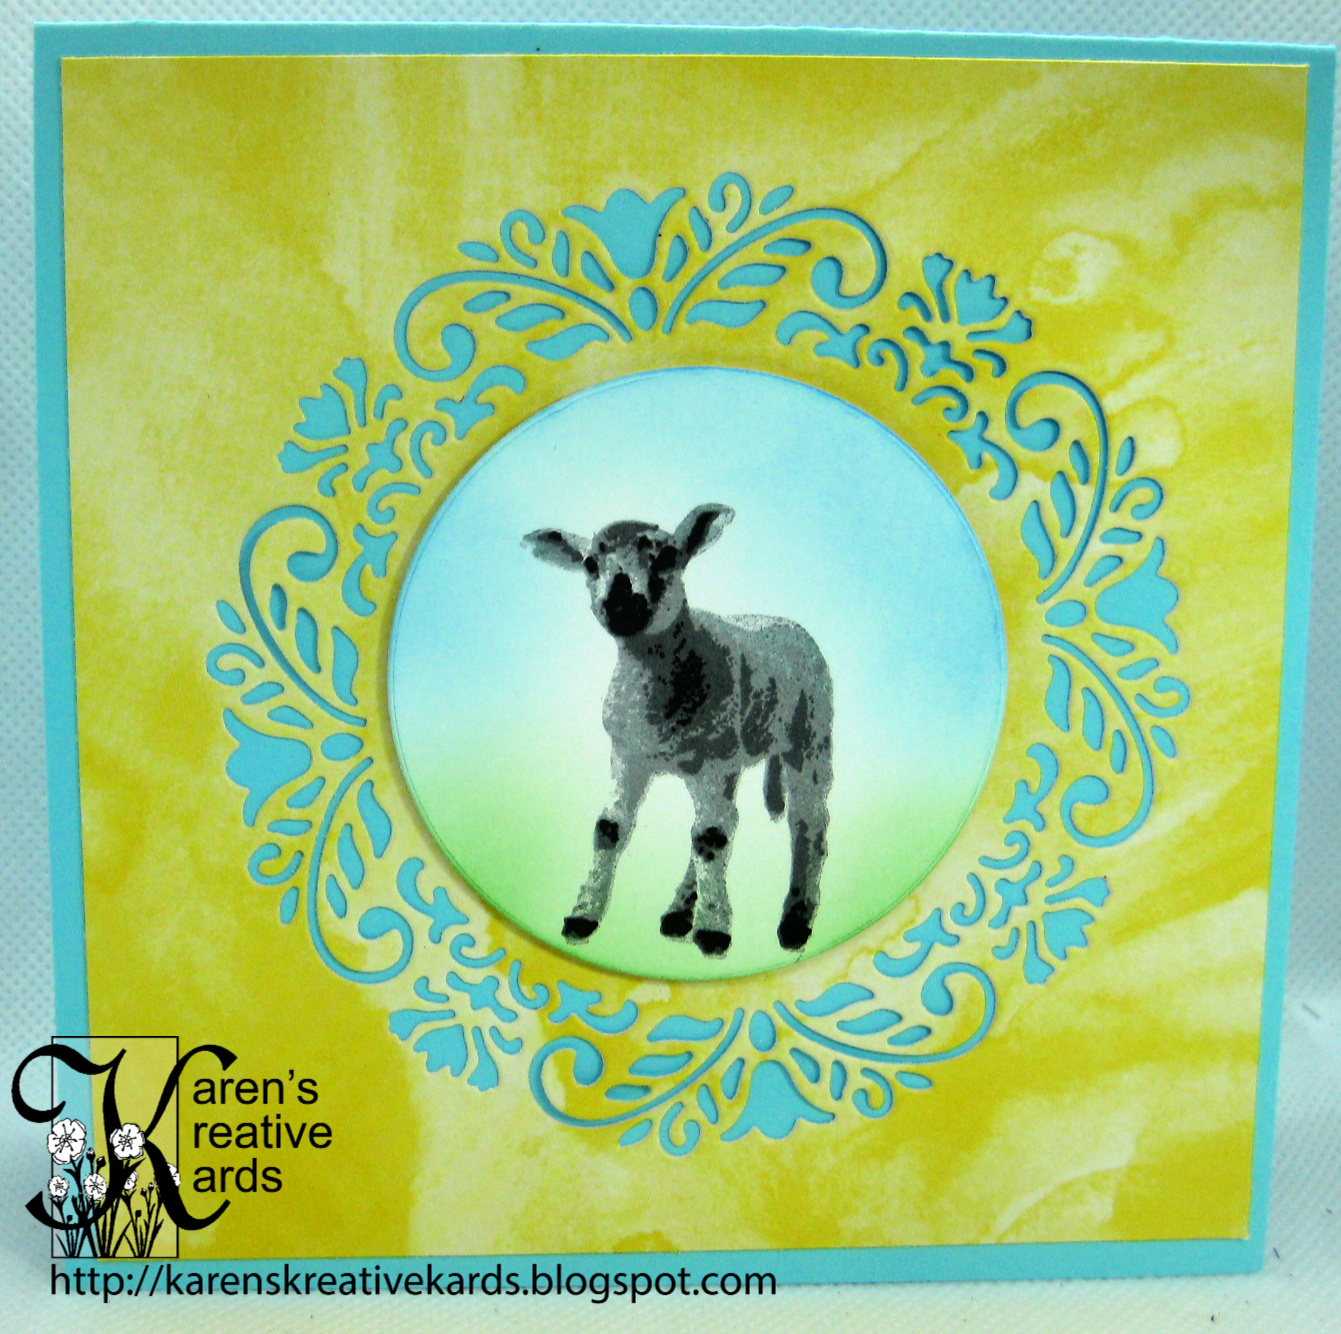
The theme for this challenge is: Easter or Spring Cards 4 Kids OR Anything Goes 4 Kids.  It may be winter, but now is the is the time to make and send in Easter and Spring Cards to our volunteers. But always please check the “Current Needs” page before sending in cards to see which volunteer needs what for their hospitals and kids.

I created my fuzzy sweet upside down Spring bunny using a die from Lil’ Inker and flower soft. Remember flower soft? I decided to play with it recently for a video about updating older products with new crafty supplies. Two sided tape sheets like those from Sookwang make adding flower soft so much easier than gluing it on as we did years ago. The bow is from a Karen Burniston set and the sentiment is from Lil’ Inker.

Be sure to check out the rest of the cards from TEAM SAS here and we would love it if you entered our challenge.

I am entering this card in the Anything Goes Challenge at Simon Says Stamp Wednesday.