Showing posts with label Stamplorations. Show all posts

Thursday, February 12, 2026

What's Your Sign? Shaped Cards with Spellbinders BetterPress/Glimmer


What's your sign? Most of us know our astrological sign and Spellbinders has a new way to personalize our cards with the zodiac sign of the recipient. The sign for most of February and March is Pisces, and I created this card for a special Pisces. 

The Block Print Zodiacs are BetterPress Plates/Glimmer Plates and I used copper foil and my Glimmer Machine to make this card. You can use the plates with your BetterPress Machine and any color ink or choose to hot foil with a favorite color of foil as I did. I find shaped cards so much more interesting than traditional cards and so I used Spellbinder's Essential Arches on several of the cards I am sharing. I also added some Tangled Threads (also from Spellbinders) for texture and fun on this easel card. 


My twin brother has a birthday the end of March so he is an Aries. I created this card for him with the new Aries Block Print Zodiac BetterPress/Glimmer plate and Spellbinders Mirrored Arch Labels. 


I also chose the Sagittarius Block Print Zodiac image because I know someone very special who has a birthday early in December. I used three Essential Arches dies from Spellbinders- one to cut the shaped card, and two for the card front. The center arch is raised on pop dots for dimension and the image continues from the background into the raised center. The image is from a Card Front Set by STAMPlorations. 

Cardmaking Joy & Hugs, Karen 

Sunday, January 18, 2026

Playing with Blending, Glimmer and New Card Fronts

I was so happy to see that Stamplorations is back and starting to release new products. I purchased some of the new Card Fronts and had a play this weekend. I am also participating in the Blending Bootcamp at Scrapbook and Cards Today. The first session was a masterclass taught by Mindy Eggen. She was teaching basics but I learned a lot and tried some of her tips when making this card:


As Mindy pointed out, we can ink blend on any paper and I decided to use an oval mask from Gina K to add some interest to the pretty scenery card front from Stamplorations. I needed a masculine birthday card and I added some blending on the inside too: 


I am also sharing the blending brushes and inks I used. I learned about the best way to use the different sizes of brushes in the first lesson of Blending Bootcamp. There are 4 different sessions each with a class and then a live session to watch. You can still join in here.


I haven't played with my Glimmer Machine or foil in awhile but Spellbinders has a new challenge and the theme is January Glam- Foil and Shine. I started this card with a new card front from Stamplorations and then added some foil and shine with a Spellbinders BetterPress plate called Feather Dream from Dina Wakley. I am entering this in the January Challenge here at Spellbinders. 


Another way to use gorgeous scenery card fronts like the new ones from Stamplorations is to cut one with an eclipse slatted die and raise it over another identical scene. The slatted die is from Craft Addictions UK. 

Cardmaking Joy & Hugs, Karen


Wednesday, March 30, 2022

Even More Monochromatic Cards From My Newest Video


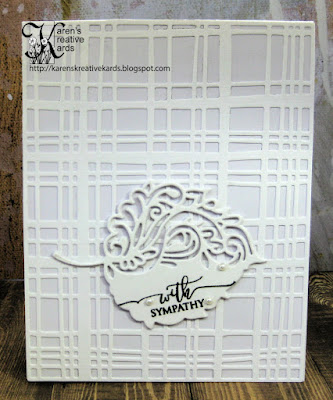
White on white cards may seem boring but they don't have to be when extra texture is added with a background die and the focal point is raised up to stand out against the monochrome background as I show on this card from my newest video. I had so much fun creating tone on tone cards for the new video, I have shared many 5 minute cards Monday and Tuesday on my blog as well. The background die on this card and many from the video is the new Tim Holtz Sizzix Simple Plaid Background die. I cut several of the leaves using a die from Gina Marie Designs, layered them together for height and stamped a pretty "with sympathy" from Gina K Designs. 


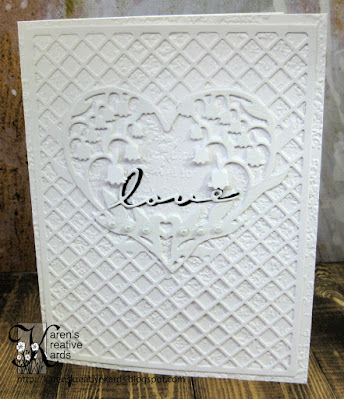
Here is another lovely white on white card featuring a beautiful cover die from Tutti Designs called Lily Heart Panel. The scripty "love" die is from Karen Burniston.


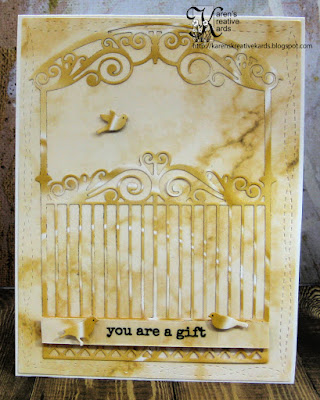
My last 5 minute monochromatic card from the new video features a lovely Arched Garden Gate die from Paper Wishes and more of the marble designer paper from Stampin' up. The clear sentiment sticker is from STAMPlorations. 


Friday, March 4, 2022

Facebook Live Beautiful Slimline W Fold Card You Could Win!


This is the front of the slimline W Fold card I made Thursday on my Facebook Live here on my Karen's Kreative Kards Facebook Page. On the front I applied Creative Expression's Cosmic Shimmer Tantalizing Teal Lustre Polish through a slimline stencil from STAMPlorations called Beautiful Mandala Accent #1. I added a butterfly and a clear sticker sentiment (also from STAMPlorations.) Here are a couple views of the W fun fold inside:


I showed in the Live how to create the W fold and also how easy it is to add 49 and Market's Vintage Artistry rub on transfers to decorate the panels and even the back of the card fold and the signature piece. The sentiment stickers are from STAMPlorations and you could win a large assortment of them and this card I made simply by watching and commenting on the Live before next Wednesday (the 9th) and have a USA mailing address. I will announce the winner in next week's Live Thursday the 10th at 11:00 CST. 

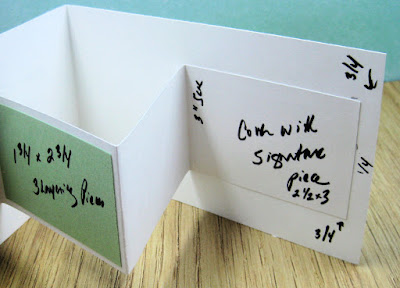
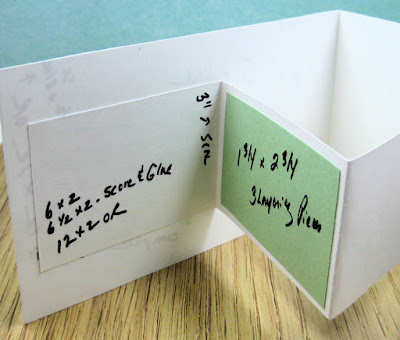
I also promised to share pictures of the slimline W fold template I shared in the LIVE and here they are: 


Here is a link to where you can watch and comment for a chance to win. Look for the "how to create a W fold slimline" video and thanks for watching!

Wednesday, March 2, 2022

Butterfly W Fold Slimline Card


In this week's YouTube video and on tomorrow's Facebook Live I am sharing slimline cards with a W Fold pop up inside. I had some pretty embossed butterflies cut with a Tim Holtz Sizzix die and decided to make another card with them. I layered two butterflies cut out of Tonic Studio's Pearlescent cardstock over a pretty dp cardfront. The sentiment is a clear sticker from STAMPlorations. My favorite part of this slimline card is the pop up inside:


There are many versions of a W Fold and this one is a slimline version. I will share a template in tomorrow's Facebook Live and on my blog here. I added several layers of extra embossed butterflies I had on hand and even put some two sided ones in the  background of the W fold:


To see how to make this type of slimline fun fold card, watch the Live tomorrow here or on replay anytime.

Tuesday, March 1, 2022

More Easy To Make Floral Pinpoint or Debossed Cards


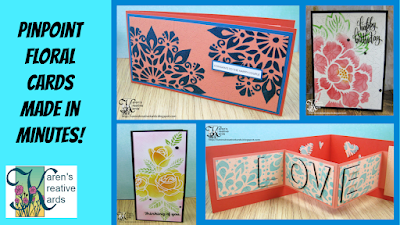
Most of the cards I share in my newest video featured stencils, but I do show a couple cards with the pinpoint or debossed backgrounds and simple floral dies such as this easy to make birthday card. I simply debossed the iridescent mirror card from Tonic Studios with the Memory Box Pinpoint Daisy background die and attached the Stamplistic Floral Flourish diecut on top. STAMPlorations clear sticker sentiments are so easy to attach to cards like this and I added Therm O Web's Easy Cut Adhesive sheets before cutting the black mirror card floral flourish. I made this and the next card in less than 5 minutes, but love how they turned out!

The leafy pinpoint background on this card is also from Memory Box on black Tonic Studios mirror card; the floral dies are from Gina Marie Designs and the sentiment strip is from Simon Says Stamp. 


Here is another favorite of the cards I share in the new video. I started with a Basketweave Slimline Die from Honey Bee Stamps that just adds that subtle texture and then brushed various colors of ink through ARTplorations Just Roses slimline stencil. The sentiment sticker is also from STAMPlorations. 


This is the full size slimline card I made a mini-slimline version of in the new video. I show how to apply Cosmic Shimmer Lustre Polish through a ARTploration slimline stencil (Peaking Mandala) over a pinpoint background die from Memory Box. I love how the inside pops with a W fun fold and am going to show how to make a similar card and the template for this card on my Facebook Live this Thursday, so be sure to join me there!


The W fold features ink stenciling over a pinpoint Stitched Heart Background Die from Kat Scrappiness. The alphabet dies are also from Kat Scrappiness as is the Wonky Wavy square die for the signature piece. 

I am entering the first card in the Anything Goes challenge at Simon Says Stamp Wednesday.

Monday, February 28, 2022

Easy Stencil Cards With Pinpoint Texture


What favorite cardmaking supplies do you reach for over and over when making cards? My current favorites are stencils and pinpoint or debossing dies, and in my most recent video I am featuring them on all the cards I share and make in the video. 


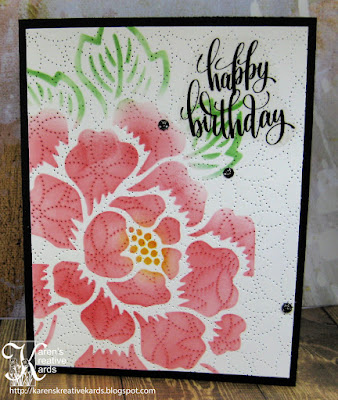
Isn't the combination of the stenciled ARTplorations Bold Rose over the Memory Box Pinpoint Daisy background die just gorgeous on this card? The stencil is one of many slimline stencils I feature in the video, but as you can see the card does not have to be a slimline one to use this or any stencil from ARTplorations (a division of STAMPlorations.) I have a subscription where I receive 3 brand new slimline stencils quarterly for only $18! You can choose to get yours monthly, bi-monthly or quarterly for that bargain of a price and can choose the ones you want or get brand new ones not even on the website yet! The sentiment is a clear sticker from STAMPlorations.


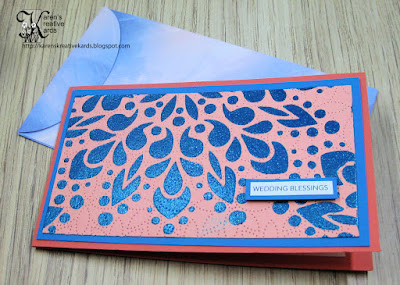
This is the card I make in the new video. It is a mini-slimline with a fun pop up surprise on the inside. I started with the same pinpoint background die from Memory Box and added Cosmic Shimmer Tantalizing Teal Lustre Polish through ARTplorations Mandala Accent #1 stencil. When it was dry, I layered on a piece of teal cardstock on a peach mini-slimline cardbase and added a Simon Says Stamp sentiment strip. I also created a mini-slimline envelope using a die from Kat Scrappiness. But the real fun happens when the card is opened:


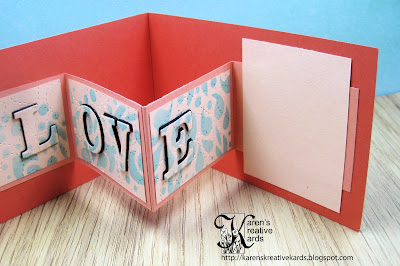
I show how to stencil ink over the Kat Scrappiness pinpoint Stitched Hearts Background die before diecutting out the word LOVE and putting them back in for the eclipse look. The letter dies are Hannah's Alphabet from Dies...To Die For. Here is another view of the inside showing the signature piece on the right side:


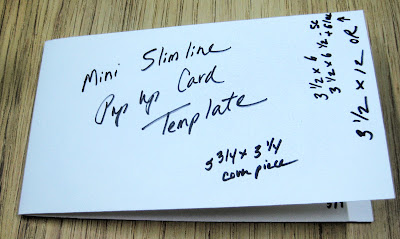
As promised in the new video, I am posting pictures of the template I shared here on my blog. However to see how to use this template and how to put the card together, I suggest you watch the new video here. On my template I show two different sizes of the card itself and the W Fold Piece if you have 12 x12 cardstock or if you don't. 


I hope you will watch the video and give some of these ideas and products a try!

I am entering the first card in the Anything Goes challenge at Simon Says Stamp Wednesday.

Wednesday, February 16, 2022

Altenew Class Bonus Inspired Cards


I am taking an Altenew class this week called Crafter Class Spring 2022 and on one of the days we had a bonus card lesson featuring the idea of creating strips in different widths and using them behind an open die. I just received some new Glitter Ombre' Mirri Card from Hunky Dory Crafts at Paper Wishes and I cut the strips for each of these cards out of that gorgeous cardstock. My first card above features the beautiful Altenew Radial Hearts Cover Die and a "forever" sentiment die from STAMPlorations.


It is hard to photograph mirror card but this pix shows the diagonal strips a little better behind the Birthday Message Cover Plate from Hero Arts.


Here is another card where the strips are more visible. I framed them with the Beautiful Butterflies Sidekick Frame from Poppystamps and added an acetate jewel butterfly from Hot off the Press at Paper Wishes. 


I went through my dies and found this open floral coverplate from Gina Marie Designs that also works beautifully with the background of strips of mirri card. I love all the cards I made easily with this idea I learned in the Altenew class bonus session. 

Wednesday, December 8, 2021

More Laser Cut Wood Technique Cards from My Newest Video


I love to take techniques I've learned from others and change them up to make the cards my own as I did here with Gina K's Laser Cut Wood Technique and show in my newest video. I show how I used a lighter blue, violet and dark blue ink with stencils to create this awesome background. The snowflake stencil on this card is from A Colorful Life Designs and the sentiment is from CUTplorations. As I usually do, I added some gems from Gina Marie Designs to complete the card. 


I recently purchased the Sizzix Mystical Nature die set and needed a night sky look for the background so I chose a galaxy stencil from The Crafter's Workshop and blue and black inks for the technique. The extra stars were also cut with a Sizzix die. 

I had so much fun playing with this technique and different colors of ink and dies and thank Gina K Designs for the inspiration! 

Monday, December 6, 2021

Video - Cardmaking with Gina K's Laser Cut Wood Technique


I love to play with new techniques and stencils, and I was so inspired by a recent Gina K Designs Facebook Love session where she taught her Laser Cut Wood Technique, I had to try it immediately. I played with the colors of ink that Gina K showed and then tried some different color combos and card styles and show them all in my new video here. 


Gina K. showed her laser cut wood technique with shades of brown and a bit of teal and this is my first card with the technique and those colors. The stencil is from Simon Says Stamp and the layered sentiment die used for the eclipse technique is from Kat Scrappiness.


This is the card I show how to make in my new video. I love the color combo of blues and purples and the slimline style is one of my favorites. I used a floral stencil from ARTplorations called Bloom Sprinkles and show the magic of having the flowers appear after putting them through a die cut machine with a rubber mat to "emboss". If you like slimline stencils, you should check out the subscriptions available at STAMPlorations where you can get 3 slimline stencils for only $18 every month, bi-monthly or quarterly. What a deal!

The butterfly die is from Sizzix and the sentiment die is from Papertrey Ink. Here is a look at the inside of this card:


As I show in the video, I tried this technique on colored cardstock but found I liked it better with the woodgrain lines more visible when I started with thick cream or white cardstock. But the patterned paper was too pretty to throw away, so I cut a butterfly for the inside of this card. I die cut the slimline rectangle inside piece with a wavy, wonky die from Kat Scrappiness because I believe those stitches make everything so much more interesting.

I show several more cards in the video and hope my cards inspire you to give this technique a try!