Showing posts with label Pear Blossom Press. Show all posts

Friday, February 13, 2026

OMG Cards That Move From Spellbinders


OMG! Spellbinders new Aged to Perfection dies are perfect to create punny cards that we all love to send in the mail. This Dancin' Chatterbox will surely put a smile on anyone's face! These cards also feature the new OMG and HBD Balloons dies. I added shapes to the cards with Spellbinders Essential Arches and Mirrored Arched Labels dies. 

Here are a couple more pictures to show the movement and the inside of this card:


Pear Blossom Press Snap 'N Slide is the easy to use object that allows the legs to swing back and forth. I also used it to make the front piece and inside balloon spin on this card:


Movement is hard to capture in still photos, so here is a reel I made showing the interactive movement of these cards:


(If you a subscriber and  cannot see the video, you can see it on my blog itself, or on Instagram or my Facebook page.)


Cardmaking Joy & Hugs, Karen 


Saturday, April 26, 2025

Halo Light Cards With Club Scrap and 49 & Market


I recently discovered Club Scrap, a company out of Wisconsin (too!) with monthly kits of gorgeous papers for card makers and scrappers and received my first box not long ago. In exploring their Facebook page, I found a challenge to make a card with this sketch: 

Sketches are a great place to start when designing cards, and I designed to take the challenge. I used all papers, a sentiment strip and some floral outline stickers from the Club Scrap April '25 kit on my card. But I added one fun item to make this card really special:


The velum flower is now lit up! I have used many One Lights and EZ Lights from Pear Blossom Press, but recently decided to try their Halo Lights for the first time. I had a set here and made this card and the next one with their circle of lights called Halo Lights.


I used products from the new 49 and Market Birdsong Essentials release on this card and once again a halo of lights from Pear Blossom Press. This card is pretty below, but IRL much prettier with the halo of lights. 


It is really hard to show the Halo Lights beauty with still pictures, so I filmed a mini- video to show you:


Tuesday, May 14, 2024

Simon Says Create 2024 Create It Take Its and Impressions


Yup- that is me and the Tim Holtz taken first thing when I walked into Simon Says Create in Columbus Ohio this last weekend! I was able to see so many of my crafty heroes up close and make many projects with their fantastic products. There were two full days of shopping and creating in two large rooms and I loved every minute! I wasn't able to take the classes but still had so many hands on instruction at each CITI table. 


Look who signed my Idea-ology project making it a keepsake I will keep forever! We also had the opportunity to sit down with many of Tim's content creators, and I made these cards with Richele Christensen and Cheiron: 


Do you believe we could just sit down and do a make and take with Jennifer McGuire and Gina K of Gina K Designs?? The line was soooo long when I snapped this picture I wasn't that lucky, but Rina K and Mindy Eggen did help me make these two beauties featuring new polymer sheets we could buy (and of course I did.) 


I have been a huge fan of Pear Blossom Press's EZ Lights for years, and Trinity Stamps has created many die sets to feature these lights as well as other fun dies like the donut shaped set. Here are a couple more cards I made with 49 and Market products and Spellbinders BetterPress plates:


I made many more cards, but if I included them all this blog post would be very very long. Here are a couple of the many I made with Simon Says Stamp products:


The two day Simon Says Create show was well worth every penny of the $45 it cost. I have many more card samples and lots of new products to play with as soon as I have time. Even though I didn't get into the classes so I can't comment on those, I do recommend the show and Create It Take Its very very much! 

Tuesday, September 26, 2023

September Guy's Card Class at Harts N Scraps


I really loved the cards I designed for my September classes at Harts N Scraps this month. They were all guys cards, and this one was made with several stencils and stamps from Blue Knight Rubber Stamps. Here is a picture of some of the happy class members with this card:


We had two very full classes and one smaller class and it was in that class these pictures were taken. Two of the cards were light up cards featuring EZ Lights and One Lights from Pear Blossom Press and everyone had great fun making these cards:


The BBQ dies are from Trinity Stamps and the love bug car dies are from Paper Rose Studio. Here are some more pix of the students with these cards:


The last card we made this month was a shaped fish vest card made without large expensive specialty dies. 


Monday, July 31, 2023

Light Up Your Cards The EZ Way!


I love this card I made with the fun Love Bug Car Builder die set from Paper Rose Studio on a shaped cardbase created with dies from Crealies. But as I show in my newest video here, it is even more fun when the "press here" button is pushed:


It is much easier to see the lights light up and this and all the cards I share in the video. If we want more than one light (up to 3) on a card, it is super easy to do that with Pear Blossom Press EZ Lights. Now if we want just one light on our cards there is a new product from Pear Blossom Press called One Light. Here is a card I made so easily with the lighted option:


The lantern die is from Divinity Designs and I embossed it with an embossing folder from Stampin' up. I was inspired by a card I saw in the Let's Create booth at a stamp show to try a white on white Christmas card with this lantern, but mine would light up as I show in the video


After I made it in the video, I am not sure if the lantern stands out enough? Maybe with some more dimension on the lantern, but then the "press here" wouldn't work. But I do love the look when the candle in the lantern lights up:


I added a white poinsettia and pine branch created with dies from Tim Holtz and Sizzix and the pinpoint background was created with a die from Memory Box. 

Watch the new video here to see how easy it is to light up our cards. Thanks for your visit today!

Monday, May 29, 2023

Un-Grill-ievable Interactive Grill Cards 3 Ways


If you want to learn how to make interactive cards for a favorite grill master in your life, my newest video and cards are perfect for you! I made 3 different cards with the new Backyard BBQ die set and Un-grill-ievable Stamp Set from Trinity Stamps and show how each is interactive in a different way in the new video. My first BBQ Grill opens up with a brad to reveal a funny sentiment: 


I was inspired by a card from a Trinity Stamps design team member to try a slimline pull up lid grill card:


I didn't have a die for the pull up and no tutorial, but was able to figure out how to cut a slot under the grill top so it could be pulled up to finish the sentiment: "You're Not Old"...


LOL! I love stamp sets with humorous sentiments to match the die cut images! I was inspired by a card I made in a class taught by Amanda Stevens of Pear Blossom Press with this die set to make a light up version with her One Light units and show in the video how easy it was to make this card:


The grass was created with a die from Karen Burniston and the rest of the dies and stamps are from Trinity Stamps. Here is a picture of what happens when the "Push Here" button is pushed (but of course easier to see in the video here):


I had so much fun designing with these dies and stamps from Trinity Stamps and hope you will watch the video and give some of the ideas and products a try!

I am entering the 1st card in the Add A Sentiment challenge at Simon Says Stamp Wednesday. 

Wednesday, August 31, 2022

Many More Christmas Cards Made with the Faux Rice Paper Technique


Here is another card I made with a Christmas dinner napkin and the Faux Rice Paper Technique for my newest video here. The top layer of the napkin was used to create 3 different cards and in total I made eight cards with one dinner napkin. I showed how two cards could be made with one of the unpatterned layers and stencils and made these cards that way:


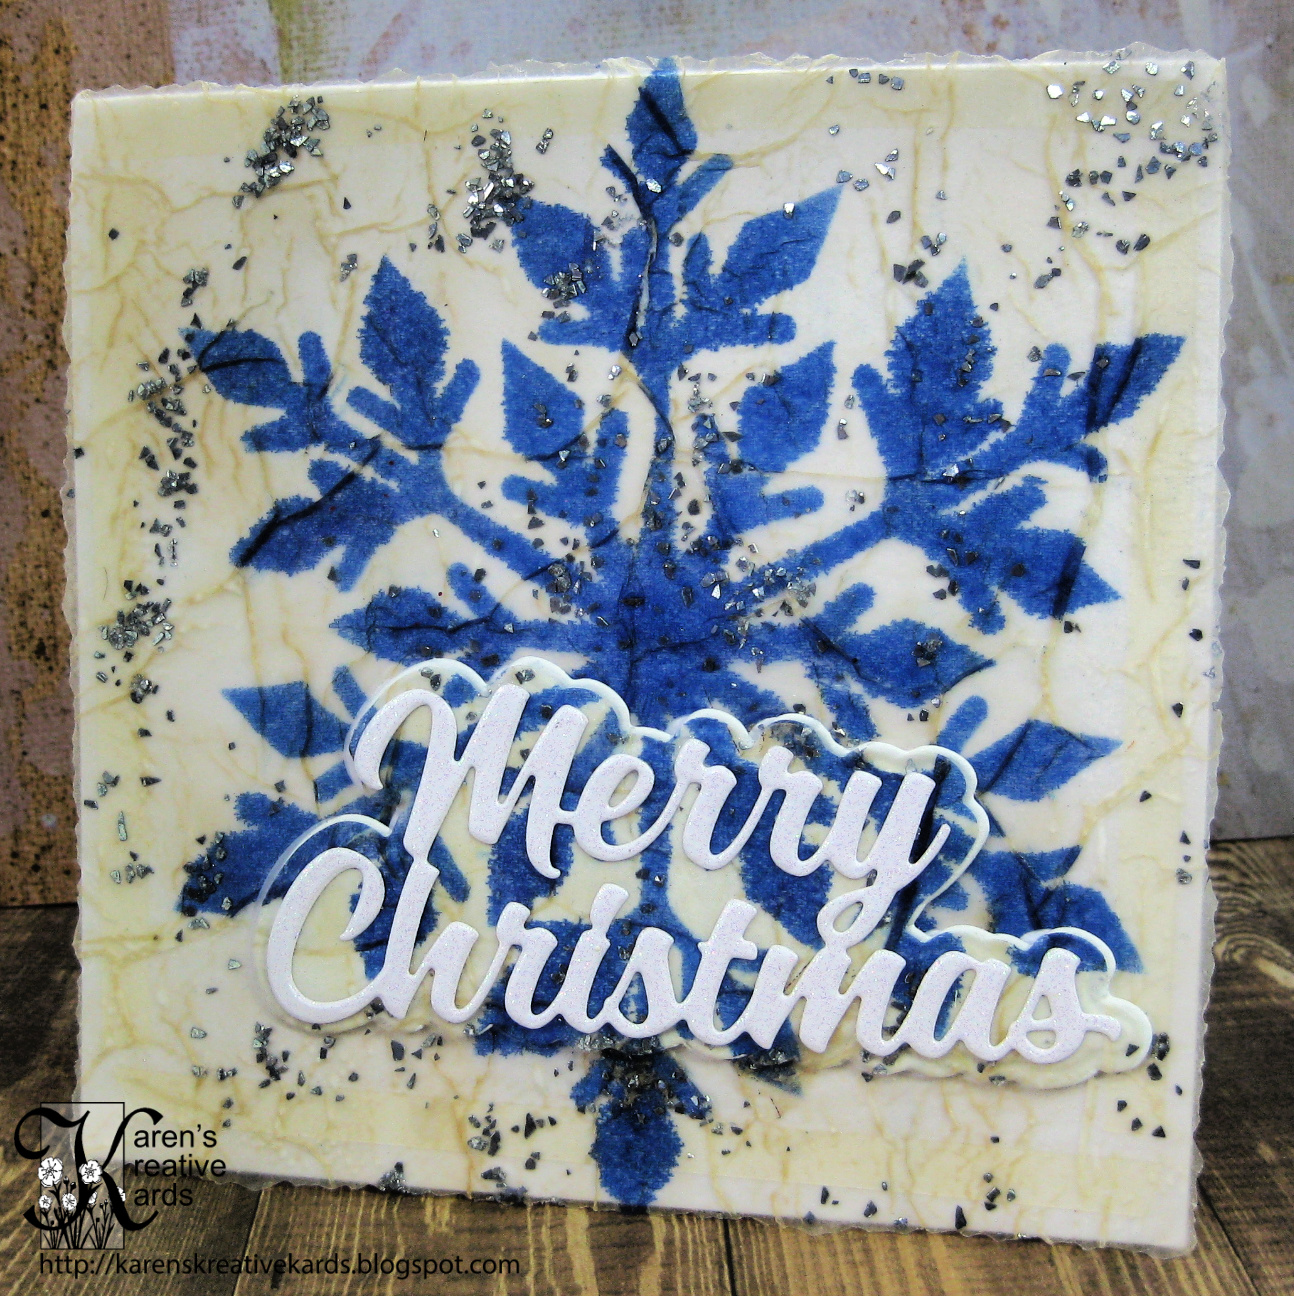
I demo how to stencil on the napkins before adding the glue and coffee mixture, and shared the information that we need to use a permanent ink not just any dye ink as they will smear. I used Versafine Clair and a stencil from A Colorful Life Designs on this card.  I added the Merry Christmas sentiment with a layered die from Karen Burniston and raised it for an eclipse look. 

This pretty layered tree was created with a stencil from Trinity Stamps and framed with Double Dotted Rectangle dies from Crealies.

This is a favorite of all the Christmas cards I created even though I used a darker napkin with very little white space. Look what happens when the star is pushed:


Isn't that cool? Because the paper is somewhat transparent, the EZ lights from Pear Blossom Press shine through! The inside of this card is very cool too and can be seen in the video, but I just have too many pictures to share in this post to show that too.


This card is a slimline showing napkins with no white space can be used with this technique but are not as translucent and so not (in my opinion) as pretty, but still nice. My last card shows an alternative if you can't find patterned napkins with lots of white space. Gift wrap tissue paper does work with the Faux Rice Paper technique. This was the only Christmas gift wrap tissue paper I had but soon there will be many to choose from in the stores.


I now have a bunch of lovely Christmas cards for my stash and had great fun making all these cards for this new video which is the 2nd in my series on my favorite new technique- Faux Rice Paper Technique. I am going to play with different additives and stamping for the third installment coming soon.