If you follow my blog, you know of my love for embossing folders and die cuts. Couture Creations has many unique embossing folders and other products, and they are having a design team call right now here on their blog. I would absolutely love to create with more of their fantastic products and this blog post is an audition for them. The tri-shutter card above is one I posted on my blog 1/14/14, shared at the January Stamp Club meeting held at our local Stamp Shoppe, and is going to be taught in my March in home classes. Here is how the card looks open:
To make a tri-shutter card, you simply cut a piece of cardstock 5 1/2 inches by 12 inches. Score the cardstock vertically at 2", 4", 8" and 10". Make two horizontal cuts from the 2" to the 10" scores lines, 1 1/2 inches from the top and bottom. Crease the paper as shown in the template below - the dots are mountain folds and the dashes are valley folds.
To decorate my tri-shutter card, I chose an embossing folder from Couture Creations called Uber, and several sets of stamps from Precious Remembrance Shop and CAS-ual Fridays. The sizes for the white embossed and stamped pieces for layering are: 5 1/4" x 1 3/4" (two for sides), 3 3/4" x 2 1/4" (one for center piece), 3 3/4" x 1 1/4" (two for top and bottom), and 1 3/4" x 2 1/4" (two for front and back center.) I stamped with several shades of blue to create this mono-chromatic fun tri-shutter card that would perfect for anyone's special celebration.

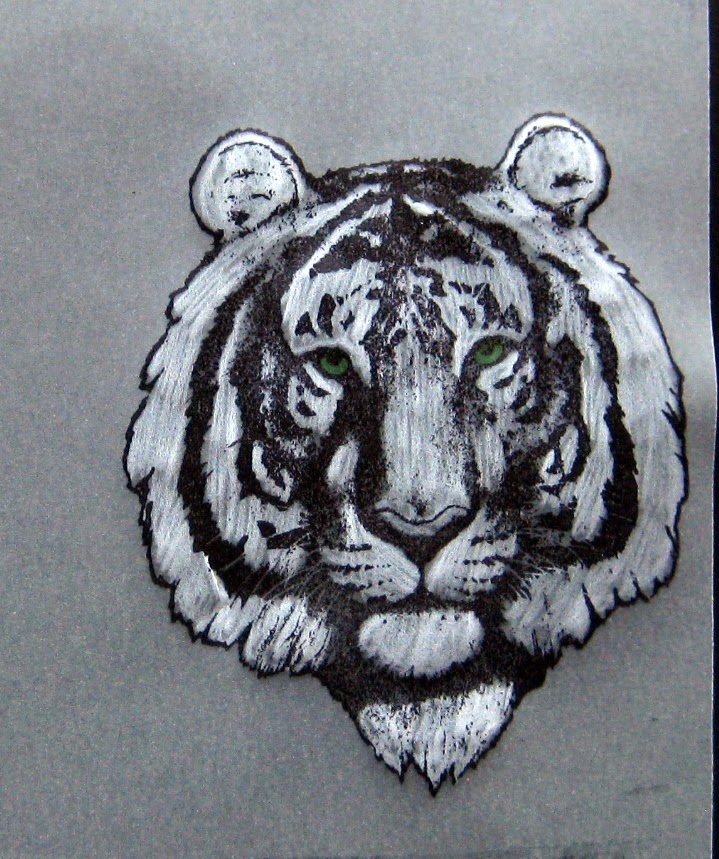
The second project I am sharing today features a technique I call Vellum Dimension and another awesome embossing folder from Couture Creations. I cut a round hole in the side of the white piece with a circle die from Spellbinders, then embossed the piece with the Nuevo embossing folder from Couture Creations. I stamped the tiger (from Repeat Impressions) with Ranger black Archival Ink on a vellum piece and set aside to dry for just a few minutes. I stamped the hello (from Crackerbox Palace), cut into a flag and layered onto a piece of torn washi tape. The circle opening is framed with a scalloped circle cut with more Spellbinders dies.
To create the vellum dimension, turn the tiger vellum piece over and lay on a thick cushioned pad. Rub the back of the vellum with a piece of wax paper, enabling the stylus to move easier. Using the large end of the stylus, very carefully so as to not tear it, "color" the white parts of the tiger. The vellum will stretch and turn white as you "color" in the tiger and it will stand out with great dimension. Here is a picture of me starting the "coloring" with the stylus, and the completed tiger.
I taped the velum piece behind the white embossed layer, and attached the completed piece to a black card. This is the card I am sharing in Madison at the large gathering of stampers I am attending in March called the Madison Mingle. It is also being featured in an article I wrote on the vellum dimension technique to be published by Scrap and Stamp Arts in their October 2014 issue.
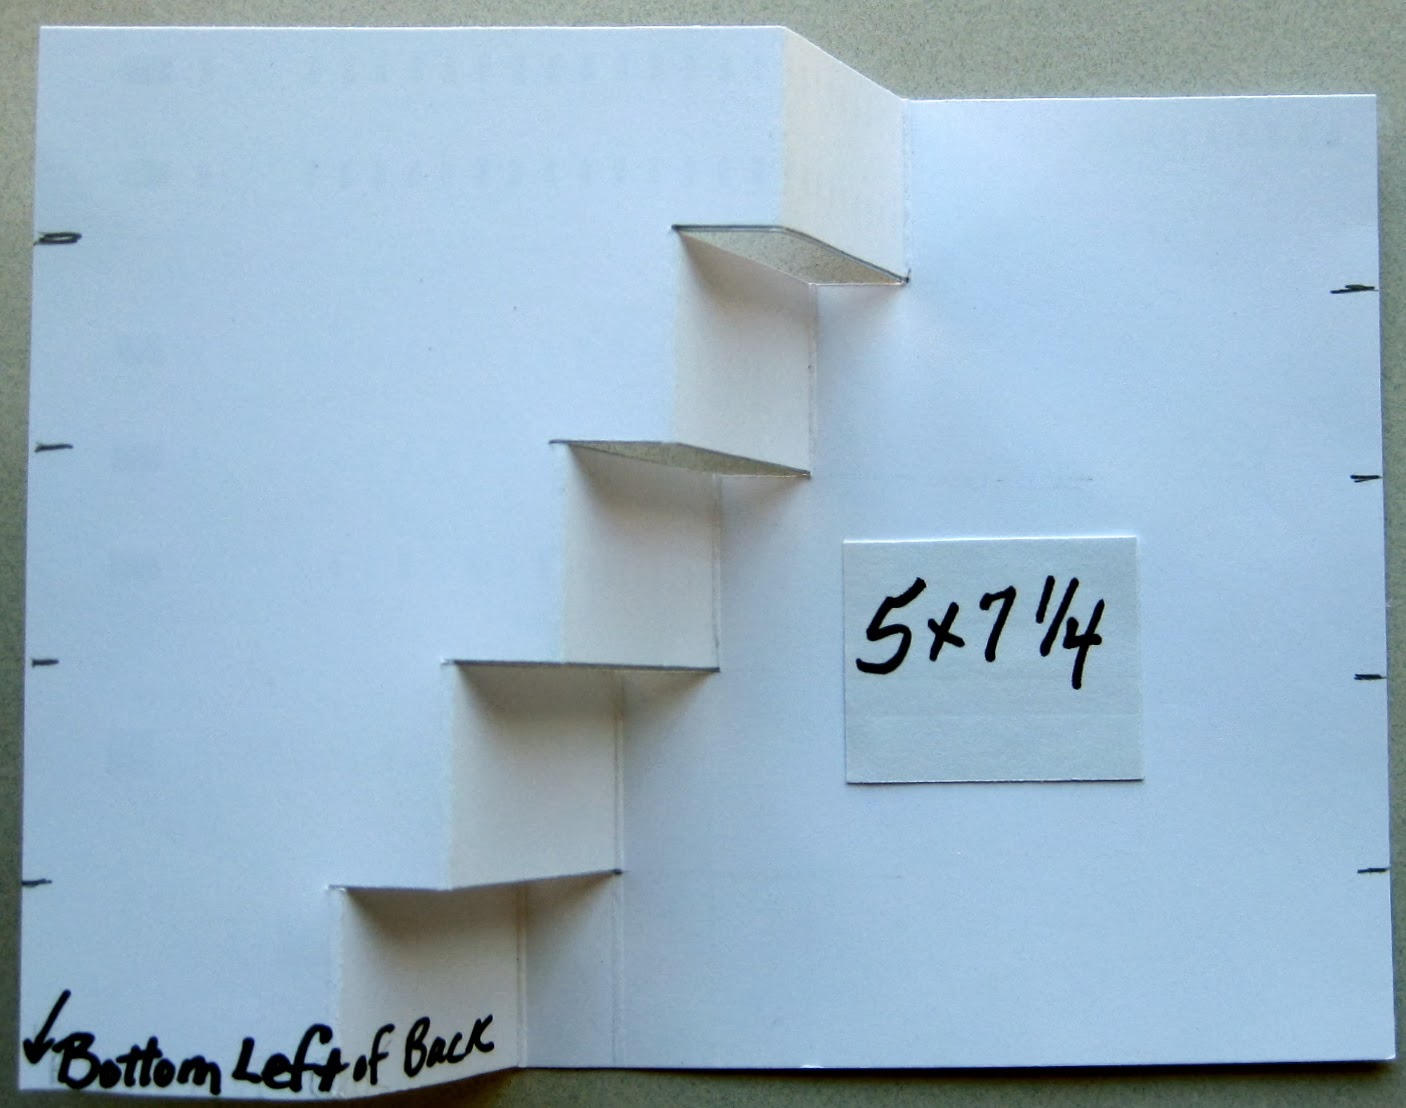
I have been very honored this year to have eight articles published or soon to be published in Scrap and Stamp Arts. This center stair step card is going to be published as part of an article called "Not Your Average Everyday Stair Step Card" in the August issue of Scrap and Stamp Arts. Here are the instructions to create this unique center stair step card:
*Cut card
base 5” by 7 ¼” to make an A2 sized card when completed and folded.
*On back of
the piece, mark 1”, 2”, 3” and 4” on both shorter sides of card. (These marks
are later erased.)
*We are
working on the BACK of the card so everything is opposite of what the front
will look like. The picture below shows what it should look like from the
back.
*From the
BOTTOM LEFT, draw pencil lines from:
1 ½” to 3 ½” on the ONE inch line
2” to 4” on the TWO inch line
2 ½” to 4 ½” on the THREE inch line
3” to 5” on the FOUR inch line (see picture)
*Cut these
lines with ruler, utility knife and cutting surface.
*From bottom
left, SCORE DOWN from each inch line at:
1 ½” and 3” (not necessarily the end of the cut line, so
pay attention to the measurements for each line.)
2” and 3 ½”
2 ½” and 4”
3” and 4 ½”
3 ½” and 5”
*Turn card
over and Mountain Fold the first scored lines and Valley Fold the 2nd
(or furthest right of the score lines) to form stairs. Here is a template to illustrate these directions:
I embossed
the completed blue card base with a snowflake embossing folder (Sizzix.) Then I stamped
the Snowball Sequence set of snowmen from Repeat Impressions tumbling down and
attached to each stair. I added some punched snowflakes (Martha Stewart) and a
“Snow Much Fun” sentiment from Repeat Impressions. I cut the sentiment out with
a label die from Spellbinders and added some gems to complete the card.

My last audition card is one I created for my kids at Send a Smile 4 Kids, my charitable blog whose mission is to collect and distribute handmade cards to children who are inpatient in eight children's hospitals. It was originally posted on my blog on 1/18/14 in this blog post. One of the reasons I love designing cards with embossing folders is they make the cards easy to make, but still fun and unique. To create this CAS card, I started with a diagonally cut pink piece of card stock embossed with Couture Creation's Nuevo embossing folder. The red card base was embossed with a Sizzix embossing folder. The sweet heart sheep is a pre-colored digital image from Doodle Pantry which I printed twice, cut out the hearts and raised them for extra dimension. The sentiment is from The Artful Stamper.
Thanks to Couture Creations for this opportunity to audition for their design team, and for all of my loyal readers for sticking with me through this lengthy blog post.
Stamping smiles, Karen