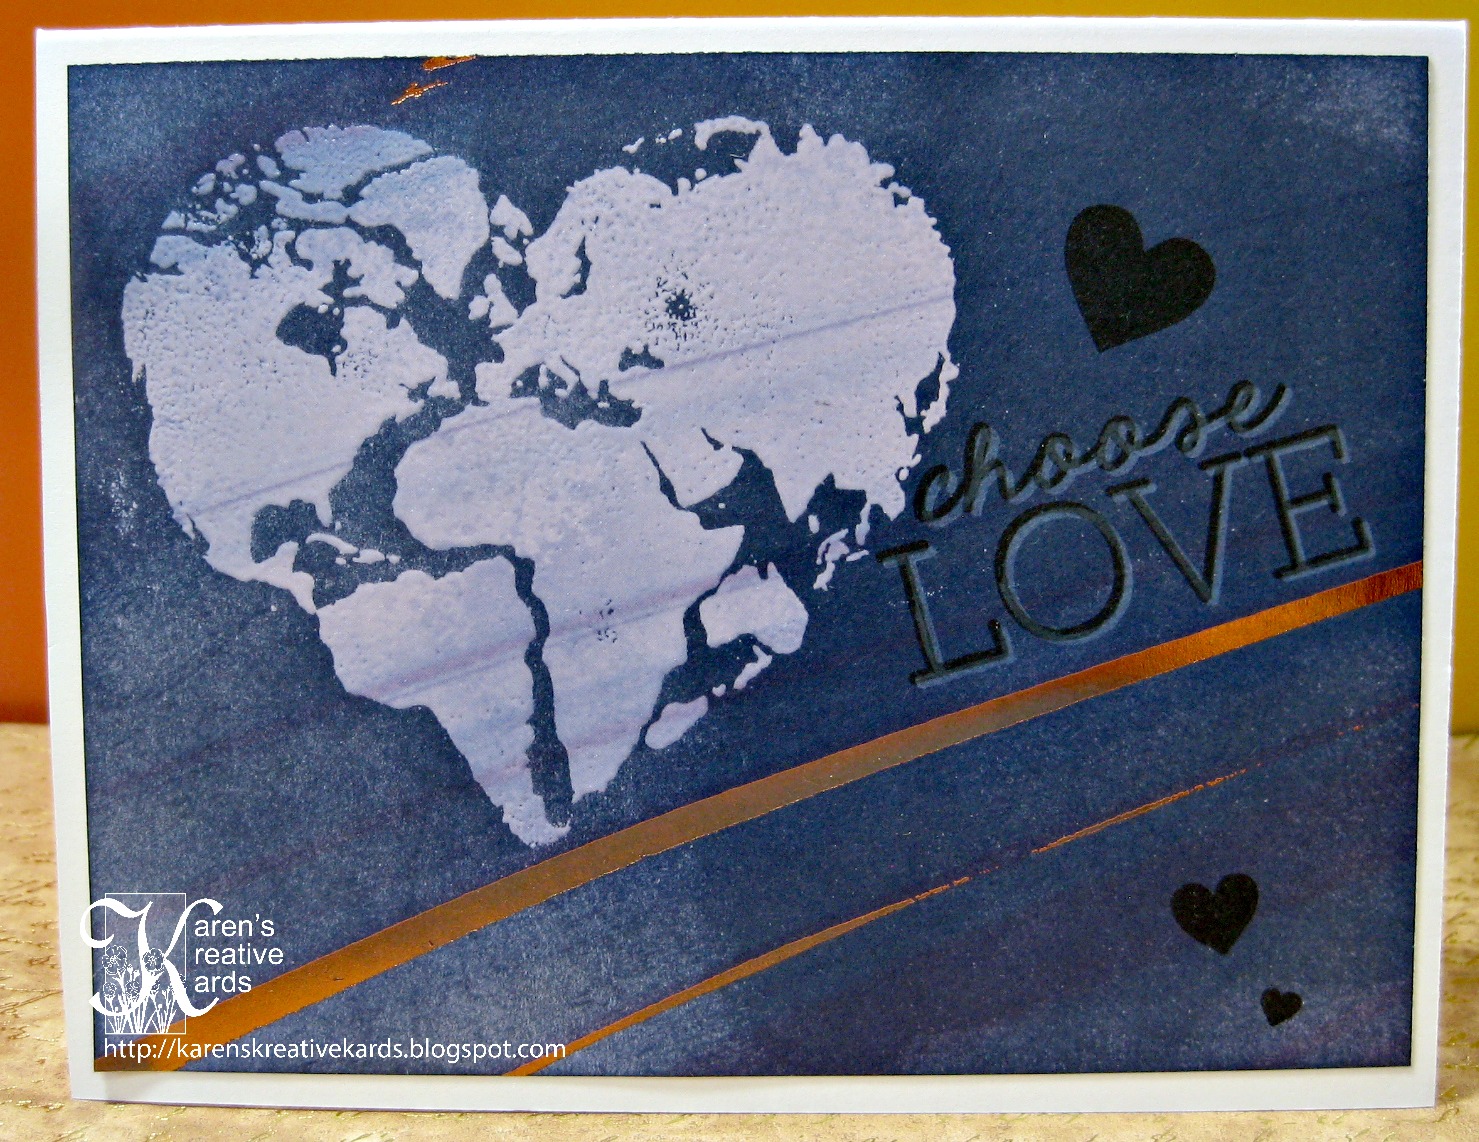
I have been playing with some new stamp sets as well as techniques that are on my list to try someday. I was inspired by some cards made with a technique called Black Resist Emboss over patterned paper here on this blog and made these cards using that technique and a new stamp set from Lil' Inker called One Love Stamps. I stamped the heart world from that stamp set on a striped designer paper with Versamark, dumped on clear embossing powder and melted that with my heat gun. Then I simply applied navy blue ink directly to the paper and wiped off the world heart. I stamped "Choose Love" and some hearts from the inspirational Lil' Inker set, and attached the completed card front onto a white card base.

The technique I found on line used black ink, so I tried it on a Christmas card with the same world heart embossed with clear embossing powder and some blue holiday wishes paper. I added the perfect Christmas sentiment die cut in gold paper with a die from Penny Black. This technique is easy to do and creates a lovely resist look with any stamps and designer paper you choose to use.
I am entering the second card in the challenge at Scrapy Land. and the first in the Anything Goes challenge at Simon Says Stamp Wednesday.

I found a new background idea in the Issue 4 of Love Cardmaking called paper pleating and tried it on these cards. I love how they turned out! I played around with the measurements which in the article were in centimeters. I found I liked the look the best scoring at the 3/4 inch lines and the one inch line. So to make it easy, score at every inch line on a piece of thin designer paper 8 1/2 x 11. This is bigger than you need, but after folding the pleats you lose much of the width. Then score at every 3/4 inch line- so 3/4", 1 3/4", 2 3/4" etc. I started with a very pretty designer paper from Recollections. After scoring and folding, I die cut the front out with a wonky stitched rectangle die from Kat Scrappiness. I held the pleats down with regular tape on the back and a little glue on the front under the pleats. I also pleated some yellow floral dp and die cut a stitched heart (also from Kat Scrappiness) with the pleats going horizontal. I attached that pleated heart with pop dots to raise and added a "love" die from Tonic Studios.

My second card was made the same way but I used a Stamplorations stitched rectangle die to cut out the pleated brown dp and added a pleated butterfly cut with a Stampendous die and "Heartfelt Sympathy" from Tonic Studios. This was an easy and lovely looking technique and I hope you give it a try.
I am entering the first card in the challenge at Scrapy Land.
Sometimes we need a small gift box for a special teacher or friend, and in my newest YouTube video here, I show how easy it is to make these cute tag boxes. I have put a gift card and some goodies in my "just purrrrfect" kitty tag box. All the dies and stamps shown are from Tonic Studios. Here are a couple more pictures of this "totally pawsome" set of gift boxes:
I mostly make cards, but once in awhile it is fun to make a cute box to present a gift in. For all the information on how to make these easy tag boxes, watch the video here. Thanks for watching, sharing, subscribing and commenting. And thanks, too, for helping me #share the joy of creativity.
Can I say I love everything about this card? Especially the layered butterfly cut with a gorgeous set of dies from Birch Press Designs. I am enamored with the many layered sets of dies from Birch Press Designs but can not afford many of them. This set is called Layered Sparkler Butterflies and is a set of 4 dies. I found some gorgeous paper at Michaels with shades of teal and gold and blue and used that for the top of the butterfly as well as the card front. I attached the butterfly layers together and added it along with a pretty sentiment die from Frantic Stamper to the front of my card. I finished the card with some pretty blue gems.
One of my favorites of the Sparkle Blend sequin mixes from Doodles Paper Playground is called Spring Fling and is a delightful mix of spring colors and butterflies and flowers. I was inspired by that mix to make these two hello spring shaker cards. I recently found Jillibean shaker cardbases and plastic pouches here at White Rose Crafts and I purchased the flowers and butterflies. I colored the card bases with Nuvo Shimmer Powders (sprinkle on and spritz with water to release the colors) and when they were dry, I embossed with embossing folders from Darice and WeR Memory Keepers. I added the Spring Fling Sparkle Blend sequins in the PVC card shaker shapes and sealed the card base. I layered the finished shaker pieces onto a purple card base and added a hello die cut (from Paper Smooches and Little B.) Here are a couple more pictures showing the shakers all shook up:


The perfect finishing touch to any card is a few shaped and colorful sequins and I added some to both cards from the Spring Fling Sparkle Blend mix.
I recently played with a new fun fold called the "impossible card" because it is named after a magic trick that looks complicated but is very easy to do with a simple fold. I learned how to do the fold and how to make many sizes of the card here on this blog post. I show today's cards in a video I posted this week here. This birthday version features funny Technique Tuesday sentiment, a cupcake die from Karen Burniston, "enjoy" by IO and the fun "happy birthday" die from Penny Black. Here is another look at this card and a Christmas version I made to teach to my class:
I teach Christmas cards all year so we all have a stash when December comes. I made this one 5 1/2 square so it will fit in a 6 inch square envelope and added some cute dies from Penny Black, Sue Wilson and My Creative Time. This fold is so easy to do, and will pop up to display in the recipient's home. To learn how to make this card and the others I shared yesterday, come watch my newest YouTube video here.
If you follow me, you know I absolutely love interactive and fun fold cards, so in this week's YouTube video, I share some of my favorite cards I have made recently. When I saw the Technique Tuesday valance die set with an interactive window valance that can be pulled up and down, I just had to have it. I also love to use humor in my cards, and so also had to purchase the Sammy the Squirrel stamp set with the many funny sentiments such as I used in this humorous get well card. I show in the video how easy it is to make this valance that can be pulled up and down. Here are a couple more pictures of this card:
I especially loved the sentiment in the inside of the card from the Technique Tuesday set because I do say that- a saying from my youth.
The second card I make in the video is a version of the very popular Impossible Card fun fold sized to fit in an A2 envelope. The card stands up and looks complicated to make, but is in fact very simple to make. I made mine with some darling stamps and dies from Julie Ebersole for Ellen Hutson with a fortune cookie that has a pull out fortune. For more information on how to make both of these cards, please visit and watch here.
Thanks for watching, subscribing, sharing and helping me #share the joy of creativity!
It’s Saturday and time for another
fun challenge at Send a Smile 4 Kids! This year, all challenges at
SAS4Kids are Anything Goes 4 Kids! We will often have an alternative theme
that you can choose to follow, but are not required to. Create and link any card
that is appropriate for a child and your card could be chosen as one of our top
three cards and you could join us as a guest dt member on a future challenge.
I created a card for an awesome
kid using a Lego napkin and my Heidi Swapp Minc Mini. To learn how to do that
easily, watch my video
here. I die cut U R using large alpha dies from Kat Scrappiness and raised
them on black foam. The “awesome” die is from Tonic Studios.
Be sure to check out the rest of
the cards from TEAM SAS here and we
would love it if you entered our challenge.
As I shared on Wednesday in this blog post, I love love love great sentiment stamp sets that combine different fonts and sizes for creative ways to express ourselves on our handmade cards. I just received the clear stamp set called Big Word Thanks from Stampendous and used it on both the cards I am sharing today. I also used Nuvo's Aqua Flows and Shimmer Powders to create the colorful backgrounds on both cards. On the card above, I liberally colored a piece of watercolor paper with various blue Nuvo Aqua Flow colors and then sprinkled on several colors of Nuvo Shimmer Powders and spritzed with water. When it was dry, I used my Tim Holtz Stamp Platform to stamp the Stampendous Cling Tree Circle and sentiments from the Big Word Thanks set from Stampendous.


My second card features the mixed fonts and sizes of the Big Word Thanks set again and also some cute stamps from the Laurel Birch Floral Greetings Set also from Stampendous. I created the background with Nuvo's Aqua Flows and Shimmer Powders and cut it out with a die from Gina Marie Designs. I stamped using my Tim Holtz Tonic Studios Stamp Platform because it allows me to stamp several times for a perfect image. I stamped and cut out a couple dragonflies and flowers from a scrap of the shimmer paper created with the Nuvo products and added some white Nuvo Crystal Drops to complete the card. I want to thank Stampendous for the wonderful stamps I have used in this series and suggest you check out their great stamps and other products at their website or at Scrapbook.com.
In most of my guest dt blogposts for Doodles Paper Playground, I have been showing how to use their awesome Sparkle Blend sequin mixes in shaker cards. For today's cards, I am showing how the shaped sequins from Doodles Paper Playground (sold exclusively at White Rose Crafts here) can be the perfect finishing touch on any card. Both of my cards today are feminine birthday cards with rosettes created with the Tim Holtz Sizzix Rosette set of dies. I decorated the rosettes and card with floral sequins from the Flower Powers Sparkle Blend and added some Nuvo Sugared Almond Crystal Drops to the center of the flowers. The Happy Birthday die on the card above is from Memory Box.
My second card features some gorgeous papers from the Recollections brand at Michaels and another Tim Holtz Sizzix rosette. The Happy Birthday sentiment die is from Simon Says Stamp and the perfect finishing touches are the Fairy Dust sequins from Doodles Paper Playground.
Here are a couple more views of these cards showing the dimension of the sequins and dies:
Thanks for visiting and helping me #share the joy of creativity!
I love to personalize graduation cards using the graduate's school colors and in this case, her name as well. I share a look at this card and the card below in my newest YouTube video here. Gold and maroon are the school colors at the school my niece Iris will graduate from, and I used Concord & 9th's alphabet stamp sets to write her name. This card is an interactive peek-a-boo card that features Motion Crafts Peek-A-Boo dies and Springy stamp set. I thought the little bunny with the glasses would look so cute as a graduate, so I stamped and cut out the grad hat from Tim Holtz's Crazy Things (accessories for his Crazy Birds). The congrats die is from Tonic Studios. Look at what happens when the tab is pulled:
The animated bunny hops up and down in excitement that he finally graduated:) I show this motion in the new video here and am showing step by step how to make peek-a-boo cards with Motions Crafts stamps and dies in an upcoming video as well.
My last school color graduation card is a bridge card that folds flat to mail in an A2 envelope. The measurements for the base are 4 1/4" x 8" and it is scored at 1 1/4" and 2 1/2" and then flipped so the other side is also scored at those measurements. The bridge size is optional although it is always (for this size) 5 1/2 inches wide. I made mine 3 inches tall and die cut Taylored Expressions celebrating graduates out of the top and glued on Tonic Studio's Congratulations on the bottom. The Class of 2018 was die cut with a die from Impression Obsession and the Hats Off To You is a stamp from Crackerbox Palace.