Tuesday, August 31, 2021

More 4 Page Bookbinding Cards with 49 and Market Vintage Artistry Rub-on Transfers


In my newest video I share three book cards I made with 49 and Market's Vintage Artistry Rub-on Transfers. There are 4 pages in each book card and so it would be easiest for you to see them in the video here as still pictures do not show how lovely these are. The rub-on transfers on this card are navy and yellow and on the front are the lace, butterflies and hearts. The center die is Butterfly Meadow from Gemini. Here are pictures of the other pages: 


As I show in the video, the 49 and Market rub-ons transfer easily to the cardstock and quickly decorate each page in these 4 page bookbinding cards. Here is another one I made:


I had great fun creating and decorating these 4 page bookbinding cards and hope my cards encourage you to watch the video here and try the ideas and products featured.

I am entering the first card in the Anything Goes challenge at Simon Says Stamp Wednesday.

Monday, August 30, 2021

Video - Cardmaking with Vintage Artistry Rub-On Transfers and Bookbinding


Do you remember the rub-on transfers we used to use years ago? I was not a fan at that time, but I recently discovered gorgeous new ones from 49 and Market that make vintage artistry on our cards so easy to do. In my newest video here I share three bookbinding cards decorated so beautifully and easily with the 49 and Market Rub-on Transfers. I learned how to make the 4 page bookbinding cards from Sam of Mixed Up Crafts and here is a link to her tutorial. 


This is the 4 page wedding book card I made in the new video. I show how to put the book binding card together and as promised, here is a list of the sizes of each page:

Sizes of pages and layering pieces:

Cut 4 pieces of cardstock all 5 inches tall with the widths 5 1/2, 6, 6 1/2 and 7 inches. Score each at 1 1/2 and fold both ways for the side of the book. 

Cut 4 layering pieces (I used one layer but Sam used two): All are 4 3/4 inches tall and the widths are 3 3/4, 4 1/4, 4 3/4 and 5 1/4 inches.

If you choose to do a vellum layer cut three the same size as the full cardstock pieces, or you can choose to make them the same height and width as the layering pieces once put on the back pieces. 

The side layering piece is 1 1/4 x 4 3/4. 


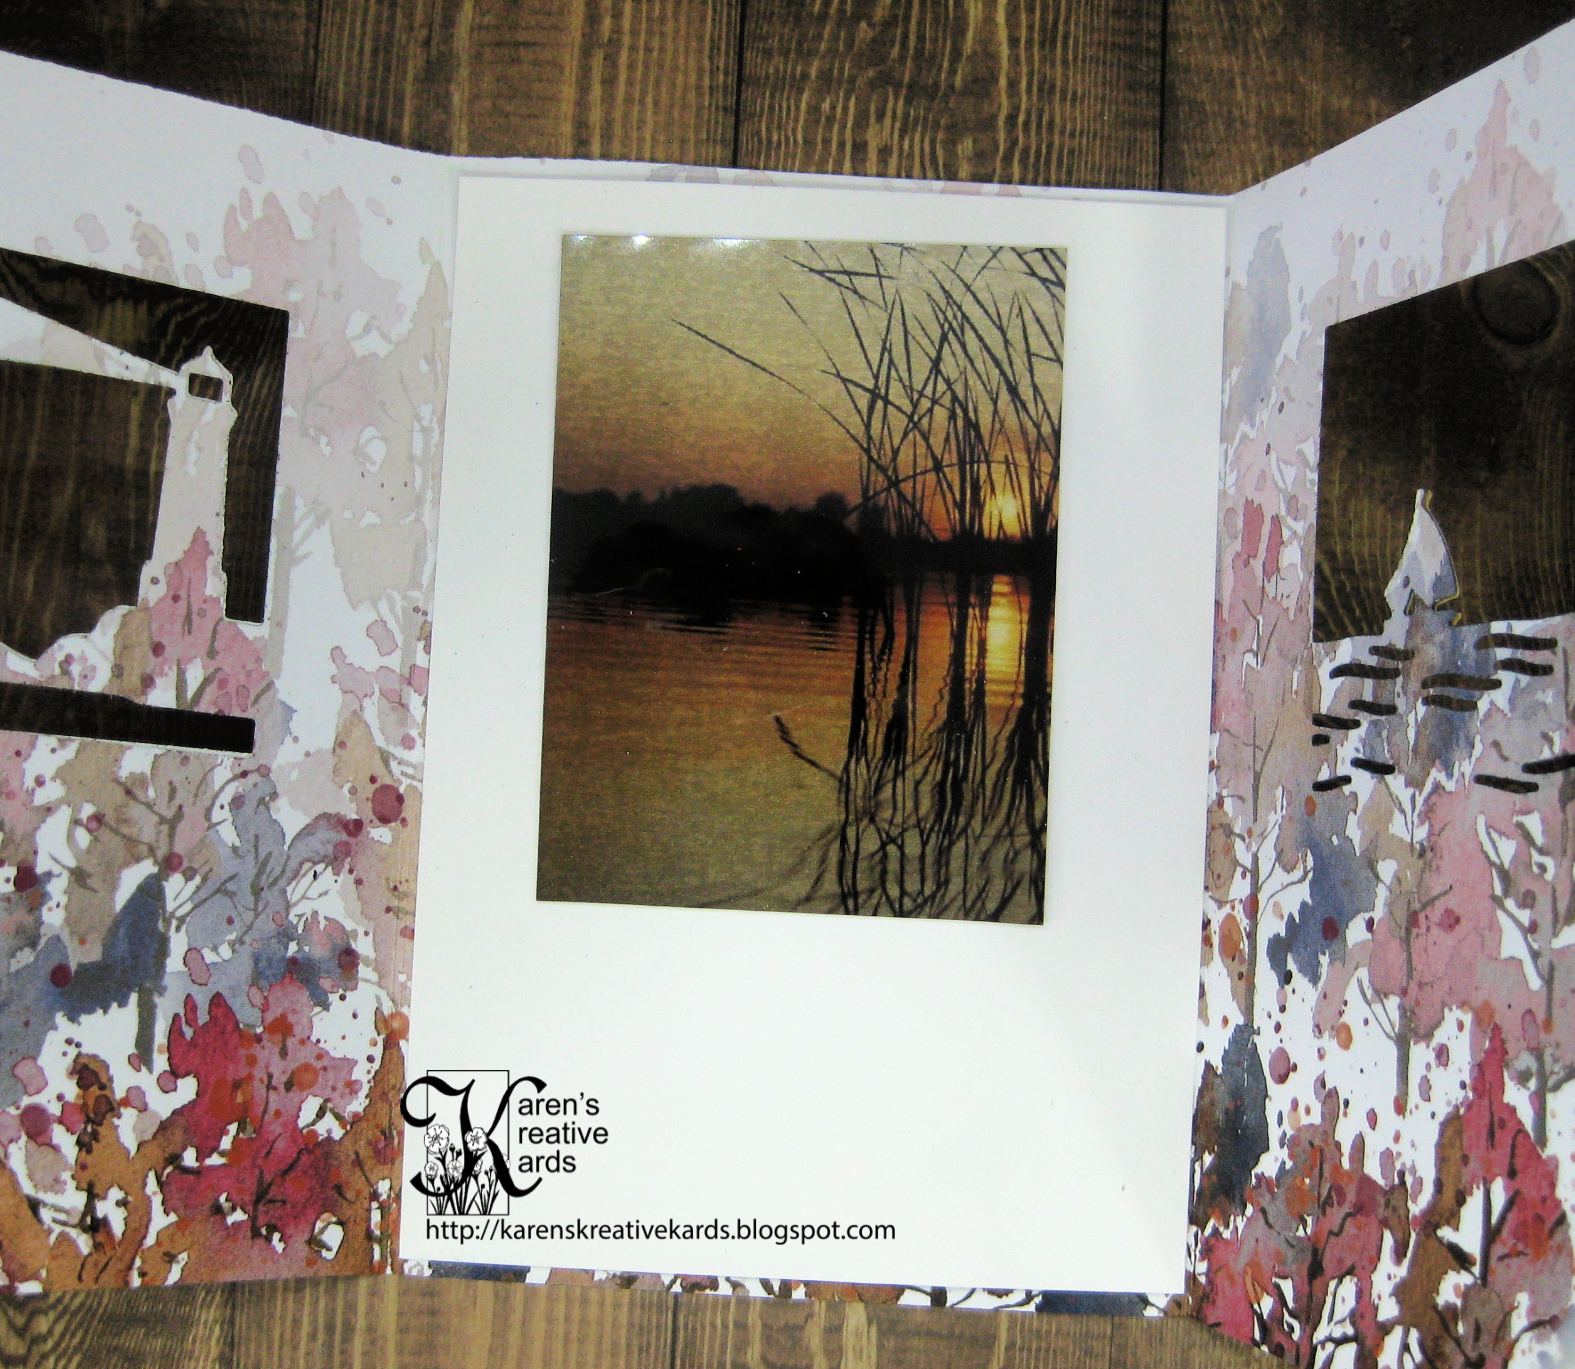
On every page of the 4 page bookbinding cards I show in the new video is decorated with 49 and Market Vintage Artistry Rub-on Transfers and on the front and 2nd page on this wedding version I used layered sentiment dies from Honey Bee Stamps. Here are pictures of the 3rd and 4th pages (both sentiments from Dies...to Die For) and also a side where I added a gift card (or cash or check) holder for the newly married couple:


I love how these 4 page bookbinding cards with 49 and Market rub-on transfers turned out (and I share two more in the new video here.) I hope the cards encourage you to give this fun fold and the products I feature a try! 

Monday, August 23, 2021

Video - Cardmaking With Hero Arts Looking Glass Dies and Transparencies


I recently discovered Hero Arts Looking Glass Die Sets and found them to be beautiful one, two or three layer frames for Clear Views Transparencies as I show in my newest video here. 


I have loved Clear Views transparencies from The Mark-It Place and made cards with them for years. They are now available at a local stamp shop called Let's Create and you can call them at 715-424-1343 if you want some after seeing the video and checking out the different ones available on their website here. I created a one layer frame with the deer from the Winter Forest Hero Arts Looking Glass Die Set and added a navy frame around him with a Karen Burniston square frame die. The snowflake debossing on the white cardbase was created with a Memory Box Pinpoint Snowflake die and the sentiment strip is from Simon Says Stamp. 


This is the card I create in the new  video. The fisherman Clear Views Transparency is from a beautiful set called New Day (for John) in memory of Jill's husband John and the dotted squares were created with dies from Crealies.  Here is a side view and more photos that shows a great new fun fold I learned from a Pinterest post of a card by Lisa Curcio: 


Do you remember Rub-on Transfers? I used to have a bunch years ago but never used them. I just discovered a gorgeous pack of Rub-on Transfers from 49 and Market called Travel Hike More and used several in this card. I put a three layer lighthouse picture on the inside with dies from the Lighthouse Looking Glass die set from Hero Arts and another gorgeous Clear Views Transparency from New Day (for John.) 


My third card is a trifold created with the Lighthouse die set and two sided dp from Stampin' Up. Here are views of the 2nd fold and the inside of this card:


Combining the Hero Arts Looking Glass layers with the Clear Views Transparencies make easy gorgeous cards, and I hope my cards in my newest video encourage you to give some of these ideas and products a try!

I am entering the first card in the Add A Sentiment challenge at Simon Says Stamp Wednesday.

Monday, August 16, 2021

Video - Christmas Card Countdown - Kaleidoscope Plaid Holiday Cards


I find it stressful to try to make my holiday cards later in the year when we are so busy with decorating and shopping, so I try to make some each month of the year. I am starting a new video series today called Christmas Card Countdown to share easy and unique holiday cards with some of my favorite products and techniques. If you make a few Christmas cards each month with me, you will have one less thing to do in November and December. But keep in mind that each of these cards can be for any occasion with different colors and sentiments. I am featuring the Kaleidoscope Plaid Die Set from Spellbinders on each of the cards I share in the new video, and this is the card I show step by step how to make:


The background paper on this card is from Whimsy Stamps and the sentiment strip is from Taylored Expressions. The shaker windows were created easily with the Spellbinders Kaleidoscope Plaid die set out of silver and blue cardstock and I added snowflakes and seed beads in the shaker windows as I show in the video. I suggest not tossing all the pieces from the plaid diecuts and I used them to add color and glitter to each of the corners. This Kaleidoscope Plaid die set can easily create many different plaid patterns as you can see from this picture:


This card looks complicated to make but was really easy with 4 plaid rectangles made in Christmas colors and placed on an A2 cardbase with another Taylored Expressions sentiment strip. 


This slimline holiday card shows three different configurations of the Spellbinders Kaleidoscope Plaid die set cut out of non-traditional Christmas colors along with some punched snowflakes and a clear sentiment sticker from STAMPlorations. 

These cards were easy and fun to make and now I have 4 more for my stash. I hope my cards in my newest video encourage you to get started on your holiday cards and to give some of the ideas and products a try. 

Tuesday, August 10, 2021

More Interactive Cards Made with Favorite Dies From My Newest Video


I have been wanting to try a theatre card made easy with a die set  and I found a die set from Crealies which creates a very sturdy and easy to make theatre card. Crealies is in the Netherlands but has very reasonably prices and high quality dies and I do recommend them highly. Here is another view of this theatre card showing the extra pieces in  the inside which can also be decorated:


All the flower dies on this card are from Dies...to Die For, sentiment is from Honey Bee Stamps and the theatre "curtains" are decorated with pretty rub-ons from 49 and Market. Here is a look at the card flat and ready to mail:


I wanted to make some special cards to celebrate that my card club of female friends is back together monthly to play canasta and other fun card games. I found a perfect die set from Impression Obsession and used my computer to print the sentiments. But look what pops up when the card is opened:


I popped up a hand of cards on a simple pop up made with a die from Karen Burniston. Here is a side view:


This card and the others I show in my new video here are all made so much easier with the dies from many of my favorite companies. I hope my cards inspire you to give some of these ideas and products a try! 

Monday, August 9, 2021

Video - Die Cut Crazy Fun Interactive Cards For Special People


I admit I am die cut crazy and in my newest video I share many interactive cards I made with dies from many of my favorite companies. 


I have been a huge fan of Motion Crafts and their animated stamps and dies for years and was thrilled recently when they released two huge sets of dies and stamps. I made this card with the new You Melt My Heart set which includes 28 stamps, 28 dies, animation grids, double sided skinny adhesive strips and complete instructions all available for only $31 here at HSN. I show how to make this card and how the wheels move and the ice cream sign pulls up to reveal a message in the new video. Here is another view of this adorable interactive ice cream truck:


To see how this card is made and several other unique interactive cards, be sure to watch the new video here. But here is a mini-video showing how the wheels move and the sign goes up and down to reveal the secret message: 


I hope my cards and video inspire you to give some of these ideas and products a try! 

Saturday, August 7, 2021

Thank You Cards for Kids at Send a Smile 4 Kids

It’s the first Saturday of a new month and time for another fun challenge at Send a Smile 4 Kids! Again this year, all challenges at SAS4Kids are Anything Goes 4 Kids! We will also have an alternative theme that you can choose to follow, but are not required to. The theme for this challenge is: Thank You Cards for Kids.

I made my thank you card with Deco Foil Rainbow Shattered Foil through a slimline stencil from STAMPlorations called Twisties. The sentiment dies are also from CUTplorations (a division of STAMPlorations) as are the stitched rectangle dies.  

Be sure to check out the rest of the cards from TEAM SAS here and we would love it if you entered our challenge. 


Wednesday, August 4, 2021

Thanks A Bunch Lilacs Card with August Dies...To Die For


I love lilacs, pussy willows and layered sentiment dies so this card made with the brand new August release at Dies...To Die For at Shopscrapbook101.com just makes me very happy. All the dies you see are in the newest release at Dies...To Die For here and the gems are also new there too. The cardfront has an acetate center with a milk pitcher full of lilacs and pussy willows across the two pieces of purple dotted cardstock and the acetate center. I offset two colors of purple on the sentiment over the green shadow and raised it up. Here is another look at this card: 

Tuesday, August 3, 2021

More Distress Oxide Reinker Salad Spun Beauty


My favorite color combo of Distress Oxide reinkers that I spun in my salad spinner for this background is Wild Honey, Picked Raspberry and Peacock Feathers. I chose those colors for both this card and the next one from my newest video here. The stamps on the card above are from a set at Stamplorations from Dee's Artsy Impressions called "Beautiful You." The card below features water droplet stamps from Designs by Ryn and an "awesome" die from Tonic Studios.


This is another stamped card I made with a salad spun background for the new video. I chose Tumbled Glass, Scattered Straw and Orange Marmalade Distress Oxide reinkers, a sentiment die from Karen Burniston and a cool Baseball in Motion stamp from Technique Junkies. 

To see many more cards and how easy it is to create these awesome backgrounds, be sure to watch the new video here. I hope my cards inspire you to give this technique and the products shared a try!

I am entering the first card in the Anything Goes challenge at Simon Says Stamp Wednesday.