Thursday, July 28, 2022

In The Garden Layered Stencils In Different Monochromatic Choices


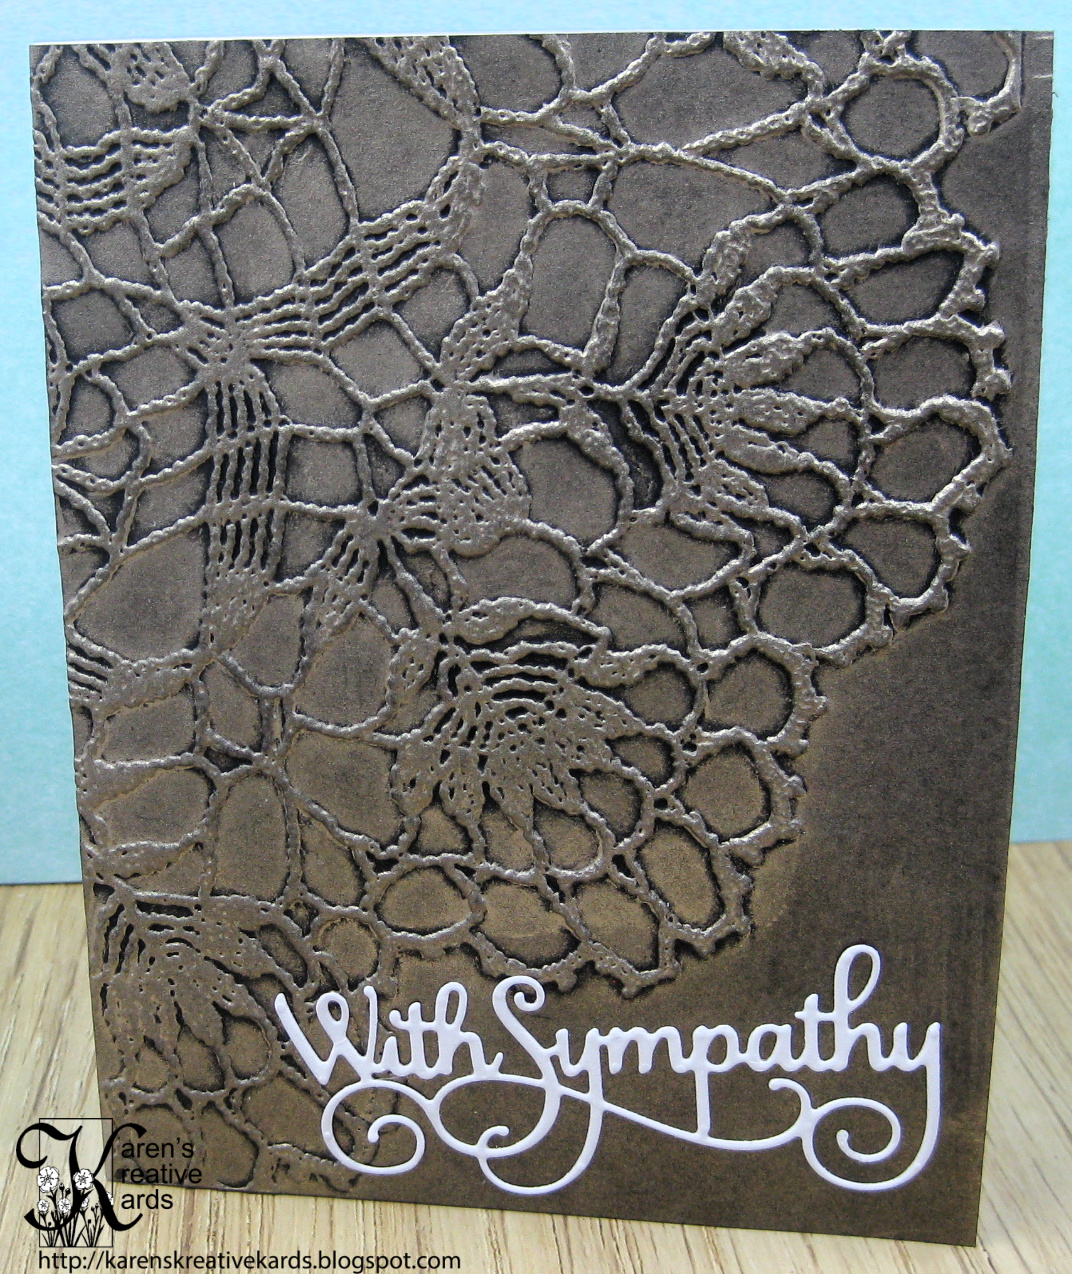
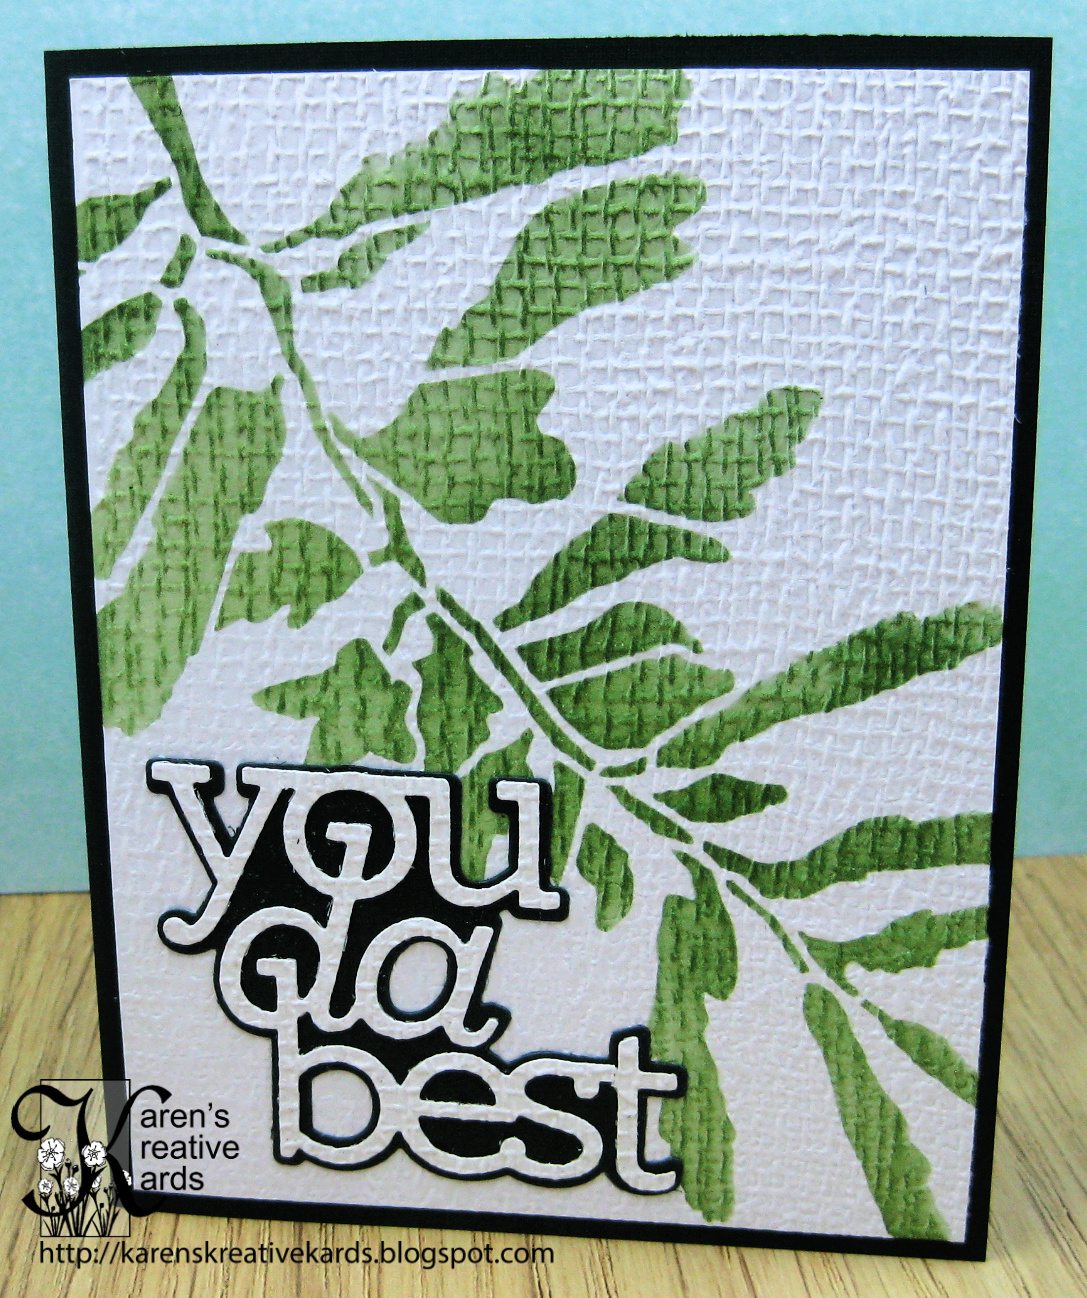
I am working this week on an article for Rubber Stamp Madness magazine featuring Taylored Expressions In The Garden Mini Slim layered stencils. The cards in the article (to be published in Spring of 2023) are in traditional bright floral colors, but as the stencils were out, I decided to play with mono-chromatic tones. There is no law the leaves have to be green or the flowers in more traditional colors, right? After completing three card fronts with these unique layered stencils (which make 3 cards all at once!), I die cut the card fronts on all these cards with Kat Scrappiness Wonky Mini slimline dies. I love the eclipse look on cards like these, so on this and the next card, I die cut YOU using dies also from Kat Scrappiness, raised them on fun foam and put them back in the card with the pattern flowing from the background into the letters. The stamped sentiment is from Stampendous. 


I decided to try browns and greys in my next two selections of mono-chromatic choices and love how they turned out!


I used a Gina K Designs layered Hello die for the eclipse look on this one. This experiment reminded me to step out of my box when choosing colors for flowers and other elements on my cards!


Wednesday, July 27, 2022

More Mini Envelope Punch Board Cards PLUS Bonus Tutorial Cards and Envelopes


As I show in my new video this week, I had great fun playing with my new Mini Envelope Punch Board from We R Memory Keepers and this sweet card and envelope is one of the many I made. On the front of the card which is 3 1/4 x 4" is a Penny Black Masterpieces Made Simple Bright Bouquets picture and a perfect sentiment die from Sue Wilson and Creative Expressions. Here is what is inside this sweet card for the birthday girl:


The 2 x 2 1/2 inch envelope I show how to make in the video is perfect for gift cards! It is also perfect for on the front of a mini slimline card with tons of hearts and sending hugs like on this card:


The wavy stitched mini slimline die I created the card front with is from Kat Scrappiness and the heart dies are from Dies...To Die For.  Here is another mini slimline card I created with super cute mini envelopes and messages for my grandson:


Inside the one and two inch square envelopes on this mini slimline card are cute racoon stickers from Pipstickers showing swimming and smores and campfires which is what we can't wait to do with him in July. I discovered how to make mini slimline envelopes in a YouTube video and decided to add a bonus tutorial to my new video and share how to make them. You can see one in the Sending Hugs card above. As I show in the video, the larger size Envelope Punch Board from We R Memory Keepers is required and a piece of 8 x 8 inch lighter weight paper. Watch the video here and you will see I now have a cute plaid mini slimline envelope to mail this card in.


I hope you find time this week to play and then send some of your handmade joy out into this world!

Monday, July 25, 2022

Mini Envelope Punch Board - Major Impact Projects!


The size of the Mini Envelope Punch Board from We R Memory Keepers that I am featuring in my newest video may be mini, but the many projects you can make with it are to the max! 


I made a card similar to this one at a local stamp shop and we made the envelope the flowers are bursting out of with the Mini Envelope Punch Board from We R Memory Keepers and I just couldn't resist bringing one home with me. This card features stitched flowers from Pretty Pink Posh and a stitched background die from Poppystamps called Pinpoint Half Ring Plate. In the new video I show how to make this size of mini envelope (2 x 2 1/2") which is my favorite because it is perfect for the front of a card but also to slip a gift card into. 


Here are a bunch of sizes of little envelopes you can easily make in this mini envelope board all the way from 1 x 1 inch to 4 x 4 inch. And next is a project that shows a pretty floral 4 x 3 3/4" envelope with a mini card and a gift card envelope:


So pretty-I love how this turned out and it will be perfect to give my next gift card gift. The card features two layers of the Kaleidoscope floral circle die set from Birch Press Design and a Whittle Spinner Background die from Poppystamps. 


I also show in the new video other projects that can be made with the mini envelope punch board like this treat box with a cute little bow also made with the punch board. I made this box out of patterned mirri card from Paper Wishes. Here are a couple more views of this cute box which could also hold a gift card:


I had so much fun playing with the Mini Envelope Punch Board from We R Memory Keepers and my new video shows many more cards and projects I made. I hope you will watch the new video here and give some of the ideas and products a try!

Sunday, July 24, 2022

Arrow Fold Card With Altenew Wide Washi Tape


I would love to be a guest designer at Altenew and one of the prizes in their monthly challenge is that opportunity, so I pulled out my favorite Altenew product - wide washi tape - and made this arrow fold card. One thing I really love about Altenew's wide washi tape such as this Teal Shadow is we can get different looks with them depending on what the wide washi tape is attached to. On this card I attached it to a blue woodgrain cardstock and it can be seen through the washi tape pieces. Here is a look at the inside of this arrow fold card:


The die cut circle on the top inside was cut out out the blue washi tape covered cardstock with a circle die from Gina Marie Designs and "thank you" is a die from Karen Burniston.

I am entering this card in the July Inspiration Challenge at Altenew.

Saturday, July 23, 2022

Altenew Inspired Challenge HB To You Card


I received an email that asked: "Do You Want to Be a Guest Designer for Altenew?" and my answer is YES Very Much So, so I pulled out some of my favorite Altenew products and made a couple cards I am entering in their July 2022 Inspiration Challenge here.


The top border of this card was created with Altenew's Gilded Greenery Washi Tape cut with a border foliage die. I double stenciled the card front with Altenew's Leaves and Berries stencil, and die cut Happy Birthday using a die from Simon Says Stamp. I attached the card front to a black A2 sized card base. 

Thursday, July 21, 2022

My Last 10 3D Embossed 5 Minute Cards From My Newest Video


Got 5 minutes, a 3D embossing folder like this one from Tim Holtz and Sizzix, some inks and sentiment dies? In no time you can have three (or 27!) pretty cards for your stash as I show in my newest video here. 


These three cards were all made with the Tim Holtz Sizzix Doily 3D embossing folder and the letterpress technique where distress ink was applied directly to the flatter side of the embossing folder before the cardstock was inserted and embossed. 


These two cards were made in minutes with a Stampin up 3D embossing folder, brushed on ink and sentiment dies. These last two cards feature Lisa Horton's Botanical Ferns 3D embossing folder with more ink and sentiment dies: 


Whew! My card stash is full with 5 minute cards I will be proud to send out or hand out all made with 3D embossing folders PLUS. I hope you will check out all the cards and techniques here and give some of the ideas and products a try! 

Tuesday, July 19, 2022

3D Embossing Folders PLUS Gilders Wax Paste and Mirri Card


In my newest video I share 27 cards made in 5 minutes or less with 3D embossing folders PLUS other products to make gorgeous cards. My first few cards in this blog post show 3D embossed backgrounds created with Gilders Paste Wax. The embossing folder on this card is Woven from Tim Holtz and Sizzix, the sentiment die is from Sue Wilson and the 3D dragonfly is an Easy 3D Topper from Hearty Crafts. 


Both of these cards were created in minutes with the Gilders Wax on 3D embossing folders from Stampin' up and Lisa Horton. The next two show Antique Gold wax in two very different ways on Sizzix Doily embossed backgrounds both with Sue Wilson Creative Expressions sentiments:


Another easy quick way to make lovely cards with 3D embossing folders is to simply emboss mirri card especially one that changes colors like these from Paper Wishes:


All I needed to do is add a sentiment die or strip and these cards were done in less than 5 minutes! As were all the many many cards I show in the new video so you will want to check it out here.

Monday, July 18, 2022

27 3D Embossed Cards Made in 5 Minutes or Less!


Do you like to make gorgeous cards in less than 5 minutes you  can send out with pride to loved ones and friends? Who wouldn't? In my newest video I share many many cards I made with 3D embossing folders PLUS...Plus stencils, mirri card, sentiment dies and a new product for me called Gilders Paste Wax. I created 27 cards plus a few in the new video and so these blog posts are going to be photo heavy. To see how easy it is to create these cards and see a demo on the Gilders Paste Wax, be sure to watch the video here. 

I have four new 3D embossing folders that I use on all the cards I share. Under the picture of each card I will share a little info on what I used on the card.

I made a version of this card in the video showing how to add several colors of ink through a stencil onto the textured background created with the Woven 3D embossing folder from Tim Holtz and Sizzix. The stencil is a brass one from Sweet Poppy called Absolute Abstract and the sentiment is a die from Simon Says Stamp.


These three cards all feature stencils and brushed ink color onto a background created with the Sizzix Woven 3D embossing folder. 


I also demo in the new video a new product I just discovered called Gilders Paste Wax. Every month on the 2nd Saturday there is a full day of free classes on the Crafters Classroom Facebook Page.  You can watch for free but you can also choose to purchase kits so that you can make the cards with the instructor and I decided to buy the waxes and other supplies for the "Wax on Paper Intro Class" taught by Bill the Gilder. I have tried other paste waxes before but was disappointed in the limited colors and how I ruined my stencils with them. There are 28 colors of Gilders Paste Wax including 16 Metallics available at Stamplistic here and I am ordering more after playing with the ones I got in the class kit. I show in the new video how I made the card above in just a few minutes with the Patina Gilders Paste Wax and a lovely sentiment die from Sue Wilson and Creative Expressions. 


I also demoed this quick card to show how the Patina on navy blue cardstock can be buffed to a brilliant shine especially on a less detailed embossing folder like this one from Stampin' up called Cascading Ruffles. I added a 3D champagne Easy Topper from Hearty Crafts and a Celebrate die cut from Karen Burniston. Here are some more cards I made with 3D embossing folders and the Gilders Paste Wax:


In the video I also show many cards made with the lovely Botanical Ferns 3D embossing folder from Lisa Horton and this one features the Antique Gold Gilders Wax on brown and on green with the pattern continuing from the back to the front.


I was so happy to find out the Gilders Paste Waxes can be washed off stencils (and my hands) with Fast Orange Hand Soap and will be playing with it and my stencils more for another video after I get the new colors I ordered. I added Patina over the Sizzix Woven 3D embossed background and then added Antique Gold through an Artplorations stencil. The sentiment die on this card and most of the cards I share in the new video is from Sue Wilson and Creative Expressions as I just love her use of different fonts in her dies.

I hope you will watch the new video to see my demos of this great new product and all the rest of my 5 minute cards made with 3D embossing folders. Remember to take some time to play this week and then send some of your handmade joy out into the world!