Showing posts with label Cutplorations. Show all posts

Monday, December 5, 2022

4 Ways To Add Gorgeous Color to 3D Embossing


I love my 3D embossing folders and also love discovering new products for my cardmaking and in my newest video I share many cards made with Metallique Wax from the Prima Finnabair Collection. In a make and take at the Picture This stamp shop in Eau Claire I visited recently during the fall shop hop I made this card front:
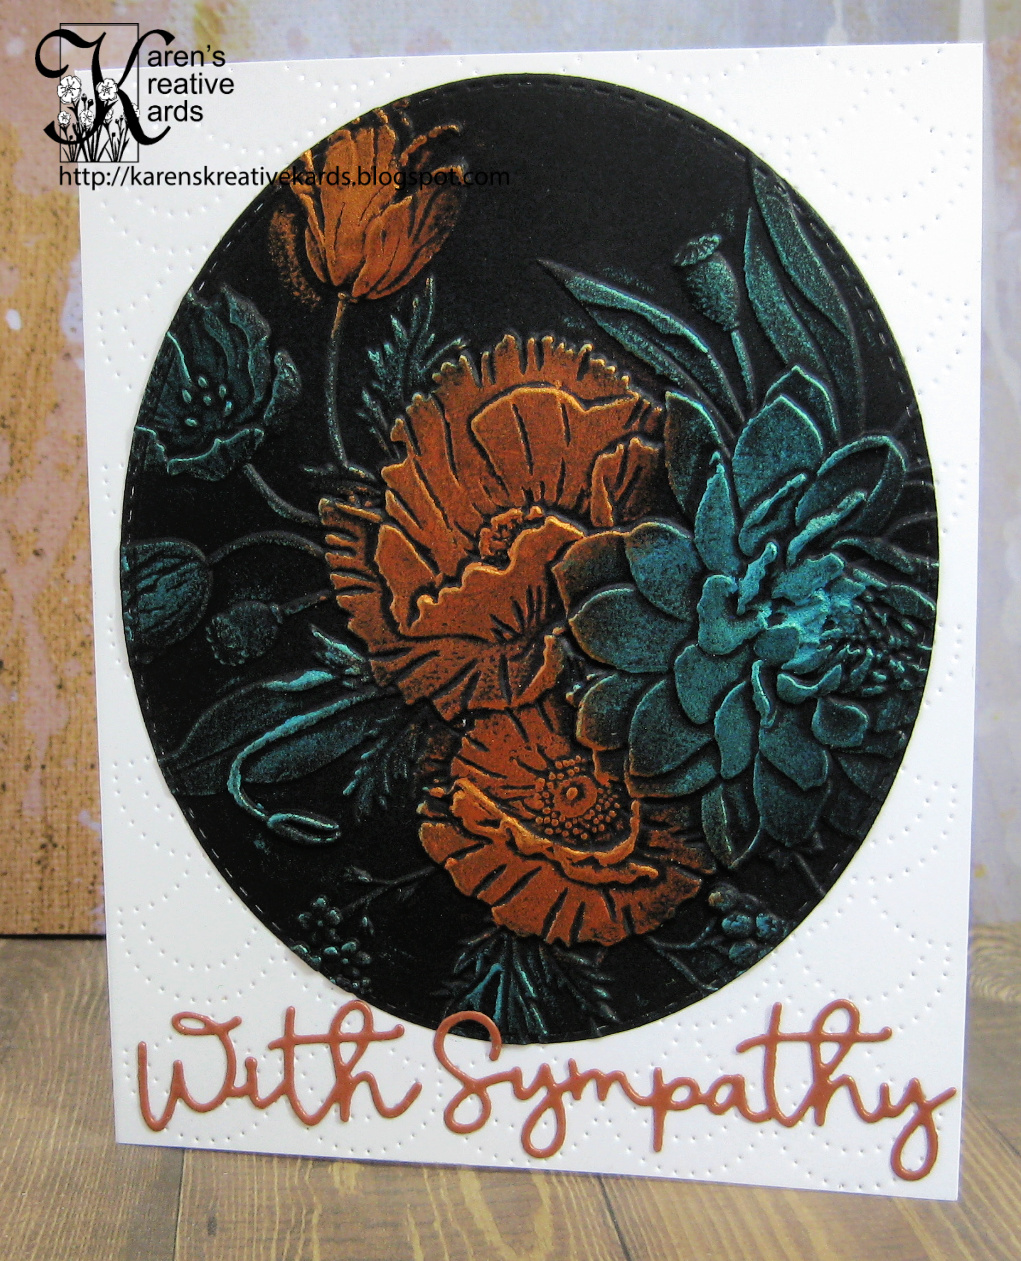

I have tried several kinds of waxes but in my opinion the Metallique Waxes from Prima are the creamiest and easiest to work with as I show in the new video. 


This is one of my favorites of the cards I made for the new video with the Metallique Waxes. The 3D Typewriter embossing folder is from Tim Holtz and Sizzix and I added Blue Lagoon and Aged Brass Metallique Wax to the embossed card front. I also added Aged Brass to the butterfly (from Tim Holtz and Idea-ology) and finished with a perfect sentiment die from Cutplorations.


This is the fun fold card I show how to make step by step in the new video. Finding the new Metallique Waxes reminded me to check my stash and pull out products I already own to add color and sparkle to my 3D embossed images. In the video I share 4 ways to do just that. This card features not only the Mint Sparkle Metallique Wax but also Apple Fizz Lustre Polish from Cosmic Shimmer and Nuvo Winter Cranberry Glitter Accents on the beautiful Flourishing Holly Corner 3D embossing folder from Crafter's Companion. The fun fold was created with a new die from Creative Craft Products Easy Folds that makes a 5 x 7 Diamond Fold card. I saw a beautiful card by Stamp Owl using this die set and had to use her link to buy it immediately. She learned this way to use the die set to make a double diamond from Sam of Mixed Up Crafts. Here is a look at the inside when two of the main die pieces are attached to a 5 x 7 piece folded in half:


The unique shape and layers are so much easier to make using a die set that cuts them perfectly. I added some die cut sentiments (JOY from Gina Marie Designs, stitched oval from Kat Scrappiness, "Christmas Wishes" from Sue Wilson and Creative Expressions and "Peace" from Quietfire Design) on the layers of the inside of this card. 
 
I had great fun making these cards with gorgeous color added to 3D embossed images and hope you will watch the video to see these and many more cards, then give some of the ideas and products a try!

I am entering the second card in the Anything Goes Challenge at Simon Says Stamp Wednesday.

Monday, September 19, 2022

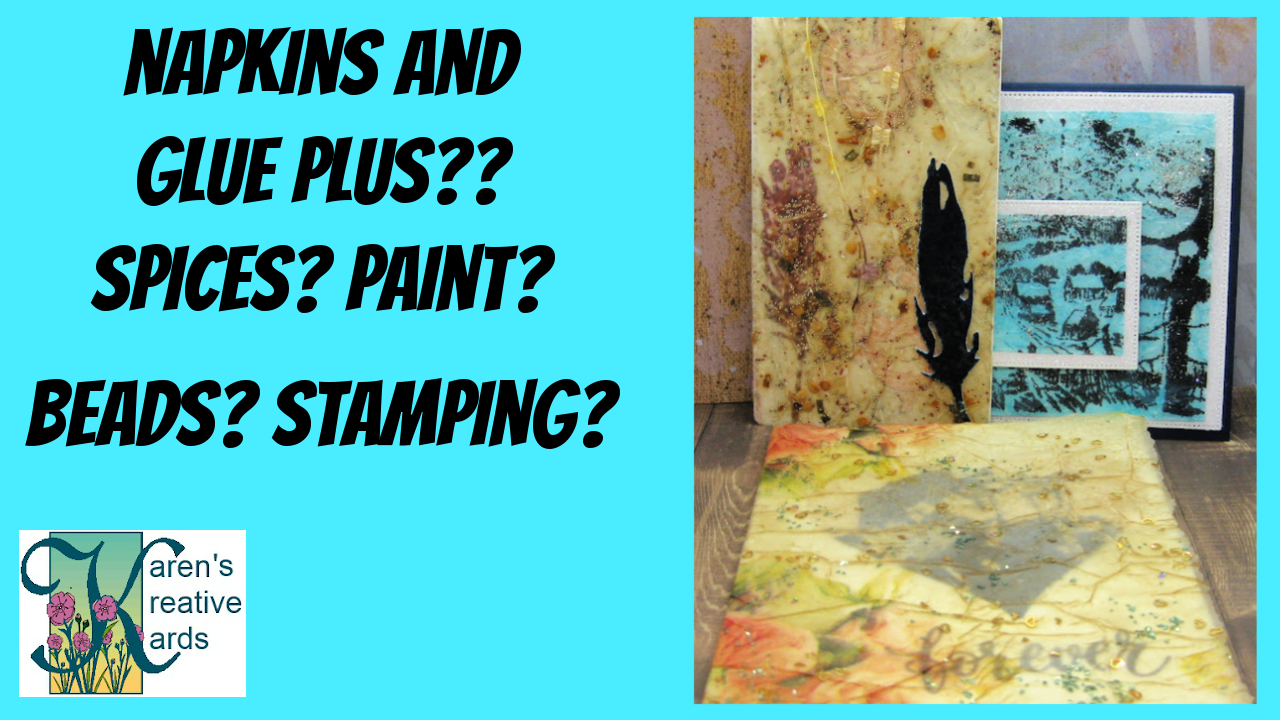
Faux Rice Paper Technique PLUS Video and Many Cards


Bet you can't guess what I added to the Faux Rice Paper glue and coffee mixture to make these tags:


My favorite new technique this year is the Faux Rice Paper Technique and in my new video (3rd in a series!) I step it up by experimenting with adding color and texture to the faux rice paper I created. Can you guess what I used for the color and texture on these tags cut with dies from Crealies? My favorite projects use a combination of white glue and coffee for a vintage look, but on these and the card and tag I make in the new video, I added gold beads, crushed red peppers and chopped chives!?! I was looking for something to add color and texture with and love the result of this unusual combination! Here is the slimline card I made in the video:


It is much easier to see the beauty of the faux rice paper in the video, but you can see on the first picture that the "forever" sentiment die (from Gina K Designs) can be seen through the gorgeous translucent slimline card front made with just a floral napkin, white glue, coffee and the spices and green glass glitter. The slimline wonky stitched die used to cut the center piece is from Kat Scrappiness. 


I also showed in the video how to make this beautiful 3 layer Christmas gift tag using a set of stitched tag dies from Cutplorations. This is my favorite card that I made with the vintage look and stamping:


The heart layer under the front was created with a stamp from Creative Expressions and Andy Skinner called Last Tango on a napkin before doing the technique and the heart on the back was also created with the Faux Rice Paper technique with the same lovely floral napkin. The hearts were cut with a die set from Tonic Studios. 

I am in love with the look this technique creates especially when stepped up with colorful textured additives like I show in the new video. I hope you watch, and then try some of the technique and products featured.

Monday, January 24, 2022

Pop Up Slimline Cards With New Little Labels Dies From Karen Burniston


Do you love pop up cards that are super easy to make? Then this new video and the cards I share created with Karen Burniston's Little Labels Pop Up Die Set are for you! 


I pulled out some favorite Easter dies to create this card I make in the video. On the front is a bunny scene created with dies from Dies...to Die For at Shopscrapbook101.com and bunny dies from Impression Obsession. "Hoppy Easter" wiggles and jiggles on an Action Wobble. But as usual with cards made with Karen Burniston dies, the real fun is on the inside of the card:


The Little Labels pop up die has three labels that pop out and I decorated them with more dies from Karen Burniston. Here is another card I made with this fun Little Labels Pop Up Die Set: 


All the flowers on the front and inside of this card were created with Pinkfresh Studio's Blossom and Berries Washi Tape and matching dies. "Bloom & Grow" are dies from Cutplorations and the wavy wonky slimline die on the front is from Kat Scrappiness.


I used the same wavy wonky slimline die from Kat Scrappiness on this birthday card to add interest to the card front. The layered Happy Birthday and Border Blends - Trims dies are from Karen Burniston. 


On the inside of this card the Little Labels pop up as you can see in the side view and in my new video, I show how easy it is to create this fun pop up look. "My Crafty Friend" is a die from Kat Scrappiness as are the wavy wonky rectangles. The rest of the dies shown are from Karen Burniston. 

In this week's Facebook Live on Thursday 1/27 at 7:00 pm CST (NOTE the different time), I am going to show how to change the orientation to a tall slimline with the pop out labels on the inside full of washi tape flowers. These cards are so easy to make but will wow the recipient with the unique pop outs when the cards are opened! To see my Facebook Lives, visit my Karen's Kreative Kards Facebook page, LIKE and FOLLOW and watch for notices for my Lives each Thursday! 

I am entering the first card in the Anything Goes challenge at Dies R Us and of course used Karen Burniston's dies in that card.

Monday, January 3, 2022

Video - Die Cut Crazy Video Series: Snowy Winter Wishes Standing Pop Up Card, NEW Facebook Live and Huge Prize to Win!


I love to find and try new fun folds and of course I also love to create cards with dies from my favorite companies and my first video of the new year combines those two loves. I found a tutorial by Christy Falk on Splitcoaststampers here that showed how to make a Standing Pop Up Box card. Here is my snowy version of that card:


As I show in the video the fun fold is easy to make and stands up for display:


Most of the dies are from Dies...To Die For at Shopscrapbook101.com including the icicles, ice skates and the dies on the back of the card: 


The "warm winter wishes" is from Cutplorations and the debossed snowflake die on the white glitter cardstock is from Memory Box. I also show in the video how easy it is to make a realistic looking snowbank using Aleen's Glitter Snow also from ShopScrapbook101.com. 


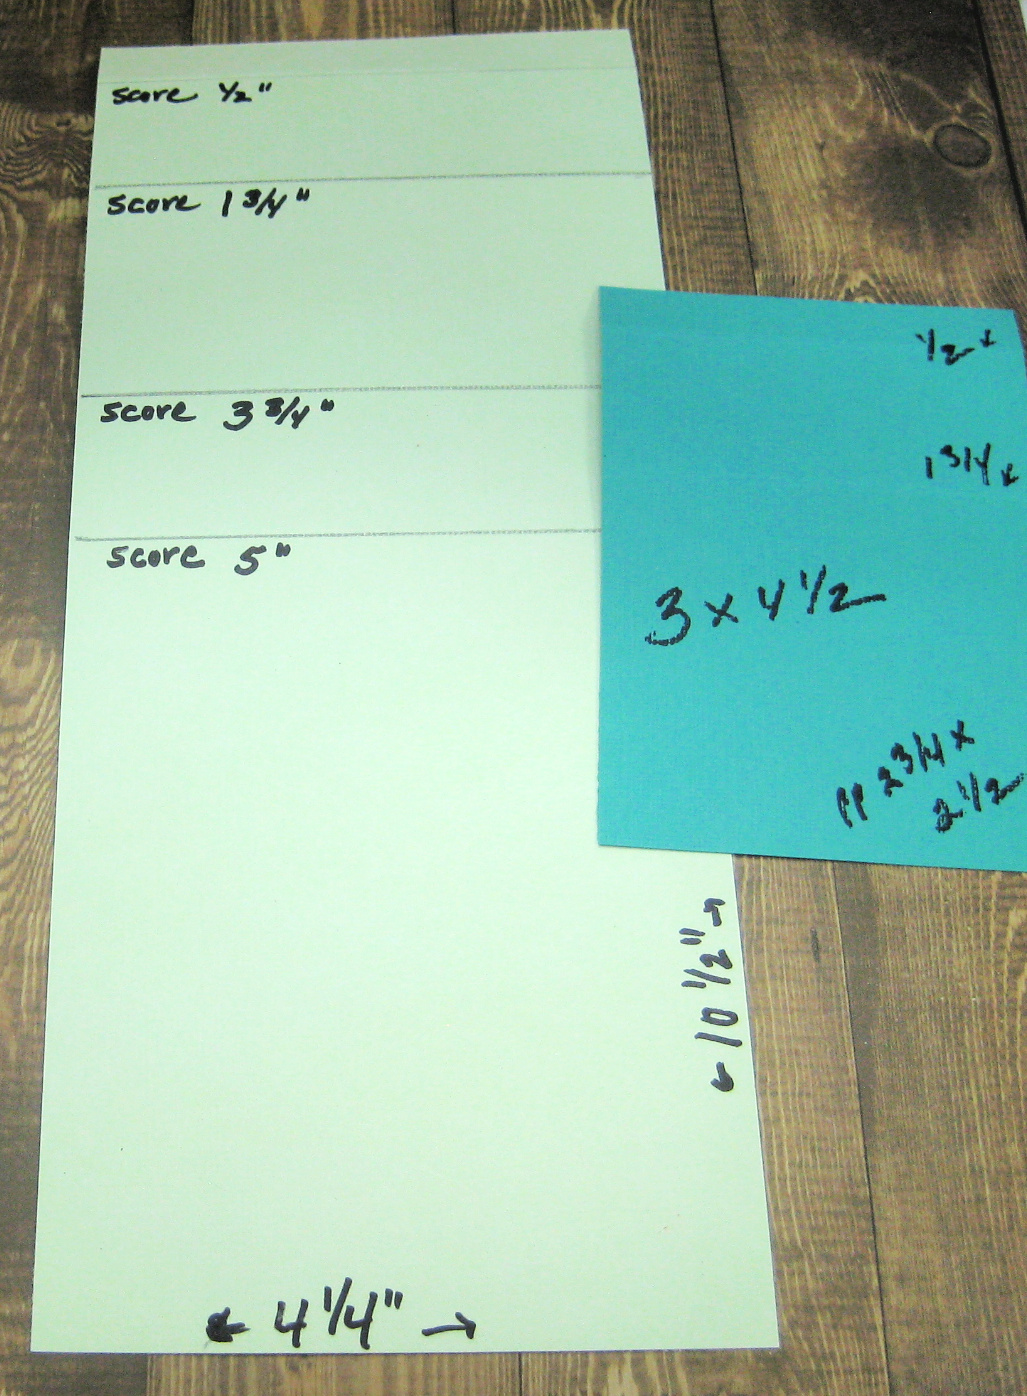
It is best of course to watch the new video to see how to put the card together,  but here is a template you can refer to for sizes, etc. I adjusted the size of the second smaller piece because I wanted more room for my icicles. When you try a new fun fold, I suggest you create a sample card with paper you don't care about to see how to put it together and then keep in mind that with some experimentation, any or all of the sizes can be adjusted to make the card your own. 

***I am going to be doing Facebook Lives in the new year once a week and in my first one on Wednesday January 5 at about 11:00 you can see me make a Valentine Standing Pop Up card and comment for a chance to win a prize package full of dies from my favorite companies valued at $100!!! Watch live and comment or ask a question OR watch later (before midnight January 7, 2021) and leave a comment for a chance to win the card I make and the prize package of dies. (USA mailing address is required.) PLEASE SHARE this new adventure for me with crafty friends and maybe you or one of your friends could win!

Wednesday, December 8, 2021

More Laser Cut Wood Technique Cards from My Newest Video


I love to take techniques I've learned from others and change them up to make the cards my own as I did here with Gina K's Laser Cut Wood Technique and show in my newest video. I show how I used a lighter blue, violet and dark blue ink with stencils to create this awesome background. The snowflake stencil on this card is from A Colorful Life Designs and the sentiment is from CUTplorations. As I usually do, I added some gems from Gina Marie Designs to complete the card. 


I recently purchased the Sizzix Mystical Nature die set and needed a night sky look for the background so I chose a galaxy stencil from The Crafter's Workshop and blue and black inks for the technique. The extra stars were also cut with a Sizzix die. 

I had so much fun playing with this technique and different colors of ink and dies and thank Gina K Designs for the inspiration! 

Monday, September 27, 2021

Die Cut Crazy Series - Penny Black Masterpieces Made Simple With Dies


I am die cut crazy as you know and I love to find new dies and creative products that make cardmaking so easy and beautiful! In my newest video here, I share many cards made with Penny Black's Masterpieces Made Simple and many favorite dies. 


Penny Black's Masterpieces Made Simple are small pictures of their most famous stamped scenes colored beautifully that we can layer on our cards. I die cut the navy blue layer with Gina Marie Designs Wonky Stitched Rectangle die and added a sentiment die from Sue Wilson and Creative Expressions. But just look at what pops up when this card is opened: 


I created this pop up staircase with a new die from Divinity Designs and I show how easy it is to make a card like this in the new video. The letters that spell HUGS were created with a die set from Karen Burniston and the "warm winter" sentiment is from Cutplorations. 


The leaf on this card was a winter leaf with snow on it in the Penny Black Masterpiece, but I decided to color it as a fall leaf stubbornly refusing to fall. I also brushed blue distress ink on the background and green distress ink on the W Plus 9 Pine Frame. Here is a look at the inside of this card with the stitched oval cut out of the frame, a pine branch and a perfect Penny Black sentiment: 


Here is another card made easily with Penny Black's Masterpieces Made Simple and dies. I added the texture with a die from Memory Box called Pinpoint Burst Plate and I brushed on some yellow ink to look like the sun. The pretty sentiment is a stamp from Penny Black.

I hope my cards in my new video encourage you to give some of these ideas and products a try. 

Saturday, August 7, 2021

Thank You Cards for Kids at Send a Smile 4 Kids

It’s the first Saturday of a new month and time for another fun challenge at Send a Smile 4 Kids! Again this year, all challenges at SAS4Kids are Anything Goes 4 Kids! We will also have an alternative theme that you can choose to follow, but are not required to. The theme for this challenge is: Thank You Cards for Kids.

I made my thank you card with Deco Foil Rainbow Shattered Foil through a slimline stencil from STAMPlorations called Twisties. The sentiment dies are also from CUTplorations (a division of STAMPlorations) as are the stitched rectangle dies.  

Be sure to check out the rest of the cards from TEAM SAS here and we would love it if you entered our challenge. 


Tuesday, June 22, 2021

Brightly Spun Cards Made with Color Burst and a Salad Spinner


In my newest video here I show how to make  colorful backgrounds like this one using a salad spinner and watercolor powders. On these cards I used Ken Oliver's Color Burst powders which are very bright and some of his Liquid Metals as well. I die cut "BDAY" with dies from Dies...To Die For, raised them on white fun foam and put back in for the eclipse look. "Happy" is also a die from DTDF and the stitched balloon is from Crealies. 


I know the spinning can be even more effective when a little white is left so I deliberately did that on this red, white and blue celebration card. The sentiment die is from Cutplorations. 


I tried to make a sunset with my purple and red ColorBurst powders for this card and also sprayed it with Therm O Web Glitter Dust. Then I simple added a flying goose from Memory Box on red and purple layers. 

I had so much fun creating these salad spinner cards, there are more to see in the video and I will be back with one more blogpost too.

I am entering the third card in the Animal Antics challenge at Simon Says Stamp Wednesday.

Tuesday, June 15, 2021

Stretch Your Supplies Video Series - More Cards Made with Hearts Dies and Stencils


One of my favorite new die sets is the Hearts of Love Shaker Card die set from Kat Scrappiness and on this slimline card I used one for a shaker and a smaller heart without shaker elements. This is just one of 8 different cards with heart dies and/or stencils from my newest video here. The "love" is a die from Suzanne Cannon and the stitched slimline die is from Pinkfresh Studios. I made many cards with the Hearts of Love Shaker die set and some were shakers and some were not.


The first card above features the same hearts cardstock, a heart shaker and the pretty LOVE die from Poppystamps. The second card shows a layered heart on a red mirror card front with a debossed heart pattern from Honey Bee Stamps. The fun sentiment is from Sue Wilson. 


Here is one last card from my newest video and this one features several new romantic stencils- the Altenew layered hearts and the hands from Stencil Girl. I stenciled the hands over the layered hearts with an aqua blue ink and then covered the ink with Gina K Designs/Therm O Web Iridescent Glitz Glitter Gel. Forever is a die from Cutplorations and the Wooden Picture Frame die is from Dies...To Die For. 

I sure had fun designing all these cards with my new heart dies and stencils and hope my cards inspire you to give some of the products and ideas a try.