Showing posts with label The Mark-it Place. Show all posts

Monday, August 23, 2021

Video - Cardmaking With Hero Arts Looking Glass Dies and Transparencies


I recently discovered Hero Arts Looking Glass Die Sets and found them to be beautiful one, two or three layer frames for Clear Views Transparencies as I show in my newest video here. 


I have loved Clear Views transparencies from The Mark-It Place and made cards with them for years. They are now available at a local stamp shop called Let's Create and you can call them at 715-424-1343 if you want some after seeing the video and checking out the different ones available on their website here. I created a one layer frame with the deer from the Winter Forest Hero Arts Looking Glass Die Set and added a navy frame around him with a Karen Burniston square frame die. The snowflake debossing on the white cardbase was created with a Memory Box Pinpoint Snowflake die and the sentiment strip is from Simon Says Stamp. 


This is the card I create in the new  video. The fisherman Clear Views Transparency is from a beautiful set called New Day (for John) in memory of Jill's husband John and the dotted squares were created with dies from Crealies.  Here is a side view and more photos that shows a great new fun fold I learned from a Pinterest post of a card by Lisa Curcio: 


Do you remember Rub-on Transfers? I used to have a bunch years ago but never used them. I just discovered a gorgeous pack of Rub-on Transfers from 49 and Market called Travel Hike More and used several in this card. I put a three layer lighthouse picture on the inside with dies from the Lighthouse Looking Glass die set from Hero Arts and another gorgeous Clear Views Transparency from New Day (for John.) 


My third card is a trifold created with the Lighthouse die set and two sided dp from Stampin' Up. Here are views of the 2nd fold and the inside of this card:

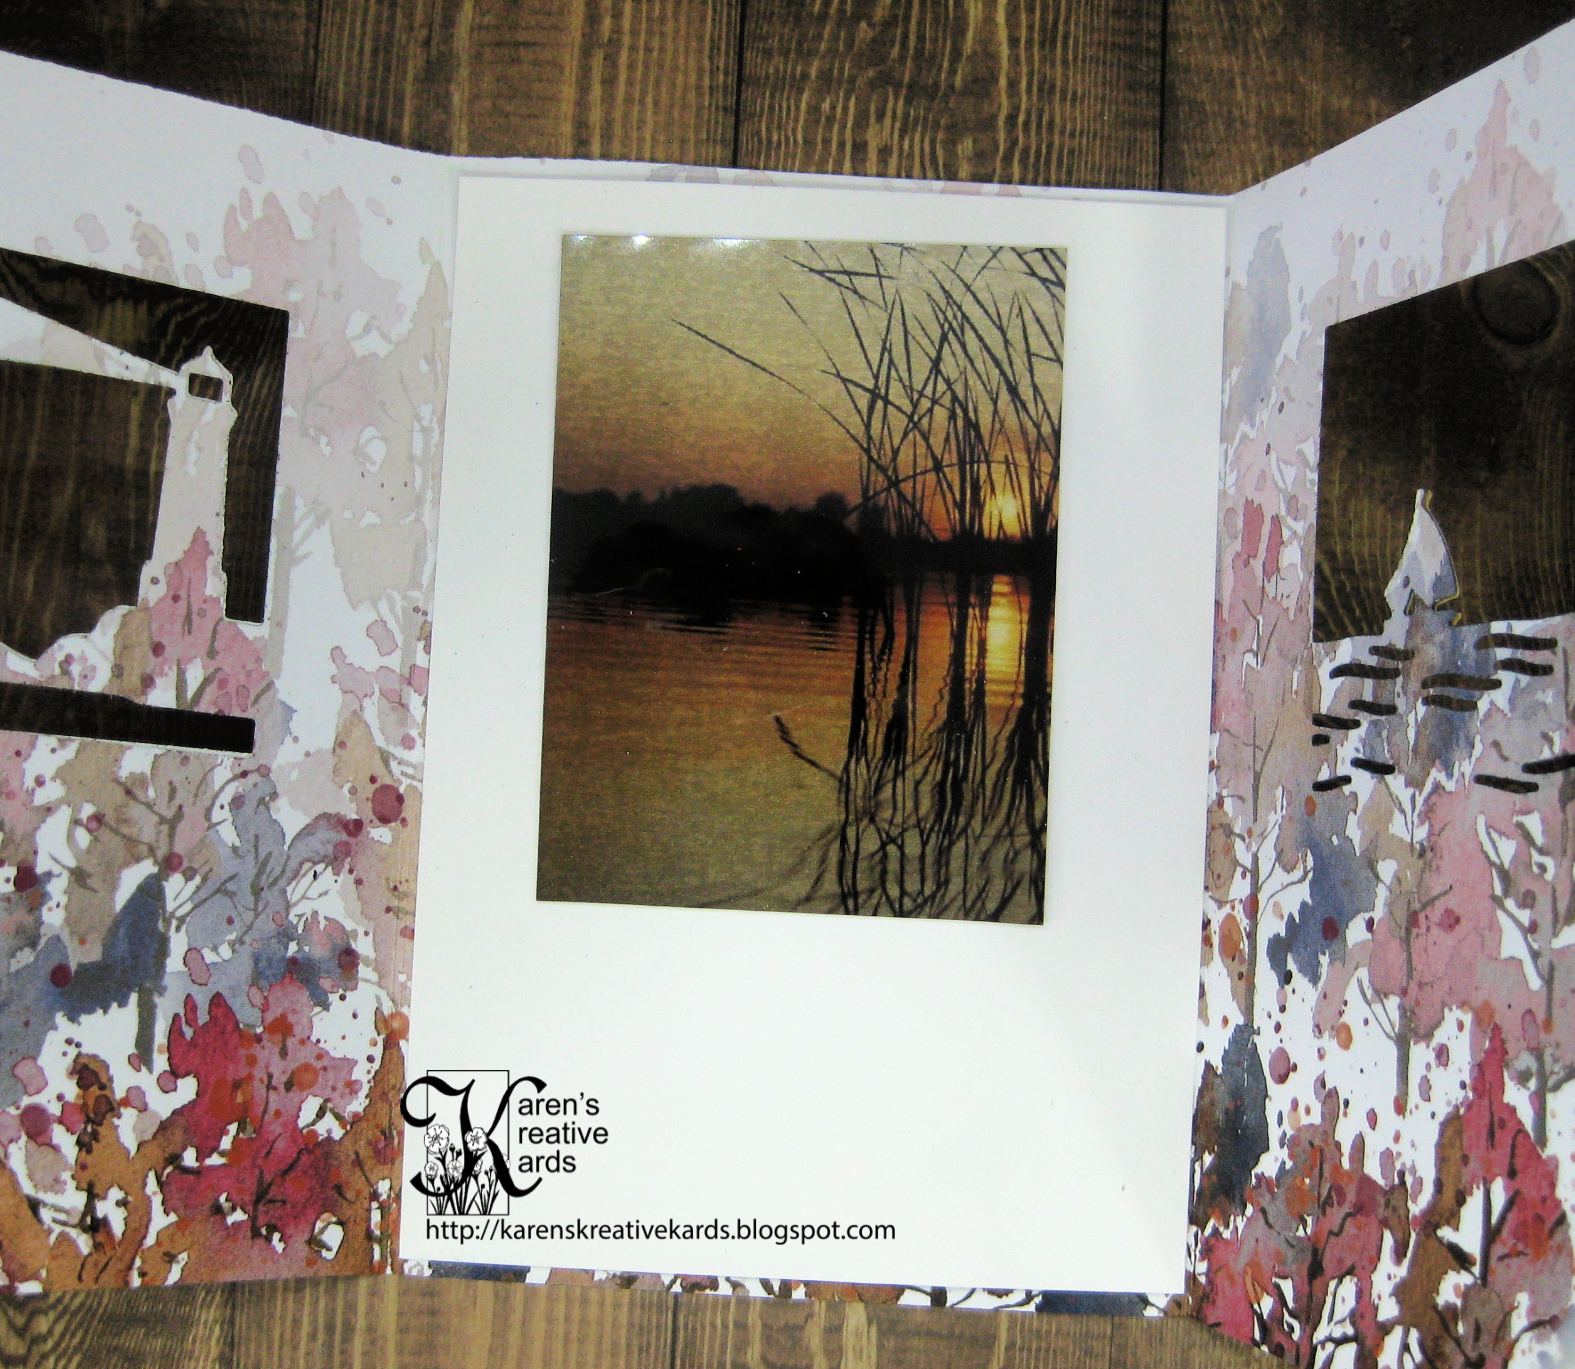

Combining the Hero Arts Looking Glass layers with the Clear Views Transparencies make easy gorgeous cards, and I hope my cards in my newest video encourage you to give some of these ideas and products a try!

I am entering the first card in the Add A Sentiment challenge at Simon Says Stamp Wednesday.

Tuesday, December 12, 2017

Siblings Christmas Card


The minute I saw a version of this z-fold card with a stairstep decorated for Christmas here, I knew I wanted to make them for my brothers and sisters and place Christmas stockings on the stairsteps just like my Mom did for all of us. There were 8 of us kids and then she added a stocking for each spouse and grandchild, so there was a lot of love and memories each Christmas there. Just seeing the scene puts a smile on my face and I am sure it will for each of my siblings too. Here are a few more pictures:


I had to choose several different patterned cardstocks since I didn't have enough for all six to be the same. I added the perfect "Family" die from Quietfire Designs and Elizabeth Crafts for the wall and added a window diecut with a Poppy Stamps die with a Clear Views Transparency picture behind it. The card lies flat to mail. 

I am entering this card in the Christmas/Winter Holidays challenge at Simon Says Stamp MondayWishing you and your family a wonderful Christmas season!

Friday, October 27, 2017

Wish Big Masculine Birthday Card


I played with a spattered blend of glimmer mist and pearlex powders on black backgrounds for the card I posted yesterday and today. Yesterday's spatters were all the same color, but on today's card I did a mix of several colors and am loving how it turned out. I die cut a pine tree shape and used it to frame a Clear Views picture from The Mark-It Place. I attached a "Wish Big" die cut from Papertrey and dotted the i's with yellow pearls. The pine tree shape that I cut out of the front made a perfect accent on the inside of the card as shown here: 


I am entering this card in the Anything Goes challenge at Simon Says Stamp Wednesday. Thanks for helping me #share the joy of creativity!

Tuesday, September 19, 2017

Watercolor Powder Comparison- Bister and Magenta Nuance Fall Cards


I posted a new YouTube video yesterday showing the differences between all the watercolor powders I owned with a bunch of card samples. Here is a link to that video:

Today I am sharing two of my favorites of the sample cards. The first watercolor powder I purchased back in 2014 was Bister powders which have a wood grain feel to them and are from the Netherlands. They are available for purchase in the USA here.  One of my favorite ways to use Bisters is to create a stormy sky background with the Black Bister powders only as I did above. When dry, I created a circle mask and used bleach on an on old waterbrush to pull some of the color out of the moon. I added a spooky tree, some bats and a ghost from Karen Burniston's Halloween dies, and "Spooky" from Tonic Studios.

I used Magenta Nuance powders and silver embossing powder to create the leaves on this card. For details on the technique, check out the YouTube video here. I die cut a leaf opening with a Fun Stampers Journey leaf die, and placed a gorgeous autumn scene Clear Views Transparency behind the opening. For details on how to order Clear Views, check out the description box on the YouTube video, or scroll down to yesterday's blogpost. The larger Magenta Nuance leaves were cut with Tim Holtz's Tattered Leaves die and the leaf punch is from The Paper Studio. The "blessed" was cut with a die from Simon Says Stamp. Here are a couple more photos of this card: 


Thanks for stopping by my blog today and also from clicking on over to check out the new video, leave a comment, give it a thumbs up and subscribe to my channel if you have not already done so. And thanks for helping me #share the joy of creativity!

Sunday, July 27, 2014

Thinking of You Rose Card

I have been having fun with my rose die from Penny Black, and the other night while laying in bed (where I get my best ideas), it occurred to me to put a Clear Views transparency picture from The Mark-It Place under the cut out image of the rose and this is how that late night idea turned out. The Thinking of You die is from Penny Black too and I sponged it with a little green ink. I stamped the sentiment from Words to the Rescue on a green piece and cut it out in a wave.

I am entering this card in the Anything Goes challenge at Crafty Catz and Sister Act.

Sunday, July 13, 2014

Christmas in July - and anytime...


I make Christmas cards all year so I am never pressured late in the year to get them done. I share a new one each month with the class that meets in my home and this is one we will be making soon. I made a similar tri-shutter card with a Clear Views transparency recently and loved it, but was troubled that the front is clearly the outside of the home with brick and a window, but when we looked through the window, we saw a scene from the outside too. I checked all the transparencies at The Mark-It Place website and none were a scene from the inside of a home. So I contacted Jill at The Mark-It Place and she was kind enough to create some new images I could use for this card and others. The Mark-It Place is closed, but she still sells her beautiful transparency pictures on line here. This is what this  tri-shutter card looks like open:

The dies are from Memory Box and IO, the punches from Martha Stewart, embossing folder by Sizzix, and the sentiment from Papertrey Ink.

I am entering this card in the Christmas challenges at Simply Create Too and Completely Christmas.

Tuesday, June 17, 2014

Guest DT Contest at The Cutting Edge


There is a new challenge called The Cutting Edge Challenge and they are celebrating their opening with a Guest Designer Contest. You know I love me my die cuts and I was intrigued by the window in the inspiration picture:
I wondered what I would like to see through my window, and I chose a beautiful peaceful Clear Views transparency from The Mark-It Place. I die cut the window (Poppy Stamps), branch and bird (Memory Box), and the "hello" from Paper Smooches.


But look- this card is a version of a tri-shutter with some slightly different folds to show the window scene. I embossed the whole card with a Sizzix embossing folder that looks like bricks so the front really looks like the front of a house. Here is what the inside looks like opened up:
I added a piece of dp with the sentiment from Repeat Impressions, CTMH and  another blue bird. The white piece at the bottom is to write a personal message and sign the card. I must give credit to this blogger and her card that inspired me to try this tri-shutter with a window.

I am entering this card in the Guest DT Challenge at The Cutting Edge and the Anything Goes challenge at 613 Avenue Create.

Monday, June 9, 2014

My Most Famous Card Updated and Improved

Today I am sharing an updated version of a card that has been published, won contests and resulted in dozens and dozens of emails about where to get the die cut, the transparency picture and the sentiment. When I saw my first feather card on Pinterest, I fell in love and started searching the internet for feather dies. My vision was to use the positive and the negative and the first few feather dies I bought, really didn't work well for that. Several years later I have finally found a feather die set by Kelly Purkey (purchased through Simon Says Stamp here) that works.  I wanted a die that was tall enough for the Clear View transparency (from The Mark-it Place) and as wide as possible to show the beautiful picture and this is the best I have found. I embossed the feather with a Sizzix embossing folder and colored the tip of the feather with a gold Wink of Stella brush pen. The speckled background was made with the Tim Holtz Distress Marker Spritzer and a marker (any will work.) The best part is the beautiful Native American sympathy sentiment from Crackerbox Palace. I truly believe those I have lost still live in my heart and thoughts. The stamped and cut out feather is also from Crackerbox Palace. This card is one of four in my new Clear Views class being taught in my home and is one of my favorites of all time:)

I am entering this card in the Anything Goes challenges at Treasured Times Rubber Stamps and Time 4 Scrap.

Monday, June 2, 2014

Enjoy Clear Views Easel Card for Classes

I am sharing a new card today I made with Clear Views Transparencies from The Mark-It Place, and it is one of three cards included in a new class featuring these lovely transparency pictures. I cut out an opening from the top of the easel piece with a Spellbinders die and created a frame with two matching dies. I attached the Clear Views picture and a piece of vellum behind the opening. The vellum covers up the back of the picture and also serves as a white background so the picture is clearer and easier to see. The "enjoy" is a new die cut from Penny Black and is part of a word set I just love. I stamped the perfect sentiment from Crackerbox Palace and cut it out with another Nestabilities die. I raised it with pop dots so it holds the easel card open and added blue sequins just for fun and to dot the j.


The real unique part of this card is that there is an opening in the back of the card (cut with another Nestabilities die) where the recipient can put a tea light that shines though the Clear Views picture at night. It is really pretty in real life- but hard to photograph. I had seen this done with vellum in the hole in the front and decided to try it with a Clear Views transparency and love how it turned out. This card could be used for a retirement card or a birthday card for anyone who loves the peaceful view of a lake.

I am entering this card in the Anything Goes challenges at Time 4 Scrap and Scribble and Scrap.

Thursday, May 22, 2014

Embossed Acetate and Clear Views Card


I have been playing with some new Clear Views Transparency pictures from The Mark-it Place and this one just makes me smile. Weeeeeee- enjoy the ride! I cut the transparency picture and the white under it with a Spellbinders die. The card base is a Core'dinations two sided paper and I stamped and cut the "enjoy" star from the other side of the paper. The star die is a Spellbinders and "enjoy" is a Heidi Swapp stamp.  I dotted the "j" with a star gem I colored black with a Sharpie.

I cut one inch from the bottom of the front and attached a thick piece of acetate that was embossed with a Cuttlebug embossing folder. I added some green Stickles to the intersections of the embossing. It looks better in real life- just hard to photograph the clear acetate.

On the inside of the card, I sponged green stars with a stencil by Heidi Swapp, and stamped the perfect sentiment from Simon Says Stamp. I messed up my first attempt and the rest of the card was complete- don't you just hate that? So I stamped it again on the same green, cut it out and attached it to the center of the card.

I am entering this card in the Anything Goes challenges at Through the Craft Room Door and Sweet Stamps
and the travel challenge at Simon Says Stamp.

Monday, April 28, 2014

CAS Sympathy Card


Because you never know when you might need a sympathy card, I try to have a few on hand that I have made at all times. I can't even imagine buying one now. This one was very easy to make but I think it is elegant and says exactly what I would want to say.

If you follow my blog, you know I love to use Clear View Transparency pictures from The Mark-it Place. I layered the picture onto a piece of gold cardstock and attached behind the rectangular shaped openings in the card. The card base is cream colored and the top piece is black. I stamped the sentiment from Stampin' Up on a cream piece, cut it out with a Spellbinders label die, and sponged the label while still in the die.

I am entering this card in the No Designer Paper challenges at Sweet Stampin' and Paper Crafting Challenges. 

Tuesday, April 30, 2013

Love to Create and Mema's Crafts Challenges


Anything Goes at Mema's Crafts this month and at Love to Create, they want to see our cards with Punches and/or Diecuts. I used both punches (heart border punch by Martha Stewart) and diecuts (wonky rectangle die by Spellbinders) to make this card. I started with a Clear Views Transparency from The Mark-It Place that was black and white except for the rainbow umbrella. I carried the rainbow theme into the hearts and the paper under the heart border as well. I cut the sentiment apart with my deckle scissors to complete the card.

Stamping smiles, Karen

Thursday, April 25, 2013

Crackerbox Palace Retirement Cards


It's Crackerbox Palace Thursday and I am sharing two retirement cards I made with Crackerbox Palace stamps. You can win your choice of the stamps featured on one of these cards by leaving a comment at either blog. The simple requirements for a chance at winning are below and now you have even more choices of what you can win!

But first- the winner of last Thursday’s blog candy is                                                   Rhea Weigand!   Here is her winning comment from my blog: Your design is just wonderful! I also just love, love love your blog!!! All of your designs are so great :) I am now following you!!!! 
Rhea, please email me or Crackerbox Palace your address and your choice of which stamps you want (see your options below), so we can get you the stamps you have won.
Several friends of mine and my husband are retiring this year, so I used an “oh so true” Crackerbox Palace sentiment stamp to design two very different retirement cards. On the day I designed my first card, I was tired and so I did take a nap. I can do that just about any day if I want and do not miss the “crap” at work at all! I am still having fun designing with the feather dies from Lifestyle Crafts, the Clear View Transparencies from The Mark-It Place and the awesome stamps from Crackerbox Palace. I used the negative space from the larger feather die to show a serene black and white scene and added some other die cut pieces cut from dp with writing on it. I split the stamp with part on the front and the rest in the inside as shown here. 


My second card features a totally different type of fisherman from Crackerbox Palace. He sure looks like he is having fun! I paper pieced his outfit and boat and colored the rest with Copics. I used Nestabilities dies to cut out frames for him and the sentiments and embossed the front of the card with a Tim Holtz embossing folder.
So would you like to win the stamps featured on one of today’s cards or your choice of another CBP stamp? Here is how to win our weekly blog candy:
Vicky or Karen will post a card or two every Thursday on both blogs. All you need to do is to leave a comment on either blog and if you leave a comment on both blogs you will have a double chance to win. We hope you also want to 'follow' the blogs. The following Wednesday a name will be picked at random and the winner will receive:

The featured stamps that we used in one of the cards that were posted,
OR you can pick out a stamp that is worth up to $10.00 and email us your choice
OR Vicky will email you a coupon code so you can go shopping at 
Crackerbox Palace store for your choice of the stamp(s) you would like with a $10.00 coupon.

For a Bonus: if you use the blog candy stamps and post it on your blog, Splitcoast or somewhere else you will be able to choose another free stamp. So make sure you check out one of our blogs on Thursday! The winner will have 2 weeks to contact Karen or Vicky.
So leave us a comment for a chance to win and come back and see us again next week!


I am entering these cards in the Anything Goes challenge at Through The Craftroom Door and The Great Outdoors challenge at Loves Rubberstamps. 

Crackerbox Palace smiles, Karen


Friday, April 12, 2013

Simon Says Stamp and Little Miss Muffet Challenges


Anything with Flowers is the theme at Simon Says Stamp this week and Anything Goes at Little Miss Muffet Challenges. I am sharing another card using Clear View Transparencies from The Mark-It Place. This time I chose a picture of beautiful roses and some pearls to make an elegant wedding or any day card. I started with a larger embossing folder from Cuttlebug, but left the center of the card unembossed. I cut a hole in the front for the picture and added some flowers to each side. The last step was to dot each intersection of the embossing with a white pearl pen.

Stamping smiles, Karen

Friday, March 15, 2013

Bearly-Mine and Fab n Funky Challenges


Easter is the challenge theme this week at Bearly-Mine Challenges and at Fab n Funky, they want us to add a sentiment. I bought an Easter sheet of Clear View Transparencies from The Mark-It Place and just had to make an Easter card with this sweetie. The sentiment was added just by cutting out and highlighting one of the Happy Easters from the designer paper. Such a simple card to make, but  the sweet bunny just makes me smile and I hope it will do the same for you and for the child who receives this card.

Stamping smiles, Karen

Thursday, February 28, 2013

Crackerbox Palace Thursday Sympathy Cards


It's Crackerbox Palace Thursday and today I am sharing two cards I made with Crackerbox Palace sympathy sentiment stamps and die cuts. You can win your choice of the stamps featured on one of these cards by leaving a comment at either blog. The simple requirements for a chance at winning are below and now you have even more choices of what you can win!
But first- the winner of last Thursday’s blog candy is                                                     Leanne! Here is her winning comment from my blog: “Really love Vicky's card.”
Leanne, please email me or Crackerbox Palace your address and your choice of which stamps you want (see your options below), so we can get you the stamps you have won.
The first card I am sharing today is my favorite card I have designed lately. It features a  beautiful sympathy sentiment that is perfect for saying just the right thing after a loss. The feather die cut is from QuicKutz and after cutting out the feather, I embossed it with a Sizzix embossing folder. I attached a Clear View Transparency (from the Mark-it Place) behind the feather opening. The feather under the sentiment is another beautiful stamp from Crackerbox Palace which I stamped on patterned paper and cut out. I was inspired to make this card by this card I found on Pinterest. 

My second card features another perfect sympathy sentiment, this time embossed in white over a background made with alcohol inks on glossy paper. The park bench die is from Memory Box and I added a punched heart to symbolize the love that remains in our hearts for the departed.
So would you like to win the stamps featured on one of today’s cards or your choice of another CBP stamp? Here is how to win our weekly blog candy:
Vicky or Karen will post a card or two every Thursday on both blogs. All you need to do is to leave a comment on either blog and if you leave a comment on both blogs you will have a double chance to win. We hope you also want to 'follow' the blogs. The following Wednesday a name will be picked at random and the winner will receive:

The featured stamps that we used in one of the cards that were posted,
OR you can pick out a stamp that is worth up to $10.00 and email us your choice
OR Vicky will email you a coupon code so you can go shopping at 
Crackerbox Palace store for your choice of the stamp(s) you would like with a $10.00 coupon.

For a Bonus: if you use the blog candy stamps and post it on your blog, Splitcoast or somewhere else you will be able to choose another free stamp. So make sure you check out one of our blogs on Thursday! The winner will have 2 weeks to contact Karen or Vicky.

I am entering these cards in the Anything Goes challenges at Through the Craftroom Door and Party Time Tuesday

Crackerbox Palace smiles, Karen

Saturday, February 23, 2013

Crafting by Designs and Penny's Paper-Crafty Challenges


Anything Goes at Crafting by Designs and Penny's Paper-Crafty this week and I am sharing a card that cracks me up and we could use a smile after all the snow and cold we continue to have in Wisconsin. This Clear View Transparency was part of an Easter set I bought from The Mark-It Place and it can't help but bring a smile to anyone who sees it. I embossed a white piece with a Tim Holtz embossing folder and sponged yellow on it before layering it on black and then a yellow card.

Stamping smiles, Karen


Tuesday, February 19, 2013

Raisin Boat and Challenges 4 Everybody


Is it time for Spring yet? I sure am ready and at Raisin Boat Challenges they are encouraging Spring too by wanting us to use flowers in our cards. At Challenges 4 Everybody the theme is Anything Goes, so I am sharing this Easter/Spring card I made with floral diecuts and a Clear View Transparency from The Mark-it Place. I am loving the Spring colors of the chicks and I punched a couple butterflies out of the cut off part of the transparency too. I think one of my kids at Send A Smile 4 Kids will like receiving this Easter card- atleast I hope so.

Stamping smiles, Karen


Friday, February 15, 2013

The Paper Shelter and Crafty Sentiments Challenges


Valentines is the theme at The Paper Shelter and Crafty Sentiments this week and so I am sharing the Valentine I made for my dear friends this year. The picture of the sweet monkeys puts a smile on my face and I hope it did for my friends too. It is a Clear View Transparency from The Mark-it Place and I cut it out with a nesties die and layered it on a slightly larger white piece and added some red pearls. I cut the left edge with a new die from Impression Obsession and added the perfect sentiment from Printworks.

Stamping smiles, Karen