Tuesday, December 17, 2013

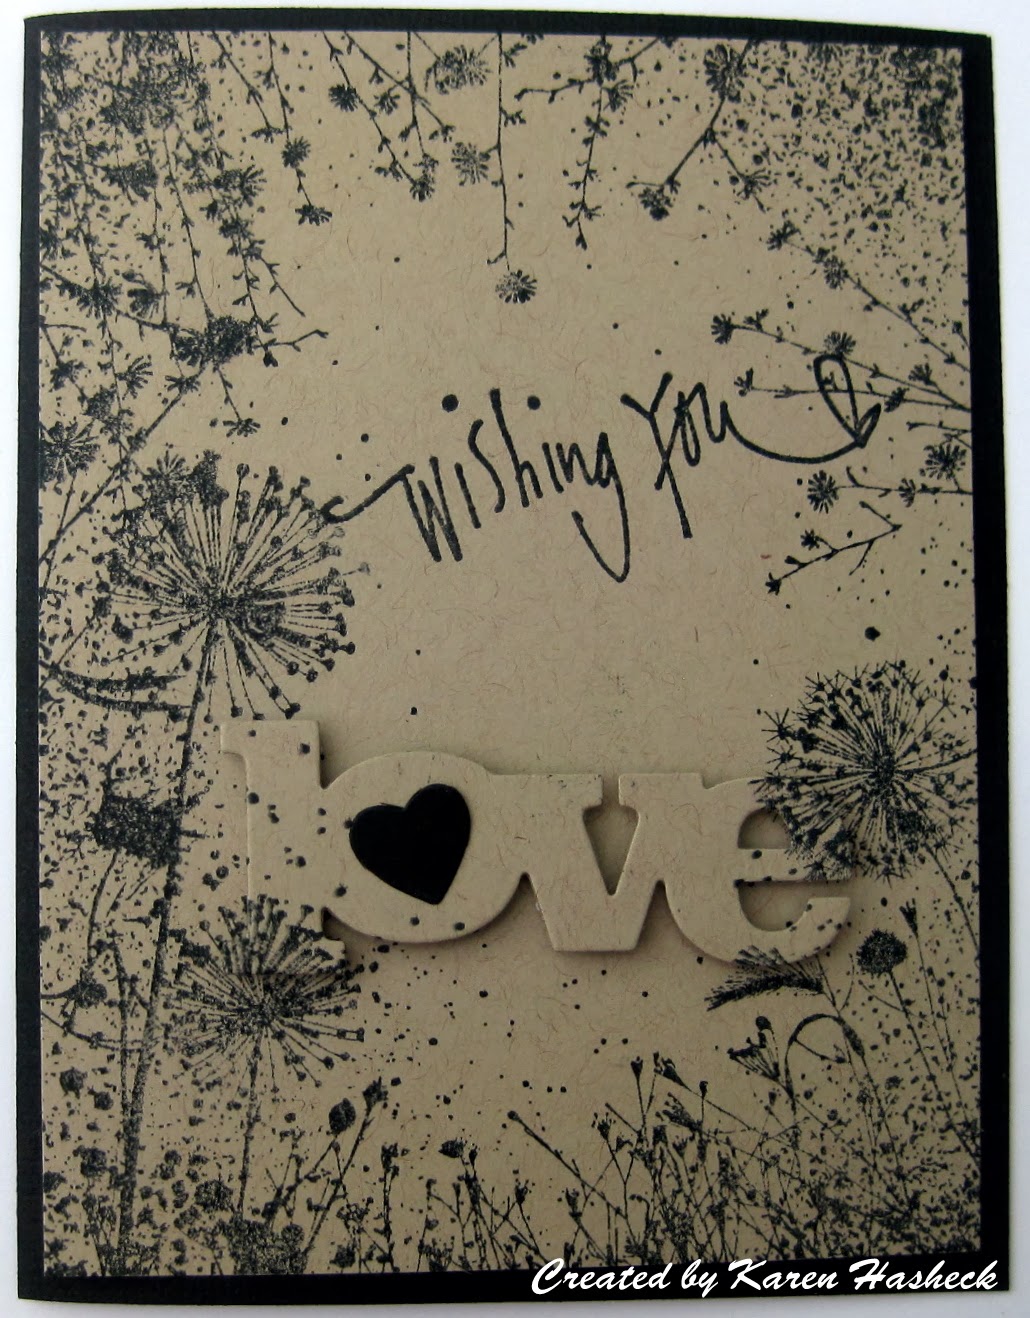
CAS Card for Anything Goes Challenges


I love kraft paper and also the technique where you stamp on the background and also on the die cut and raise the die cut words above the background. The "love" is a diecut from W Plus 9 and was cut out of a piece of kraft paper also stamped with the background floral stamp by Hero Arts and raised with pop dots when attached. That layer was attached to a black card for a CAS but nice card.

I am entering this card in the Anything Goes challenges at 613 Avenue Create and Challenges 4 Everybody.

Stamping smiles, Karen

Monday, December 16, 2013

Snowflakes and Stars CAS Card


Today I am posting one last holiday card featuring my new snowflake embossing folder from Darice and the Christmas star by Stampin' Up. I stamped the star in silver ink on a silver dp, cut out and scored the lines for great dimension. I attached to a navy blue card embossed with my favorite snowflake embossing folder and added a nice sentiment from Prickley Pear.

I am entering this card in the Snowflakes challenge at CAS-ual Fridays and the Let It Snow challenge at Simon Says Stamp.

Stamping smiles, Karen

Sunday, December 15, 2013

Quick and Easy Christmas Card on Silhouette Sunday


What do you get when you combine a sentiment die cut from Silhouette, an embossing folder and washi tape?  A very quick but fun Christmas card! I have been out of town most of this week, and my family Christmas weekend is fast approaching, so life has been very hectic.  If you missed my daily posts with new cards, that is why. But I managed to quickly make one more Christmas card. I started with the" Merry Christmas to you" die cut with my Silhouette machine with a cutting file from Silhouette America. I embossed the tree scene across the middle and added some Christmas washi tape and gems to complete the card.

I am entering this card in the Christmas card with dies challenge at Cut It Up and the Happy Holidays challenge at Chocolate, Coffee and Cards.

Stamping and Silhouette smiles, Karen

Wednesday, December 11, 2013

What If? Wed. Sketch Challenge at Repeat Impressions


It's time for another fun sketch challenge at The House that Stamps Built and we are challenging you to make a card using the sketch below and link it up for a chance at some great Repeat Impressions rubber! For all the details on what you can win and to see the other Rock Stars cards using this sketch, please visit our blog.


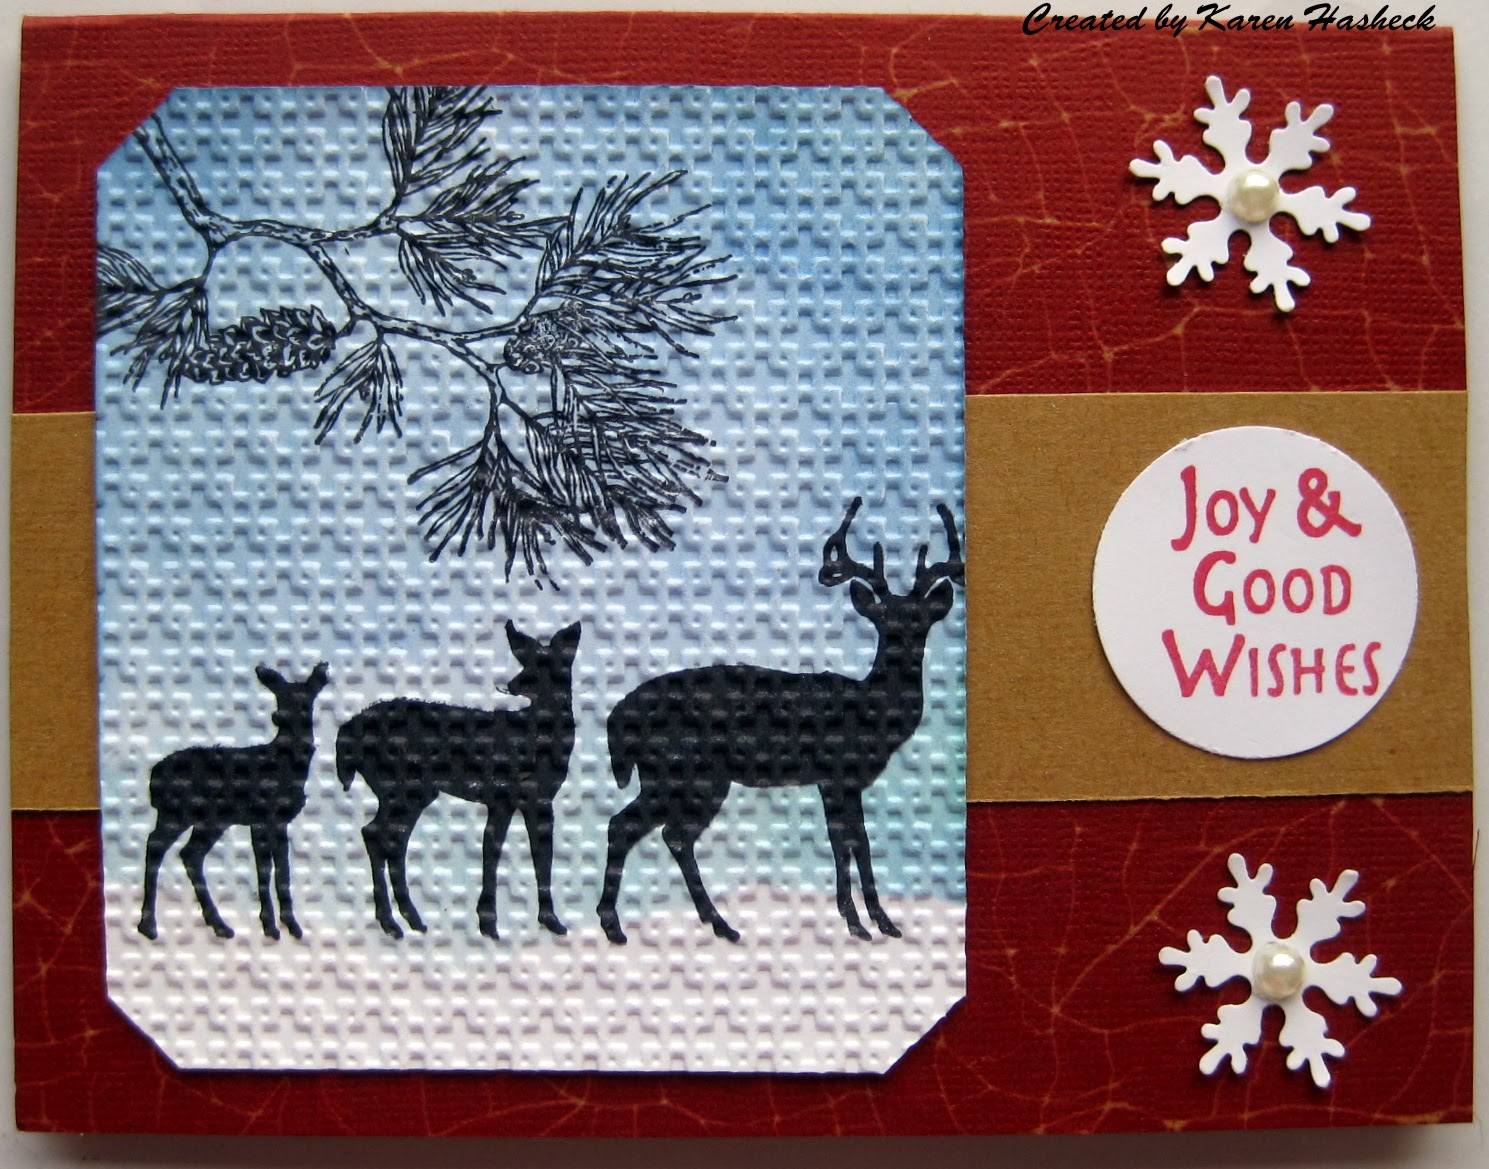
I used one of my favorite newer stamps from Repeat Impressions for this peaceful card - the deer family silhouette. I also used RI’s pine bough, and after I stamped both, I sponged and then embossed the whole picture with a Stampin’ Up embossing folder. I layered that onto a card made with Tim Holtz’s Kraft-Core Shattered card stock. I added a strip of kraft paper, some snowflakes and a circle of joyful wishes to complete the sketch card.

Here is the sketch for you to follow when you create a card for our challenge. You do not need to use Repeat Impressions stamps to enter our challenges, but you get an extra chance to win if you do!

Stamping smiles, Karen 

Monday, December 9, 2013

It's My Turn for a Project of the Week at Repeat Impressions!


It’s my turn to share a Project of the Week at The House that Stamps Built and I am going to show you how to make a new kind of center stair step card. Many of us have made center stair step cards and they are available here on the Repeat Impression’s website ready made for you. I discovered a new kind of center step card on a website recently and wanted to try making one, but the directions were not in English and the measurements were in centimeters. I created my own template with easy measurements (inches and half inches) and here is how you can make one too:

Cut card base 5” by 7 ¼” to make an A2 sized card when completed and folded. On back of piece, mark 1”, 2”, 3” and 4” on both shorter sides of card. (These marks are later erased.)

We are working on the BACK of the card so everything is opposite of what the front will look like. The picture below shows what it should look like from the back.


From the BOTTOM LEFT, draw pencil lines from:
1 ½” to 3 ½”   on the ONE inch line  
2” to 4”    on the TWO inch line
2 ½” to 4 ½”   on the THREE inch line
3” to 5”   on the FOUR inch line   (see picture)
Cut these lines with ruler, utility knife and cutting surface.

From bottom left, SCORE DOWN from each inch line at:
1 ½” and 3”   (not necessarily the end of the cut line, so pay attention to the measurements for each line to score.)
2” and 3 ½”
2 ½” and 4”
3” and 4 ½”
3 ½” and 5”   
Turn card over and Mountain Fold the first scored lines and Valley Fold the 2nd (or furthest right of the score lines) to form stairs. Erase your marks and decorate as desired. I followed these instructions and created a kraft patterned and a blue card base. 

For my first sample shown above, I sponged all the sides and the stairs with a brown distress ink. I paper pieced the Christmas kitty and hung her from the stairs. Then I stamped and attached a beautiful Christmas sentiment from Repeat Impressions.

My second center stair step card shows how you can decorate the stairs to make the card even more fun. To start this sample, I embossed the blue card base with a snowflake embossing folder. Then I stamped the Snowball Sequence set of snowmen tumbling down and attached to each stair. I added some punched snowflakes and another beautiful holiday sentiment (from Repeat Impressions, of course.) The cards lay flat to mail and fit into an A2 sized envelope. Here is a picture of the blue card closed.

I hope you try this fun folding card sometime soon, and that your holiday season is blessed with peace and joy.


Stamping smiles, Karen 

Sunday, December 8, 2013

Holiday Shapes on Silhouette Sunday


Creating a holiday project with shapes from the Silhouette online store is the challenge this week at the Silhouette Blog. I just had a few minutes yesterday before a holiday party to make this card, but with my magic Silhouette machine, that was all the time that was needed. I cut the Merry Christmas shaped card, rounded the corners and added some gold decorator tape from the dollar store. Busy, busy here as I am sure it is at your house too, so to be able to make one more Christmas card so quickly is a big help right now.

Stamping and Silhouette smiles, Karen

Saturday, December 7, 2013

Winter Fun 4 Kids at Send a Smile 4 Kids


It’s Saturday and time for another fun challenge at Send a Smile 4 Kids! This time our challenge is Winter Fun 4 Kids. Create and link any winter themed card for a child and you could win one of our great prizes. You have until January 3rd to enter this challenge as our design team is taking the rest of the month off to enjoy the holidays. 

We have three very generous sponsors for this challenge:  Dollar Graphics Depot is giving their winner a $15 gift certificate! Milk Coffee Stamps is giving their randomly picked winner 5 digis of their choice!  And Fred She Said’s winner gets a $10 gift certificate! TEAM S.A.S will also be choosing their favorite cards for our top three and the winners will receive a blog badge and an opportunity to be a guest design team member on a future challenge.

All three of my cards today feature sweet digital stamps from our sponsors and cutting files from Silhouette America. I dressed the adorable Girl Playing in Snow from Milk Coffee Stamps by paper piecing her outfit, boots and ribbon, and placed her in a snow globe cut with my Silhouette Portrait. I added some glitter and a fun sentiment.

The cute colored digital stamp on my second card is called "Brrr Outside" by Alice Smith from Dollar Graphics Depot. It is so appropriate for our weather right now in Wisconsin as the windchill is well below zero degrees. I embossed the card base, added some washi tape and a snowflake mitten cut out with my Silhouette using a Silhouette America cutting file. 

My third card features a sweet colored digital Winter Westie by Fred She Said. More washi tape and a snowflake Silhouette cutting file and this card is ready to send to our kids spending a winter day in a children's hospital. 

I am entering these cards in the Anything Goes challenges at Through the Craft Room Door and at Love's Rubberstamps. 

Stamping smiles 4 our kids, Karen