Sunday, July 3, 2016

Playing with New Tonic Products


It's time for "Christmas in July" and I have been having fun designing some Christmas cards using new Tonic Studios and Nuvo products. Did you know Tonic has awesome designer paper packs for only $5.99? I watched them fly off the shelf at Let's Create in Wisconsin Rapids and knew I had to get my hands on them for some Christmas designing fun. About a third of the 54 sheets you get in each Christmas Wishes or Winter Wonderland pack can be used for cards that are not holiday or Christmas. Kraft paper is a favorite of mine,  and I chose this pretty dp from the Christmas Wishes 8x8 Premium Pack as the base for this card. Tonic Studios is also coming out soon with a bunch of delicious colors of embossing powder! I love sparkly embossing powder and used the Gold Enchantment on the bow of the present, and the Crimson Gloss on the present itself. I die cut Tonic's Christmas Present Rococo Die out of two sided sticky paper and sprinkled the gold and red embossing powders on the sticky present. I heat set it with my heat gun resulting in the textured look you see. I die cut the Merry Christmas Strip die out of Tonic's red mirror cardstock and attached it at the top of the card. I love using candy dots or gems on my cards and recently watched Jennifer McGuire make them out of Tonic's Nuvo Crystal Drops and Glitter Drops. After they dry, you can put them anywhere on your card front and attach them with a little glue. Here is a picture of the different sizes and colors of candy gems I made:

After about an hour of drying, the dots were dry to the touch, but still runny in the inside. I would allow them to dry overnight or for several hours. Save your release paper from sticky sheets or other products to make the Crystal or Glitter drops on. I used Rhubarb Crumble, Woodland Green, Bottle Green, Bright Gold, *Golden Sunset, *Ruby Slippers, *White Blizzard and White Gloss for these candy drops I can add anytime to any project.  The starred colors are Glitter Drops and the rest are Crystal Drops. 

The paper packs also have six sheets of sentiments for your cards. Here is a look at the inside of this card using a sentiment and a strip of the matching designer paper:


I am entering this card in the Anything Goes challenges at Simon Says Stamp Wednesday Challenge and at The House that Stamps Built (Repeat Impressions.)

Saturday, July 2, 2016

CAS 4 Kids at Send a Smile 4 Kids!


It’s Saturday and time for another fun challenge at Send a Smile 4 Kids! This time our challenge is: CAS 4 Kids! Create and link any Clean and Simple card appropriate for a child and you could win one of our great prizes.

We have two very generous sponsors for this challenge: Die-Versions is giving their winner a $15 gift certificate! And the winner from A Day for Daisies gets a $12 gift certificate! TEAM S.A.S will also be choosing their favorite cards for our top three and the winners will receive a blog badge and an opportunity to be a guest design team member on a future challenge.

I created my CAS card for this challenge with a sweet digi called Birthday Mermaid by A Day for Daisies. I simply printed her on a white card front and also on several scraps of designer paper so I could paper piece the balloons and her tail. I added a "celebrate" die cut and layered on a teal card base.

I am entering this card in the Anything Goes challenges at Simon Says Stamp Wednesday Challenge and at Repeat Impressions.

Friday, July 1, 2016

Happy Birthday USA with Die-Versions Dies

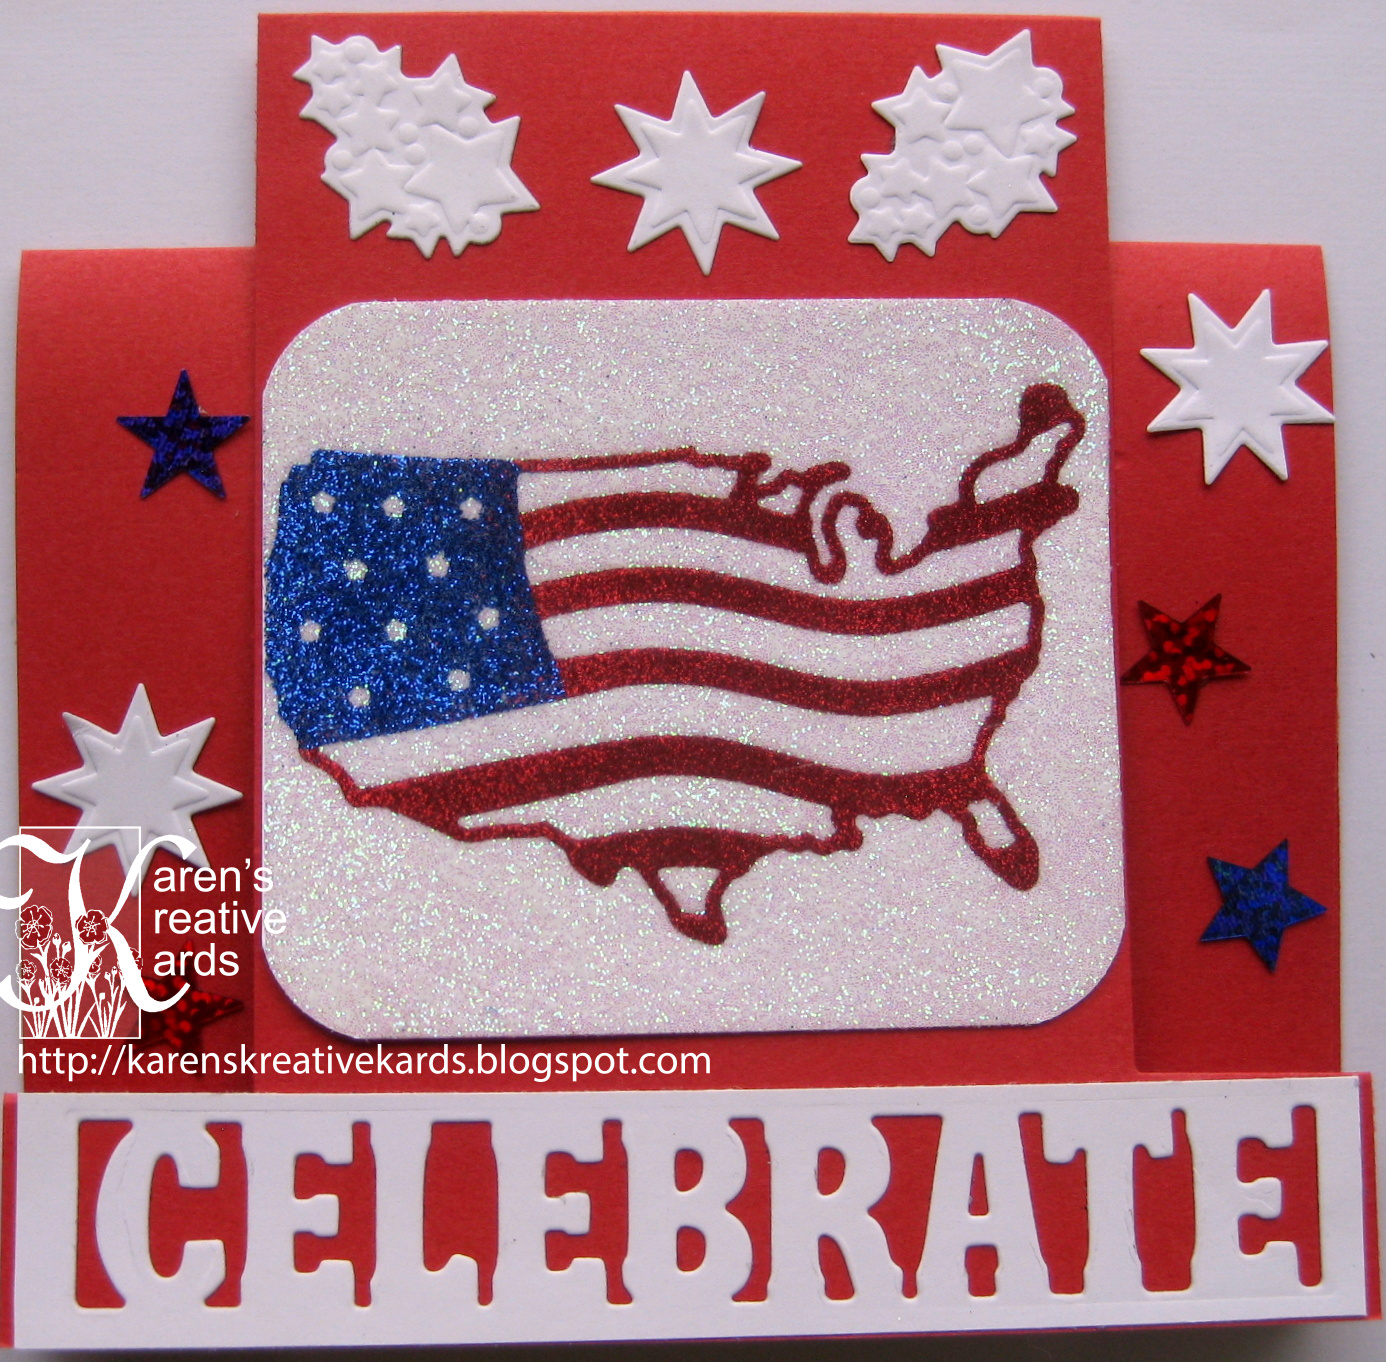
Happy 4th of July weekend everyone! It's my turn to post a card on Die-Version's blog and mine, and I am sharing this  Happy Fourth of July card featuring Die-Version’s Whispers-USA die and the glittery Kiss Cut Technique.  I cut a red center stair step card base and added a “Celebrate” die cut and some die cut and punched stars. The USA flag piece was made using the Kiss Cut Technique that I learned about on this video tutorial. The key is to apply two side tape sheets to thick cardstock and die cut your die with a sandwich that does not cut through all the layers. I used a craft pick to take off the stripes of the flag and dumped red glitter on just that part. I repeated that with the blue in the flag, then removed the rest of the sticky cover and dumped on white glitter, burnishing in each color of glitter.

It is going to be a glorious holiday weekend here in Wisconsin and we are planning on celebrating with some baseball and fireworks and relaxation. I hope you have plans for fun and celebration too.

**Remember you can get a 15% discount on any of Die-Version’s great dies by simply using my discount code karen15 when you check out at the Die-Versions website.**

I am entering this card in the Anything Goes challenges at Simon Says Stamp Wednesday Challenge and at The House that Stamps Built (Repeat Impressions.)

Thursday, June 30, 2016

Tonic Double Detail Telescoping Card


It's my turn to post a project on Blog Tonic USA and here, and I am sharing a telescoping card featuring the Double Details dies and stencils and some of the new colors of Nuvo Embellishment Mousse that just came out. Have you seen the nine gorgeous new colors of Nuvo Mousse available here on the website? Oh my- they are so pretty! I used the pastel colors of Cornflower Blue, Peony Pink and Lilac Lavender on my card, but I love the brown and copper and black as well. There are three circular layers to my telescoping card, with the smallest of the circles on top as shown here:


Each circle of the telescoping card is attached with a brad to the next layer, allowing it to open and close. I die cut the top purple layer with the scalloped circle die from the Have a Beautiful Day Sew Pretty Frame set. I also used the sentiment from that set. I die cut the flowers from the Daisy Burst Double Detail set and applied Cornflower Blue and Peony Pink Nuvo Embellishment Mousse to color them. For the middle circle, I applied blue, pink and lavender embellishment mousse with a spatula through the beautiful Daisy Burst Double Detail Stencil. Each set in this Double Detail range has a stencil that matches a die. The largest pink layer of my telescoping card features the Poppy Hideway Double Detail die cut and embossed in blue and framed with a pinhole circle die. Here is a picture of the lovely embossed die cut and the raised texture of the embellishment mousse:

I am entering this card in the challenge at Win & Tonic to use Tonic flower dies. I am also entering this card in the Anything Goes challenges at Simon Says Stamp Wednesday Challenge and at The House that Stamps Built (Repeat Impressions.)

Tonic Studios and Nuvo Products Used: Circle and Pinhole Circle Layering Dies, Scalloped Circle and sentiment from Have a Beautiful Day Circle Frame Set, 3 flowers from Daisy Burst Double Detail die set, Poppy Hideway Double Detail die, Daisy Burst Double Detail Stencil, Cornflower Blue, Peony Pink and Lilac Lavender Nuvo Embellishment Mousse, Tonic Tangerine Die Machine, Tonic Funky Glue Pen; Other: brads

Wednesday, June 29, 2016

Christmas Acetate Card


I create holiday cards all year for my in home classes and also so I don't have to rush to get them done in December. I love making acetate cards even though they do not photograph well. I embossed the front of this acetate card with a snowflake embossing folder from Sizzix. I used a Lil' Inker stitched rectangle die that is A2 sized to die cut the center white piece and attached a beautiful Merry Christmas ornament die cut from Memory Box. Anything that gets glued or attached with tape to an acetate card has to be covered in the back to hide the adhesive. So I die cut another stitched rectangle from the same Lil' Inker set and embossed it with a Crafts Too embossing folder. Here are photos of the back and the side view: 


Tuesday, June 28, 2016

Glitter and TP - Great Combo


I have been experimenting with a new technique using toilet paper and embossing folders. If you are interested in the details on how to do it, you can check it out here in this blog post.  On this one, I put the ink on the other side of the embossing folder so the color shows up in the leaves, not the background. I tore the edges of the dried tp piece and attached it to a blue card base. I die cut Memory Box's new little floral bird out of black cardstock and attached it to sticky paper, then added white glitter. I colored the bird with markers and cut it out. I added a die cut sentiment to complete the card.

I am entering this card in the Anything Goes challenge at Amusing Challenges.

Monday, June 27, 2016

Tonic Studios Zipper Guy Card


It's my turn to post a project on Blog Tonic USA and here, and  I am sharing a card for a guy on his special day featuring the Zip and Button Die and Deboss Set from the Sew Pretty range at Tonic Studios. I knew the minute I saw the zipper and button dies I wanted to try to create a guy’s sweater vest and button down shirt and had fun creating this card from that idea. I cut a top folding navy A2 size card base. I punched a V shaped collar in the vest and attached strips of light blue creating stripes on the sweater vest. I embossed the sweater vest card with an embossing folder from Sizzix. I die cut the zipper pull out of scrap of Tonic gold mirror card and debossed the light blue zipper. Here is a close up picture of the zipper and zipper pull and the white shirt which pulls out of the “sweater vest” card base as shown here:


I cut and folded the white collar and added some die cut white buttons to button down the collar. I attached the “On Your Day” sentiment which could be celebrating Father’s Day or a birthday or any special day.

I am entering this in the "One for the Boys" challenge at Win and Tonic.

Tonic Studios and Nuvo Products Used: Zip and Button Die and Deboss Set, “On Your Day” Miniature Moments Die, Tonic Gold Mirror Card, Tonic Tangerine Die Machine, Tonic Funky Glue Pen, Tonic Advantage V Blade Trimmer; Other: Sizzix embossing folder