Wednesday, August 14, 2024

Same Press Plate Hot Foiled for Two Different Seasons

I love products that can be used in many different ways and stretch our crafty dollars! Of course all Spellbinders Press Plates can be pressed with or without ink in our BetterPress systems and hot foiled in our Glimmer or Hot Foil Systems. And these two cards show the same press plate can be foiled for two different seasons using different colors:


I just purchased Spellbinders Sprinkled Confetti Press Plate and foiled it with white foil for a snowy background on this Christmas card. But here it is for fall with just some different colors:


I love the Autumn Leaves Press Plate from Spellbinders and their matching dies, and these gold leaves were made with the 2nd generation foiling of some gold Speckled Aura foiled leaves made with my solid hot foiling plate from Pinkfresh Studios. The confetti background and sentiment were also hot foiled with gold foil and I love how this card turned out! 

Since the plate is supposed to be confetti I think the next one I make will be with rainbow foil. Many ways to use the same BetterPress/Hot Foil plate- love it!

Monday, August 12, 2024

Strips of Lovely Letterpress Options

I love the Spellbinders BetterPress System because I find it almost foolproof and now so many more companies are coming out with press plates so there are so many gorgeous ones to choose from! In my new video here, I share cards made with press plates from Altenew, Pinkfresh Studios and others. 

I played with all my new press plates one day and came up with lots of lovely backgrounds, but I decided to cut them into strips and make some unique cards with them. Here is the Lattice Easel Card I show step by step how to make in the video:


The wood planks were created with an Altenew Wood Press Plate and the gorgeous leafy vines were created with a set of press plates, stencils and dies from Pinkfresh Studios called Joyful Day.  I added blues and greens through the layered stencils and then added Deco Foil's Transfer Gel Duo through the last layer. When dry, I attached Gina K Designs Glittering Green foil with my mini MINC. The letterpress sentiments were created with the same Joyful Day press plates and matching dies. Here are some pictures of the Lattice Easel template that you could pin, but of course to see how to make this card step by step it is best to watch the video here.


Another of my favorite new press plates is also from  Altenew and is called Gilded Marble. I pressed black ink into 4 different colors of cardstock, cut them into strips and created this version of a Fractured Card. The background was created with a coverplate die from Pinkfresh Studios called Stitched Diamonds. 


I created this birthday rainbow card with strips of cardstock and a press plate from Pinkfresh Studios that was a free gift with my last order. I used three different press plates on this card:


I had been wanting to try a Twisted Ribbon card so I made one with strips created with Yana Smakula's gorgeous Peony Background BetterPress plate and the Pinkfresh Studios Joyful Day press plate with gold ink. The floral bucket image is a Letterpress Impressions Stamp from Couture Creations and the vellum circle was cut with a die from Gina Marie Designs. 

I had great fun making cards with strips of letter pressed beauty and hope my cards inspire you to give some of the ideas and products a try!


Tuesday, August 6, 2024

Do you speak French or have loved ones that do? This Giveaway is for you!


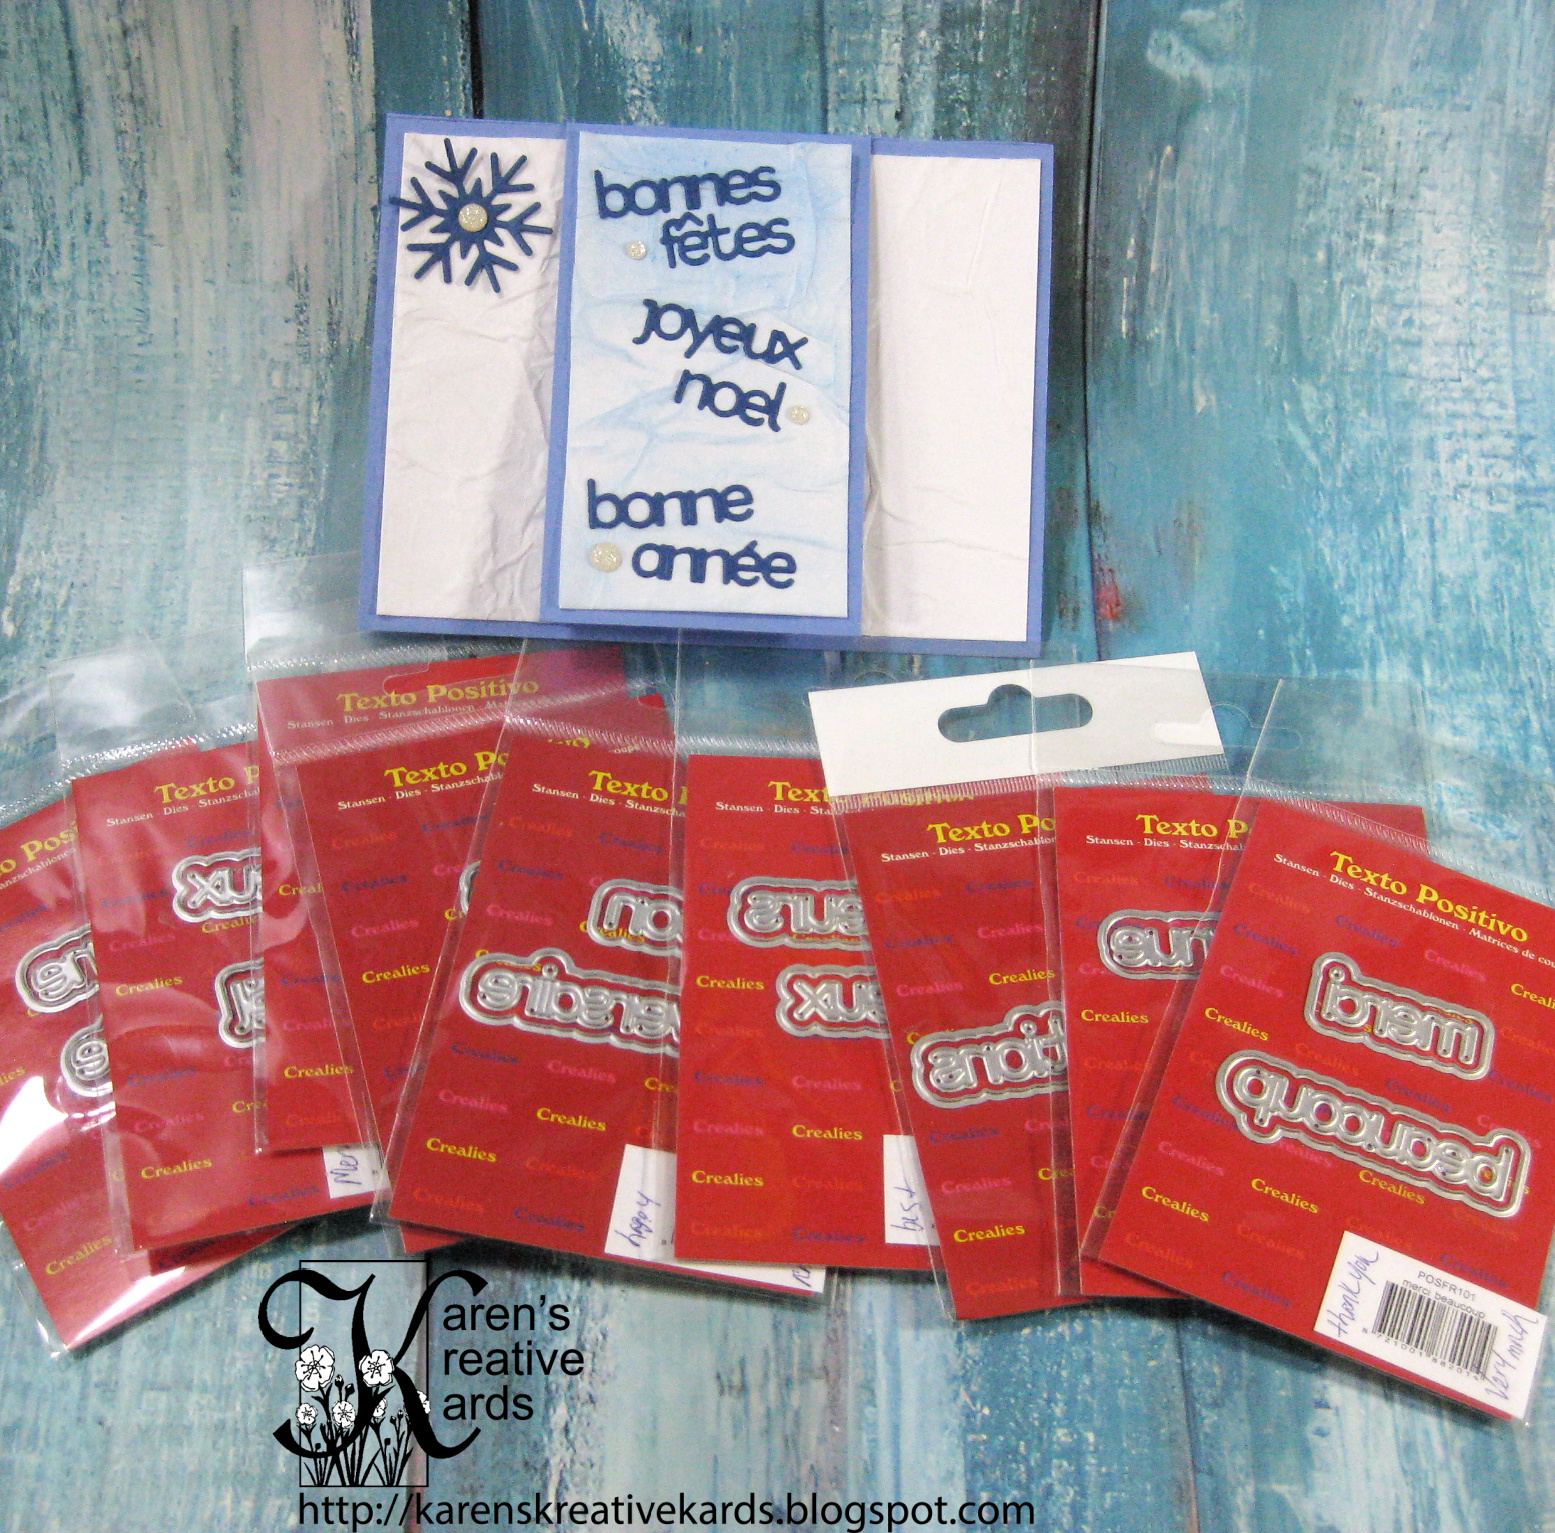
I have 9 dies from Crealies most recent release that are French words with a shadow. My grandson was studying French and loved his French teacher and I thought I would make him some cards to give to him. But the school dropped the French program in favor of Spanish - which of course is spoken much more in parts of our country.

So I am giving away 9 sets of sentiment stamps valued at around $50 to someone who speaks French or has a loved one who does and who lives in the USA. (Sorry I can only afford to mail to an address in this country.)  The winner will also receive my French happy holidays card that I shared yesterday in my video and on my blog.

I made a reel that shows all the sets but for some reason even the shortest video is too big for Blogger now. You can see it on my Instagram or my business Facebook page (links also on the side of my blog) and can leave a comment there for two more chances to win.

In your comment there or here on this blogpost, tell me if you speak French or if not, which loved one does and also where you live. (USA residents only). The contest runs from 8/6/24 - 8/19/24 midnight CDT. The winner will be drawn randomly from all qualifying comments and you can comment up to 3 times- once on this blogpost, on the specific Instagram post and on the Facebook post with the reel at Karen's Kreative Kards. I will respond to your comment if you are the winner so be sure to watch for that. If I don't hear from you within a week, I will draw another winner.

Good luck!


Monday, August 5, 2024

Crealies Layered Sentiment Dies So Many Ways

As a cardmaker, I almost always add sentiments to all the cards I make. I love sentiment dies with shadows and in the newest release at Crealies there were dozens of new sentiment dies released in four different languages! I played with some fun folds and a new technique to find lots of ways to feature all these new Texto Positivo dies for my new video here.


Here is the card I made in the video step by step. As I show, the texture on the front flap is created by wrinkling parchment paper and adding to cardstock with white glue emphasizing the wrinkles deliberately. I added Annelies’ favorite slogan “miles of smiles” and some smiley faces created with Crealies charm and face dies. I also added more layered sentiments to the inside of the card:


Above is a smaller version of the front flap card with more of the textured wrinkled background and French wishes for happy holidays.

I played with some 4 and 8 piece puzzle slider cards because the many folds offer plenty of places to add the new sentiments. I did not teach how to do the folds in the video, but did share templates you could grab if you watch the video. The first card is a 4 piece puzzle card with some adorable Crealies animals:


And here are two versions of the 8 piece puzzle cards with lots of the new Texto Positivo layered sentiments:


Did you notice how the scenery flows from each piece of the puzzle? They are not at all hard to do once you see the cards and the template.

I am happy to share that Crealies dies shown can be purchased either on the Crealies website here OR in the United States at the Frantic Stamper website here.


Friday, August 2, 2024

Leaves and More Leaves on Many Cards


Leaves are beautiful whether green as they are now and brilliant reds, oranges and yellow as they are so briefly in the fall. I just had a play with some new press plates, embossing folders and dies and am sharing the finished cards here. I am loving my Spellbinders press plates because they can be pressed with ink in the Betterpress System or foiled in the Glimmer System so there are many ways to use the same products. I just got the Spellbinders Autumn Leaves Press Plates with matching dies and made these cards with it. 


I had a play with Simon Hurley's glitter Astro Pastes and tried it on an embossed mirror card and then added some sponged embossed leaves cut and embossed with a set from Stampin' up. All of the rest of these leaves cards were made with that SU hybrid embossing folder that also cuts:


Wednesday, July 31, 2024

More You Cards and a Do Over

Can I be honest and say I did not like the card I made in my new video? I like the 6 others I shared but the one I made step by step was not a favorite. So I tore it apart and came up with this one:


I put these 4 colors on the YOU together after finding the color combo on Pinterest, but then I put it on a bright pink background and that did not work. I like this better and did add some flowers from the same die set so all the pieces have been christened. 

I share many other cards in the new video and especially love the ones that I made with the inlay die cut technique combined with a bit of eclipse. Here is the one I showed how to make in the video:


Recognize "that paper"? I only used one layer of the die and raised it up on a fun foam shadow. "Thinking of" with their shadow was cut with a die from Simon Hurley and Spellbinders. Here are two more card made with die cut inlay of the one die:


I needed a special birthday card and a thank you card and after making them, kept playing as idea after idea came. I easily made 7 cards with this one die set in one day and could have kept going! I hope you will check out the video and maybe try some of the ideas yourself!

Monday, July 29, 2024

Concord & 9th You and You and You Seven Ways!


I love a die set that can be used in many different ways and the new Everything About You die set from Concord & 9th stretches my creativity and crafty dollars! In my newest video here, I share seven different cards and ways to create with this unique die set. 


There are 3 different layers of "you" and a shadow layer and on this card I used all 4 plus some of the sprig dies in a fall colored card for a dear friend. Celebrate is a die from Karen Burniston and "friend" was cut with a die from Gina K Designs.  Another way to create a card is to use layer one on the card front and layer 2 and 3 behind it:


The stamped sentiment is from the matching Everything About You stamp set also from Concord & 9th. I added a little texture to the background with a cover die from Alex Syberia Designs.


Another awesome way to use this die set is to make a shaker with it using only one of the You dies along with the shadow die. 

In my new video here, I show seven different cards and many different layering options. I hope my cards encourage you to give some of the ideas and products a try!